
Before you begin, note that this tutorial assumes working knowledge of the following:
After you have done the initial startup (see Getting Started), you're ready to begin creating your first web application using Supermodel. Supermodel uses the Model-View-Controller (MVC) architectural pattern for implementing user interfaces and Entity Framework to map objects to the database. Below, you'll find a tutorial that will demonstrate how to create an Entity, set up your Model, View, and Controller for your Entity, and other topics that may be important for your application, such as search capabilities, Entity validation, custom HTML rendering, and more. Supermodel is built around the concept of Domain Driven Design, so you should begin by creating your Entities within your domain. Then, you can create the View Models, Controllers, and Views for your Entities, and expand your application from there.
Entities are classes defining the world in which your application operates. If you plan on having a user log in to your application, you would likely need a User Entity. Let's create one with a few embellishments:
namespace Domain
{
public class User : Entity
{
[Required] public string Username { get; set; }
public string FirstName { get; set; }
public string LastName { get; set; }
[Required] public int? Age { get; set; }
}
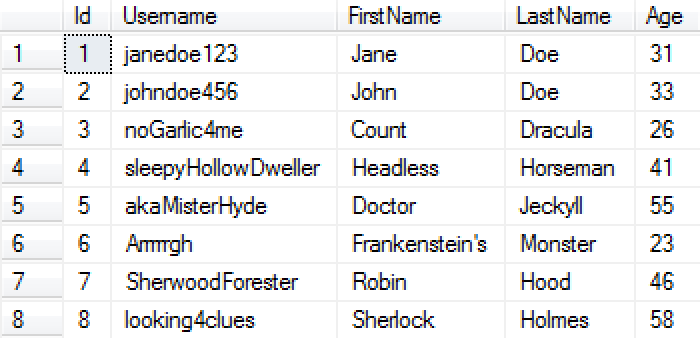
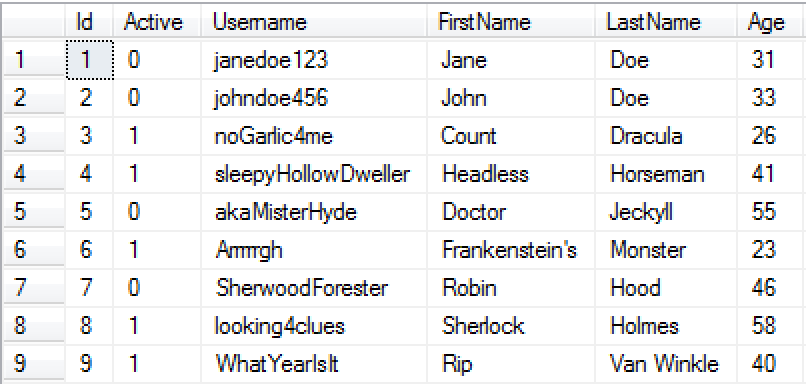
}Now that we have a User Entity, we can update our Database Initializer class Seed( ) method to seed our database with some User Entities (see Entity Framework documentation for more info):
using System.Data.Entity;
using Domain.Entities;
namespace Domain
{
    public static class DataInfoInitializer
    {
    	public static void Seed(MyFirstProjectDbContext context)
        {
            var users = new[]
            {
                new User
                {
                    FirstName = "Jane",
                    LastName = "Doe",
                    Age = 31,
                    Username = "janedoe123"
                },

                new User
                {
                    FirstName = "John",
                    LastName = "Doe",
                    Age = 33,
                    Username = "johndoe456"
                },

                new User
                {
                    FirstName = "Count",
                    LastName = "Dracula",
                    Age = 26,
                    Username = "noGarlic4me"
                },

                new User
                {
                    FirstName = "Headless",
                    LastName = "Horseman",
                    Age = 41,
                    Username = "sleepyHollowDweller"
                },

                new User
                {
                    FirstName = "Doctor",
                    LastName = "Jeckyll",
                    Age = 55,
                    Username = "akaMisterHyde"
                },

                new User
                {
                    FirstName = "Frankenstein's",
                    LastName = "Monster",
                    Age = 23,
                    Username = "Arrrrrgh"
                },

                new User
                {
                    FirstName = "Robin",
                    LastName = "Hood",
                    Age = 46,
                    Username = "SherwoodForester"
                },

                new User
                {
                    FirstName = "Sherlock",
                    LastName = "Holmes",
                    Age = 58,
                    Username = "looking4clues"
                }

            };

            foreach (var user in users) context.Set<User>().Add(user);
        }
    }

    public class MyFirstProjectDropCreateDatabaseIfModelChanges : DropCreateDatabaseIfModelChanges<MyFirstProjectDbContext>
    {
        protected override void Seed(MyFirstProjectDbContext context)
        {
            DataInfoInitializer.Seed(context);
            base.Seed(context);
        }
    }

    public class MyFirstProjectDropCreateDatabaseAlways : DropCreateDatabaseAlways<MyFirstProjectDbContext>
    {
        protected override void Seed(MyFirstProjectDbContext context)
        {
            DataInfoInitializer.Seed(context);
            base.Seed(context);
        }
    }

    public class MyFirstProjectCreateDatabaseIfNotExists : CreateDatabaseIfNotExists<MyFirstProjectDbContext>
    {
        protected override void Seed (MyFirstProjectDbContext context)
        {
            DataInfoInitializer.Seed(context);
            base.Seed(context);
        }
    }
}
Once we eventually run the application, the Seed( ) method will initialize our database:
When you work with "vanilla" Entity Framework, once you define your Entities, you must "register" them in your DbContext. For example (assume that you have two Entities: User and Order):
public class DataContext : DbContext
{
	 public DataContext() : base("DefaultConnection") {}
	 public DbSet<User> { get; set; }
	 public DbSet<Order> { get; set; }
}
Whenever you add a new Entity to your Domain, you have to add a DbSet property to your DbContext. This is an extra step that can be avoided with Supermodel. In Supermodel, the framework will find all of the types that implement IEntity interface (or derive from the Entity directly), and will automatically register them with Entity Framework. Therefore, when you're using Supermodel, the DbSet properties in DbContext become unnecessary.
But how does Supermodel know which assemblies to search in for Entities?
By default, Supermodel will look for Entities in the current domain assemblies. However, if you need to search for Entities in another assembly, or in multiple other assemblies, you can override the GetDomainEntitiesAssemblies( ) method on your DbContext. This method returns an array of assemblies in which Supermodel will search for the Entities it needs to register. The default implementation of this method returns the current domain assemblies, which includes the assembly of your DbContext:
protected virtual Assembly[] GetDomainEntitiesAssemblies() { return AppDomain.CurrentDomain.GetAssemblies(); }If you wanted to, you could override this method on your DbContext to specify the exact assembly or assemblies in which you want Supermodel to look.
As you probably know, Entity Framework includes a fluent API interface that could be used to define advanced mappings between your Entity and the database schema. One way to use the fluent API is to include your mappings in the OnModelCreating( ) method override in the DbContext:
public class DataContext : DbContext
{
	 public DataContext() : base("DefaultConnection") {}

	 protected override void OnModelCreating(DbModelBuilder modelBuilder)
	 {
		//Define mappings here
		modelBuilder.Entity<User>.ToTable("SystemUsers");
	 }

	 public DbSet<User> { get; set; }
	 public DbSet<Order> { get; set; }
}
In this example, we have forced Entity Framework to store User Entities in a table that is called "SystemUsers", as opposed to the default which would have just been "Users" per Entity Framework's "convention over configuration".
This approach doesn't scale well as we add more Entities. There is a better way in which we put configuration for each Entity into a distinct class (this is still "vanilla" Entity Framework):
public class UserConfiguration : EntityTypeConfiguration<User>
{
	public UserConfiguration()
	{
		ToTable("SystemUsers");
	}
}
Now we need to register this configuration with Entity Framework. We can do it inside the OnModelCreating override:
public class DataContext : DbContext
{
	 public DataContext() : base("DefaultConnection") {}

	 protected override void OnModelCreating(DbModelBuilder modelBuilder)
	 {
	 	//Define mappings here
	 	modelBuilder.Configurations.Add(new UserConfiguration());
	 }

	 public DbSet<User> { get; set; }
	 public DbSet<Order> { get; set; }
}
Registering each EntityTypeConfiguration is tedious. You don't need to do it if you're using Supermodel. In order to avoid having to register every EntityTypeConfiguration, you must derive your configurations instead from a Supermodel class EFDataModelConfigurationForEntity<>. This class actually derives from EntityTypeConfiguration<>, so whatever you were able to do before with EntityTypeConfiguration, you should be able to do with EFDataModelConfigurationForEntity.
Your User configuration, then, will look like this:
public class UserConfiguration : EFDataModelConfigurationForEntity<User>
{
	public UserConfiguration()
	{
		ToTable("SystemUsers");
	}
}
If you do this in Supermodel, you no longer need to register your User configuration in the OnModelCreating( ) override. Just like with auto-registering Entities, Supermodel will find all of the configurations that derive from EFDataModelConfigurationForEntity and auto-register them. Note that it uses the same mechanism as Entity auto-registration to determine which assemblies will be searched. While it is not required, a configuration class is typically put in the same .cs file with its Entity.
Now that we've created an Entity, we're going to need to create an MVC Model. MVC Models define the data and its rendering for an HTML page.
Normally we don't want to pass Entities directly into Views. Instead, to pass data to Views, we create MVC Models that can map to and from Entities using Reflection Mapper (explained in more detail in the Reflection Mapper section). Thus, MVC Models will know how to map themselves to and from Entities. They also know how to render themselves in HTML and how to model-bind themselves. A Supermodel MVC Model base class comes with a renderer that uses reflection to render all of the Model's properties. While Supermodel comes with a renderer, you can also replace it with your own. We will explain how to override the base renderer in a little bit. Supermodel comes with three variations of base MVC Models: the generic customizable MVC Model, Twitter Bootstrap MVC Model, and JQuery Mobile MVC Model.
Let's create an MVC Model for the User Entity using Twitter Bootstrap. A typical Supermodel convention is that an Entity and all of its MVC Models, API Models, and Search Models (API Models and Search Models will be explained later) are placed in the same .cs file. You don't have to do it this way. Some people might want to place MVC Models, API Models, and Search Models into the web project for "purity" since the Domain is supposedly not aware of the presentation layer. However, keeping all of them together with the Entity in the same file has proven to be a convenient and practical convention, even if at the expense of the architectural purity.
public class UserMvcModel : TweeterBS.MvcModelForEntity<User>
{
	[Required] public TweeterBS.TextBoxForStringMvcModel Username { get; set; }
	public TweeterBS.TextBoxForStringMvcModel FirstName { get; set; }
	public TweeterBS.TextBoxForStringMvcModel LastName { get; set; }
	[Required] public TweeterBS.TextBoxForIntMvcModel Age { get; set; }

	public override string Label
	{
		get { return FirstName.Value + " " + LastName.Value; }
	}
}Controllers orchestrate user interactions. With Supermodel, we can simply inherit from the base CRUD Controller to get free CRUD functionality:
public class UserController : SyncMvcCRUDController<User, UserMvcModel, MyFirstProjectDbContext> { }It's possible to add or override methods in the base CRUD Controller and insert your own functionality. All of the methods within the base CRUD Controller that would potentially make sense to override are declared virtual.
You can override the following Action methods on your base CRUD Controller to do something differently from the default.
Note that the four Detail methods each contain an ignore parameter. Each of these methods uses a different HTTP verb, but their C# signature is otherwise identical. In order to differentiate them for the C# compiler, we decided to add an ignore parameter of the HTTP method. Yes, we know that we could've made them all have different names and specified the URL through an attribute. However, we find this approach to be superior because the method signature (for example, for overrides) makes it clear which method we're working with, without losing the ability to immediately see what URL the action method routes to.
While most of these methods are self-explanatory, the last two require additional information. These methods will download or delete a binary file that is stored in the property with a name that is passed in the pn parameter. This is necessary in order for Supermodel to provide "first-class citizen" implementation for properties of a binary file type. Unlike the first five Action methods, you are unlikely to ever have to override these two.
Creating a View for your Entity is incredibly easy using Supermodel and its Html extension methods. For example, to create a List View for our Entity, we simply have to reference our MasterLayout file and call the Supermodel HTML extension for CRUDList. Our MasterLayout is referenced by each of our Views. Supermodel provides a MasterLayout helper. It takes the View page, the name of our application (to be displayed as the title of the pages in the browser), the version of JQuery to be used, and the version of Twitter Bootstrap to be used. Below, we specify that we wish to use Twitter Bootstrap in our Views by calling @Html.Supermodel( ).TweeterBS.MasterLayout within MasterLayout.cshtml:
@using Supermodel.Extensions;
@Html.Supermodel().TweeterBS.MasterLayout(this, "My First Project", "1.10.1", "2.3.2")
If we wish to use JQuery Mobile for your application's Views, simply call @Html.Supermodel( ).JQMobile.MasterLayout:
@using Supermodel.Extensions;
@Html.Supermodel().JQMobile.MasterLayout(this, "My First Project", "1.10.1", "1.3.1", true)
In the code snippet above, the MasterLayout helper takes the View page, the name of our application (to be displayed as the title of the pages in the browser), the version of JQuery we wish to use, the version of JQMobile we wish to use, and a boolean that specifies whether or not to remove iPhone browser bars.
There is no need for a MasterLayout for generic renderers, although you would likely want to create your own.
Then, within our View, we reference the MasterLayout (note that here we have stored MasterLayout.cshtml in a folder called "Shared" within the "Views" folder) and call the appropriate Supermodel HTML extension. For example, to create a List View for our Entity, we call the Supermodel HTML extension for CRUDList:
@using Supermodel.Mvc.Extensions;
@using Domain
@using Web.Controllers
@model UserMvcModel
@{
Layout = "~/Views/Shared/MasterLayout.cshtml"
}
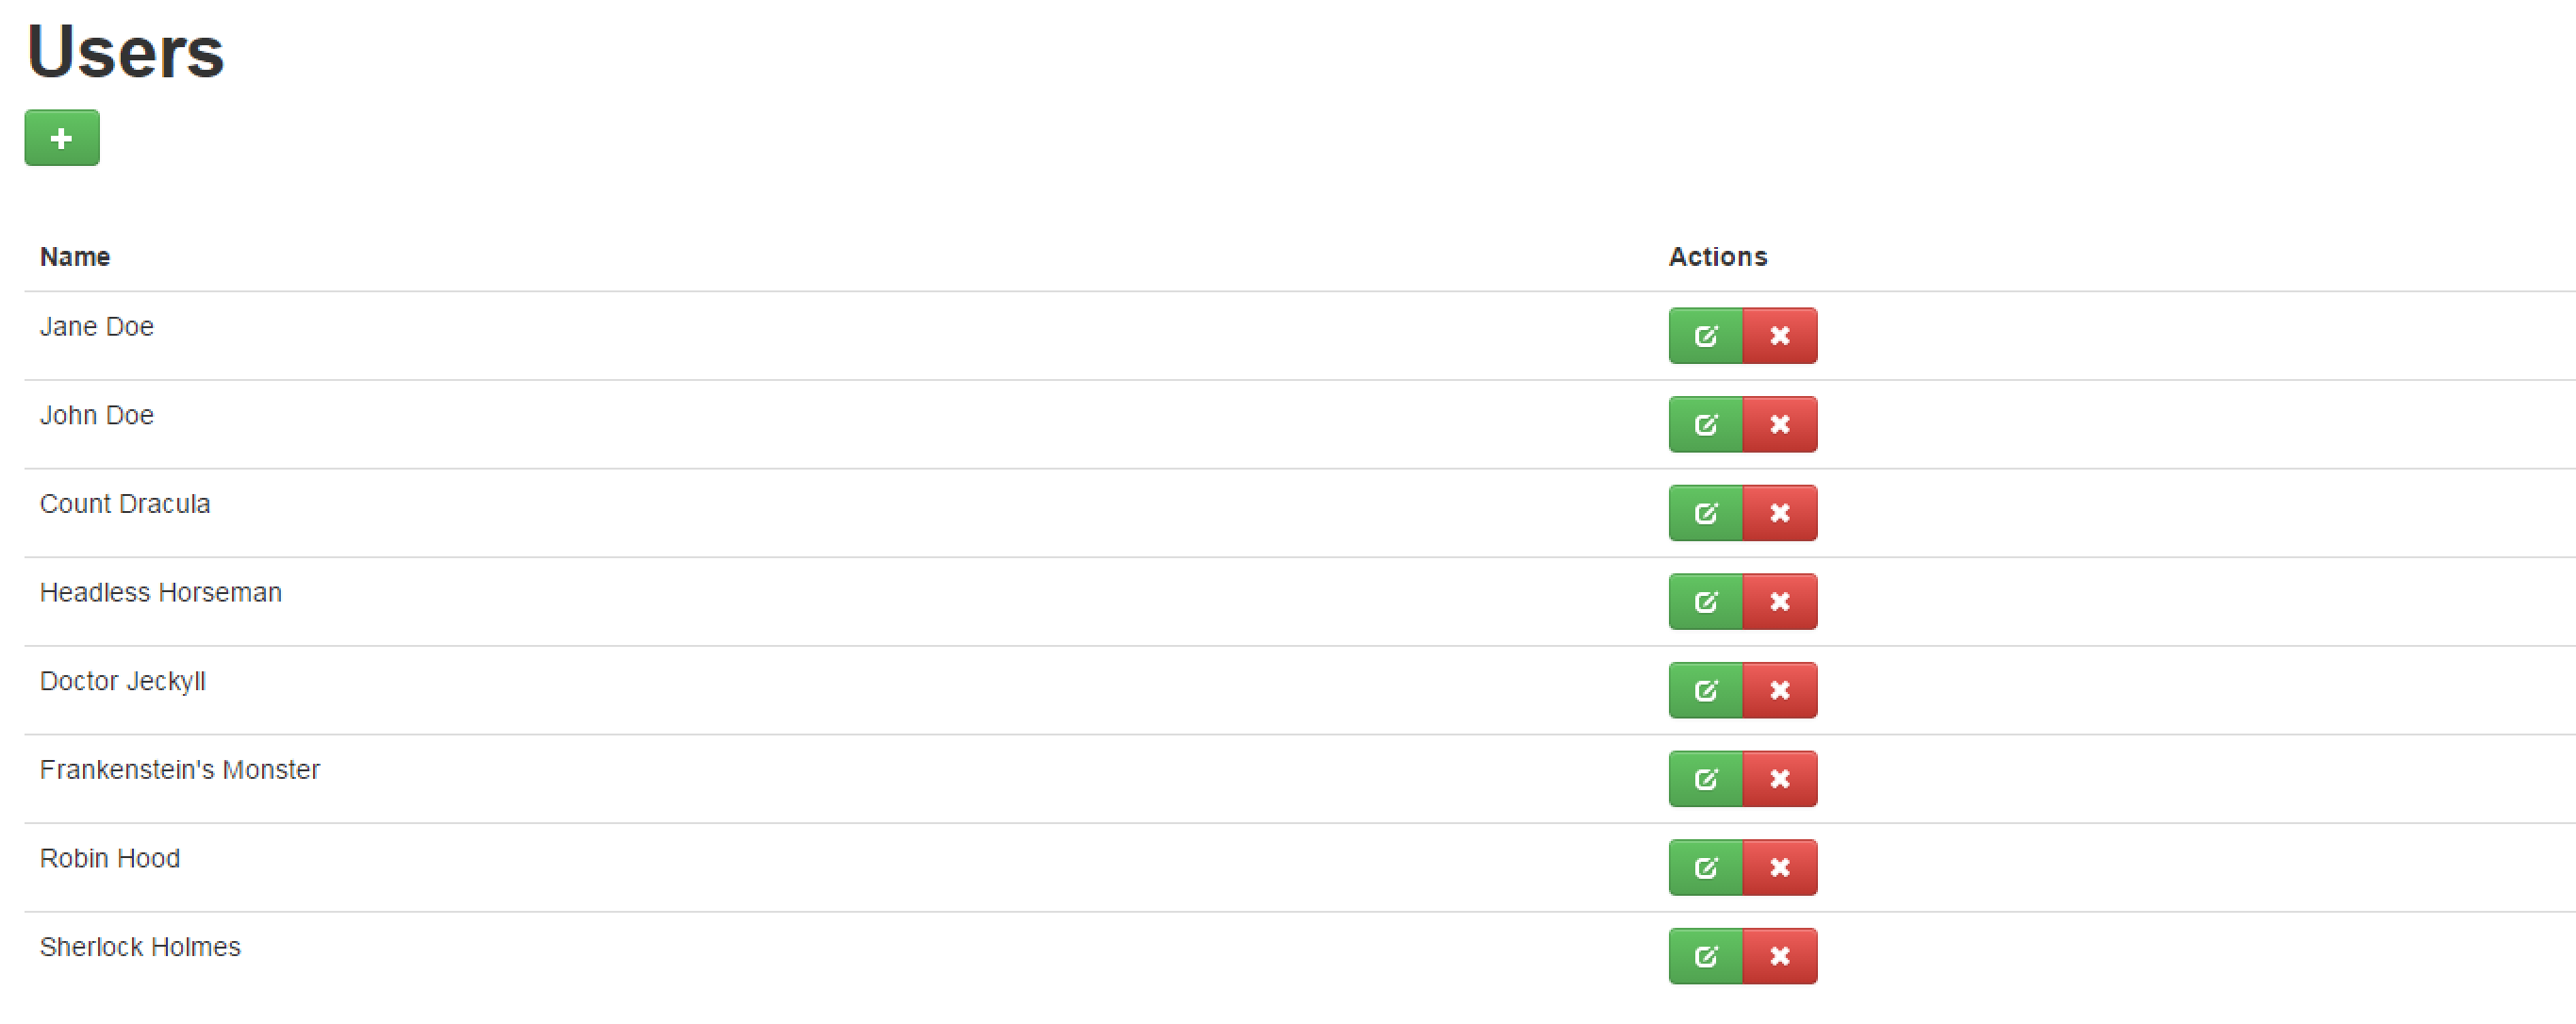
@(Html.Supermodel().TweeterBS.CRUDList<User, UserMvcModel>(Model, typeof(UserController), "Users"))CRUDList takes the generic parameters Entity (User) and MVC Model (UserMvcModel). The HTML extension takes the Model, the type of the controller to use for this Entity, in this case a SyncMvcCRUDController, and the title that will go above the List, in this case "Users." Adding a title to the List View is optional.
Note the use of parentheses around the entire last statement after the "@" sign. The reason for these is that we are calling a generic method that uses angular brackets. Without the parentheses, Razor will think that those angular brackets indicate an HTML tag.
Alternatively, instead of referencing the MasterLayout in every View, we can put it in _ViewStart.cshtml to be included by default in all of our Views.
To create a Detail View for our Entity, we call the Supermodel HTML extension for CRUDEdit:
@using Supermodel.Mvc.Extensions;
@using Domain
@using Web.Controllers
@{
Layout = "~/Views/Shared/MasterLayout.cshtml"
}
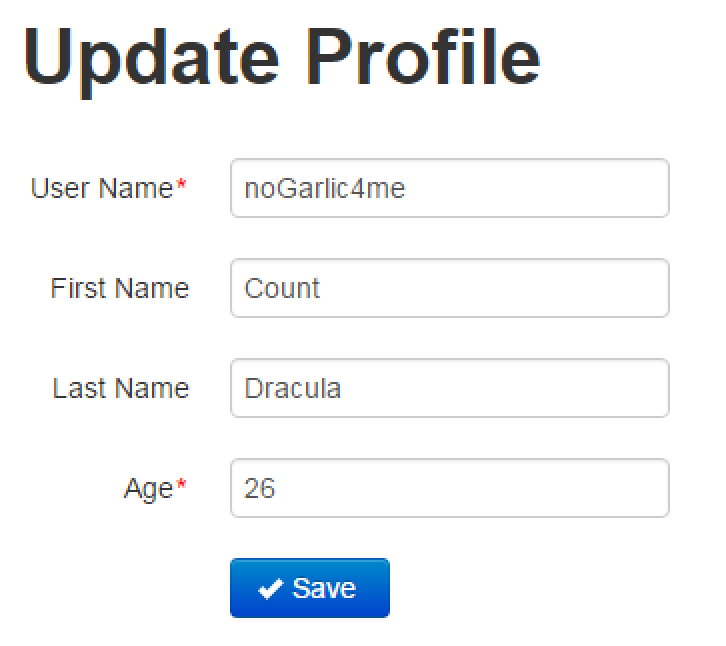
@(Html.Supermodel().TweeterBS.CRUDEdit<User, UserMvcModel>("Update Profile", false, true))CRUDEdit takes the generic parameters Entity (User) and MVC Model (UserMvcModel). The HTML extension takes a page title, "Update Profile", a boolean that says whether or not the View should be read-only or not (in this case, we set it to false so that it is read and write), and a boolean that determines whether or a not a "Back" button is displayed on the screen (in this case, we set it to true so that the back button is not displayed). All three of these parameters are optional.
For more flexibility in rendering models, see the Custom HTML Rendering section.
If your MVC Model is very "heavy" or expensive to create (for example, it includes binary images or data coming from navigational properties or database joins), it may be useful for you to separate the MVC Model into a Detail MVC Model and List MVC Model, keeping the List MVC Model "lightweight." This is important for performance reasons because a List MVC Model will be created for every item on the List page.
First, let's look at the List MVC Model:
public class UserListMvcModel : TweeterBS.MvcModelForEntity<User>
{
	public string FirstName { get; set; }
	public string LastName { get; set; }

	public override string Label { get { return FirstName + " " + LastName; } }
}Now, let's examine the Detail MVC Model for the User Entity:
public class UserDetailMvcModel : TweeterBS.MvcModelForEntity<User>
{
	[Required] public TweeterBS.TextBoxForStringMvcModel Username { get; set; }
	public TweeterBS.TextBoxForStringMvcModel FirstName { get; set; }
	public TweeterBS.TextBoxForStringMvcModel LastName { get; set; }
	[Required] public TweeterBS.TextBoxForIntMvcModel Age { get; set; }

	public override string Label { get { return FirstName.Value + " " + LastName.Value; } }
}
It is a good practice to keep the code DRY by inheriting the Detail MVC Model from the List MVC Model, if appropriate. For example:
public class UserDetailMvcModel : UserListMvcModel
{
	[Required] public TweeterBS.TextBoxForStringMvcModel Username { get; set; }
	[Required] public TweeterBS.TextBoxForIntMvcModel Age { get; set; }
}
Note that both of the MVC Models reside in the same file, "User.cs", in which we also define our User Entity. This is the typically-used convention, where MVC Models, API Models, Search Models, and configuration classes are put in the same file with their Entity:
public class UserListMvcModel : TweeterBS.MvcModelForEntity<User>
{
	public TweeterBS.TextBoxForStringMvcModel FirstName { get; set; }
	public TweeterBS.TextBoxForStringMvcModel LastName { get; set; }

	public override string Label
	{
		get { return FirstName.Value + " " + LastName.Value; }
	}
}
public class UserDetailMvcModel : UserListMvcModel
{
	[Required] public TweeterBS.TextBoxForStringMvcModel Username { get; set; }
	[Required] public TweeterBS.TextBoxForStringMvcModel Age { get; set; }
}
public class User : Entity
{
	[Required] public string Username { get; set; }
	public string FirstName { get; set; }
	public string LastName { get; set; }
	[Required] public int? Age { get; set; }
}We will need to update our User Controller to accomodate the new MVC Models. Luckily, there is a version that takes four type parameters, taking Detail and List MVC Models as separate types.
public class UserController : SyncMvcCRUDController<User, UserDetailMvcModel, UserListMvcModel, MyFirstProjectDbContext> { }Every controller in Supermodel comes with four flavors: sync vs. async and a single MVC Model vs. separate MVC Models for Detail and List (see Sync vs. Async Controllers for more detail).
Now, we need to update our Views to include a Detail View and a List View to display to the user.
@using Supermodel.Extensions
@using Domain
@using Web.Controllers
@model UserDetailMvcModel
@{
	Layout = "~/Views/Shared/MasterLayout.cshtml";
}
@(Html.Supermodel().TweeterBS.CRUDEdit<User, UserDetailMvcModel>("Update Profile", false, true))
@using Supermodel.Extensions
@using Domain
@using Web.Controllers
@model List<UserListMvcModel>
@{
	Layout = "~/Views/Shared/MasterLayout.cshtml";
}
@(Html.Supermodel().TweeterBS.CRUDList<User, UserListMvcModel>(Model, typeof(UserController), "User"))
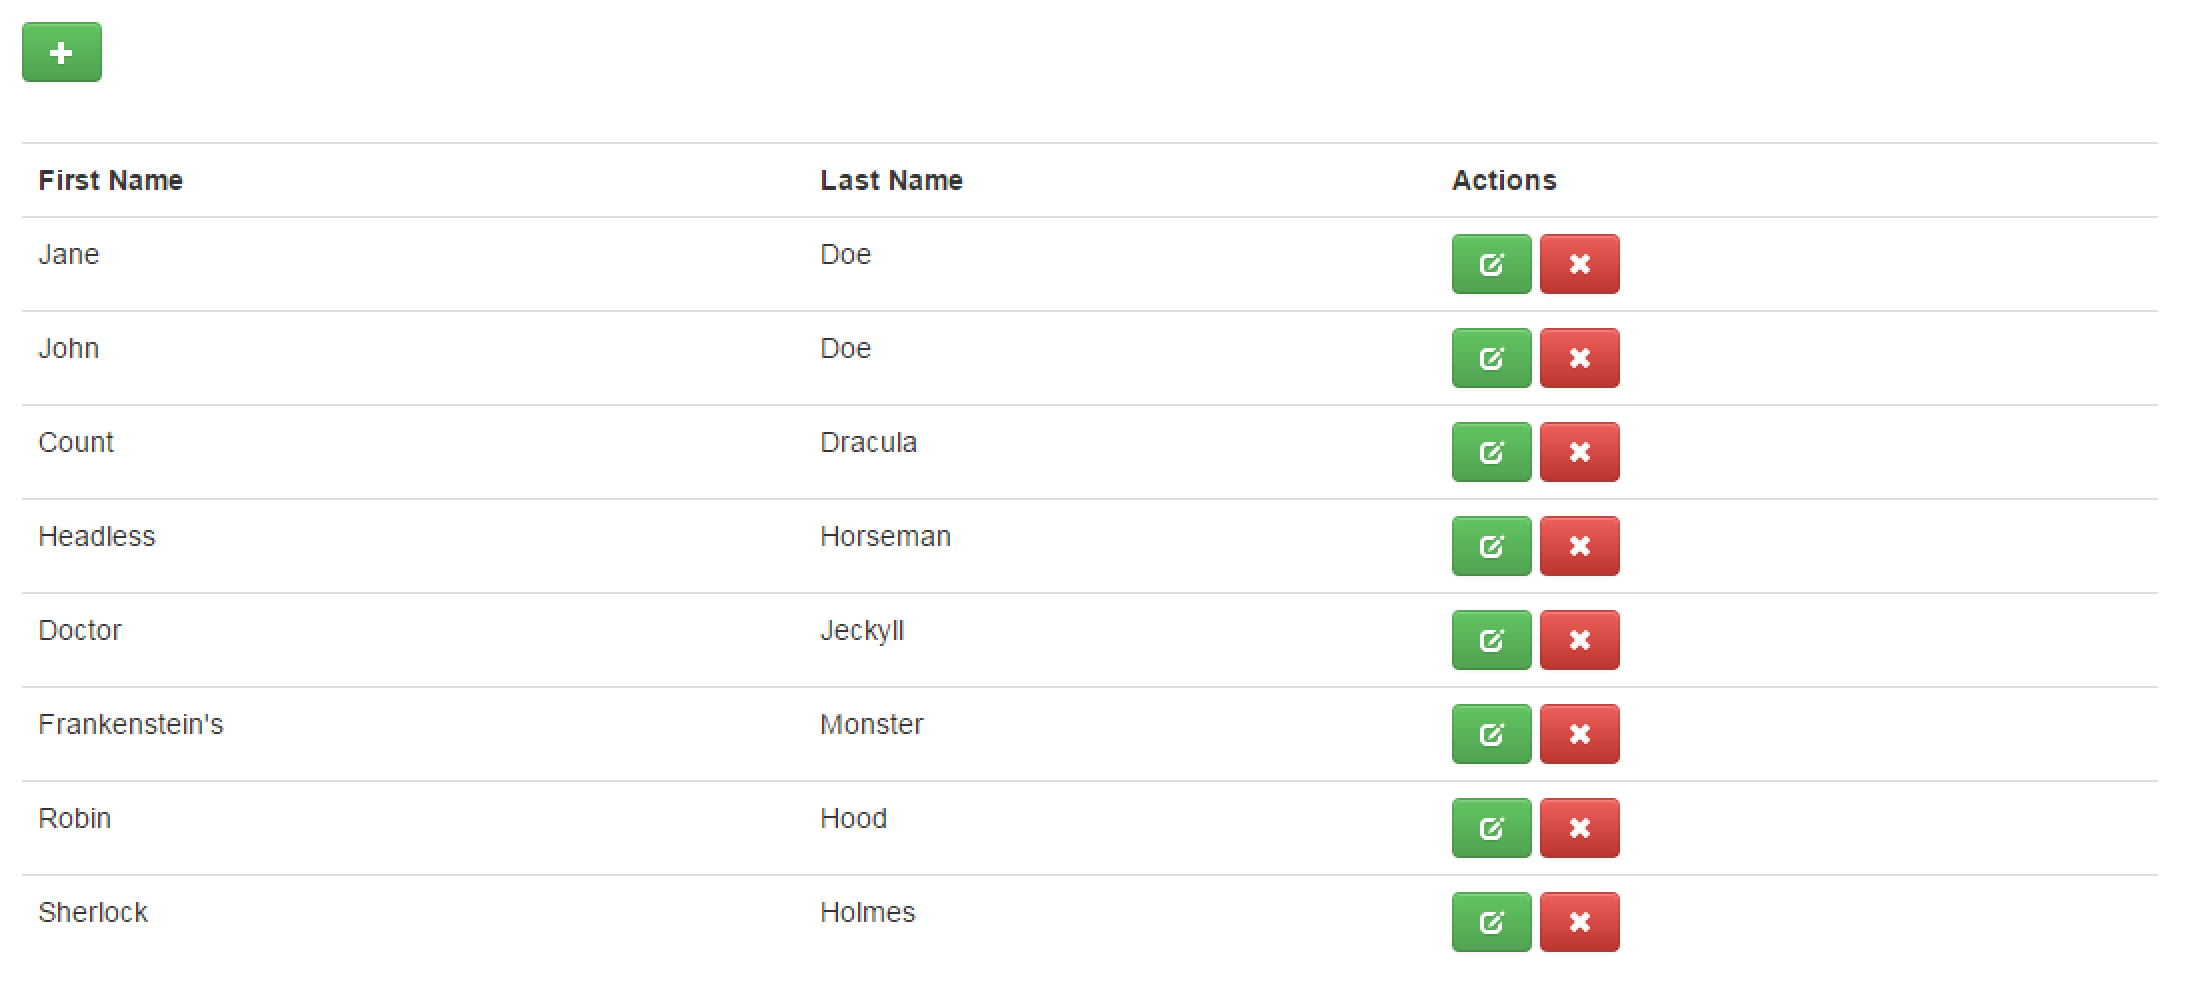
You can obviously easily loop through the list of the List MVC Models in your View to generate a complex multicolumn list. In many cases, this is the best approach for a complex/unusual List screen. For example, the following code snippet in your Razor View would render a custom Multicolumn List:
@Model UserMvcModel
@{
    Layout = "~/Views/Shared/MasterLayout.cshtml";
}
<p><a href="/User/Detail/0" class="btn btn-success"><i class="icon-plus icon-white"></i></a></p>
<table class="table">
        <tr>
            <th>First Name</th>
            <th>Last Name</th>
            <th>Actions</th>
        <tr/>
        @foreach (var user in Model)
        {
					<tr>
						<td>@user.FirstName</td>
						<td>@user.LastName</td>
						<td>
							<div class="btn-group">
								<a href="User/Detail/@user.Id" class="btn btn-success">
									<i class="icon-edit icon-white"></i>
								</a>
								<button  class="btn btn-danger" type="button" onclick="Supermodel_restfulLinkToUrlWithConfirmation('User/Detail/@user.Id', 'Delete', 'Are you sure?')">
									<i class="icon-remove icon-white"></i>
								</button>
							</div>
						</td>
					</tr>
        }
</table>
The above code snippet results in the following List View:
For common multicolumn list situations, however, Supermodel provides a helper that gives you multicolumn lists for free.
We can update the List View further by changing CRUDList( ) to CRUDMulticolumnList( ). As you saw in the example before, each User is shown on the List with a simple string that is generated by the Label method in the MVC Model. If you want to have multiple columns in your List View and you want to be able to sort the columns by clicking on the column header, you need to use CRUDMultiColumnList( ).
First we'll need to add ListColumn attributes to our UserListMvcModel properties. Let's also add the Username property to our UserListMVCModel so we can display it in the List View. ListColumn attribute indicates that the property it decorates is to be displayed as a column in the multicolumn list:
public class UserListMvcModel : TweeterBS.MvcModelForEntity<User>
{
	[ListColumn] public TweeterBS.TextBoxForStringMvcModel Username { get; set; }
	[ListColumn] public TweeterBS.TextBoxForStringMvcModel FirstName { get; set; }
	[ListColumn] public TweeterBS.TextBoxForStringMvcModel LastName { get; set; }

	public override string Label
	{
		get { return FirstName.Value + " " + LastName.Value; }
	}
}
Now that we've added Username to the UserListMvcModel, if we are inheriting our UserDetailMvcModel from the UserListMvcModel, we must be sure to remove Username from the UserDetailMvcModel because now it will be getting this property from its base class.
public class UserDetailMvcModel : UserListMvcModel
{
	public TweeterBS.TextBoxForIntMvcModel Age { get; set; }
}
Note that the CRUDMultiColumnList method will pick up all properties marked with the [ListColumn] attribute using reflection.
Now, we update our List View to use CRUDMultiColumnList:
@using Supermodel.Extensions
@using Domain
@using Web.Controllers
@model List<UserListMvcModel>
@{
	Layout = "~/Views/Shared/MasterLayout.cshtml";
}
@(Html.Supermodel().CRUDMultiColumnList<User, UserListMvcModel>(Model, typeof(UserController), "Users"))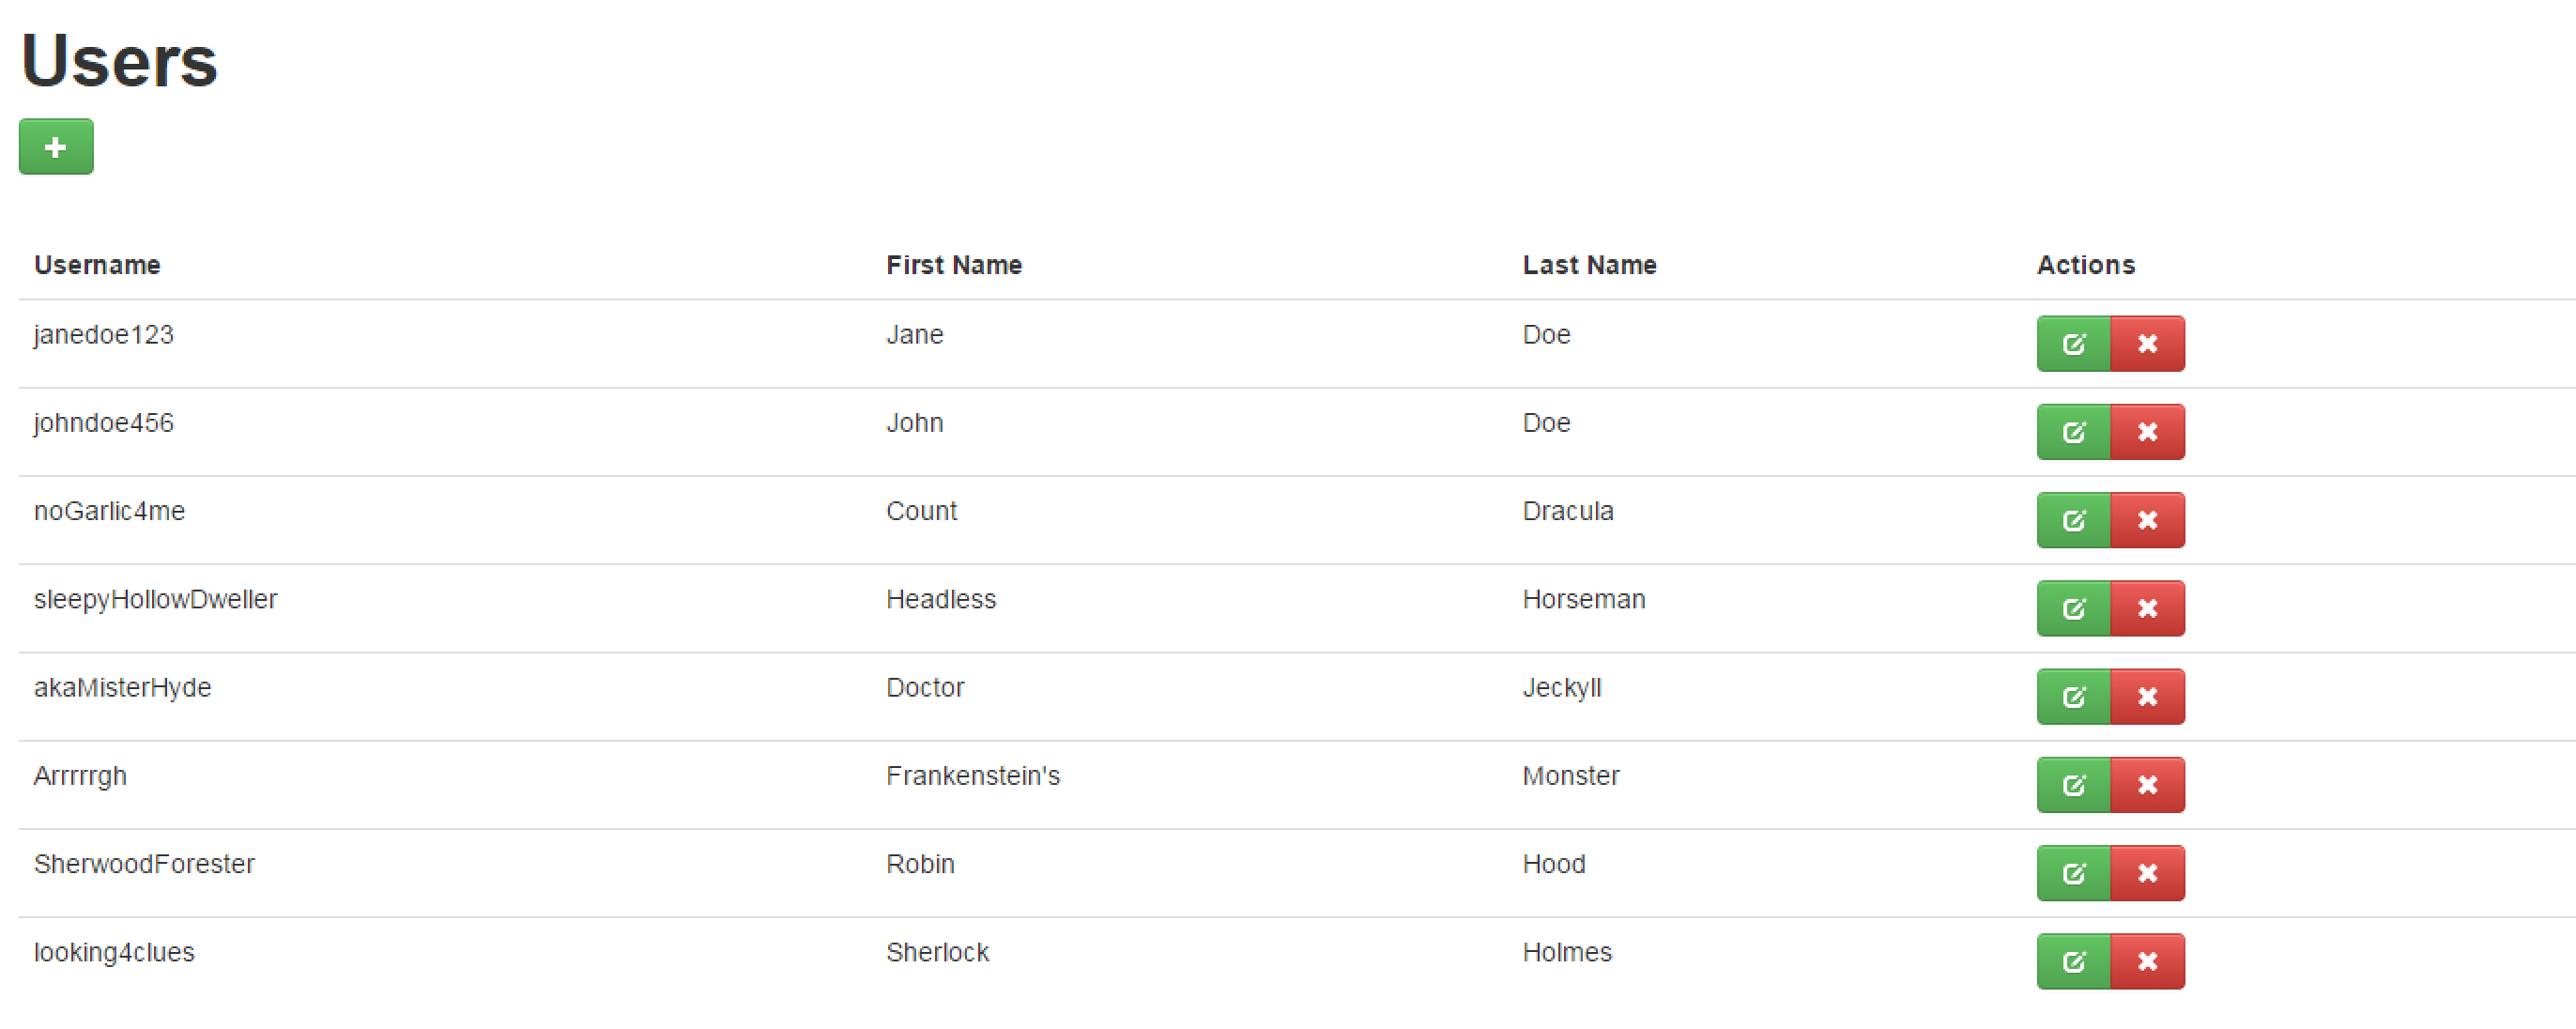
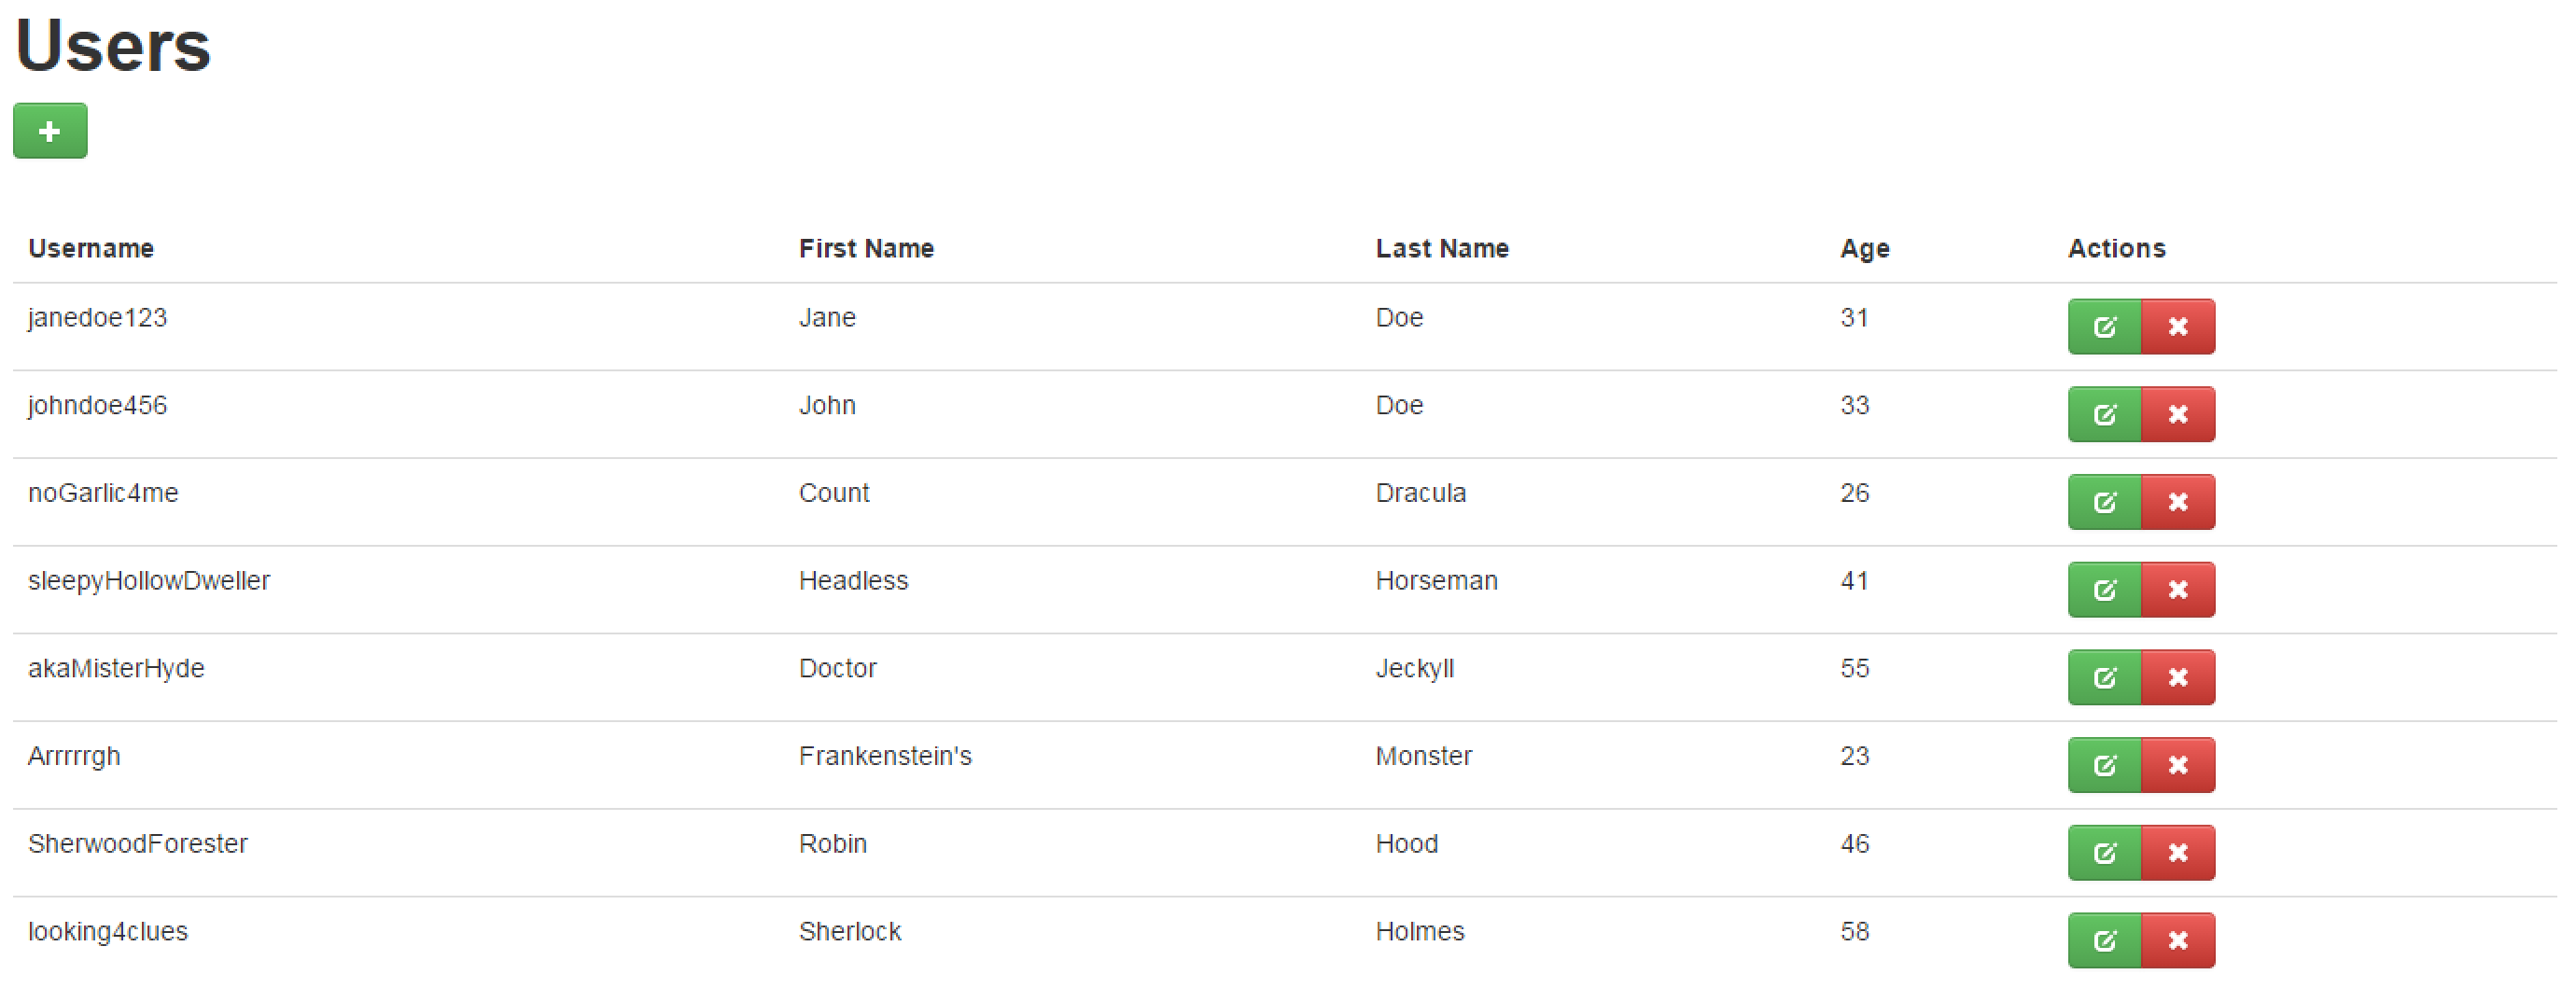
While we're at it, let's go ahead and also add the Age property to the List View as well.
public class UserListMvcModel : TweeterBS.MvcModelForEntity<User>
{
    [ListColumn] public TweeterBS.TextBoxForStringMvcModel Username { get; set; }
    [ListColumn] public TweeterBS.TextBoxForStringMvcModel FirstName { get; set; }
    [ListColumn] public TweeterBS.TextBoxForStringMvcModel LastName { get; set; }
    [ListColumn] public TweeterBS.TextBoxForIntMvcModel Age { get; set; }

	public override string Label
	{
		get { return FirstName.Value + " " + LastName.Value; }
	}
}
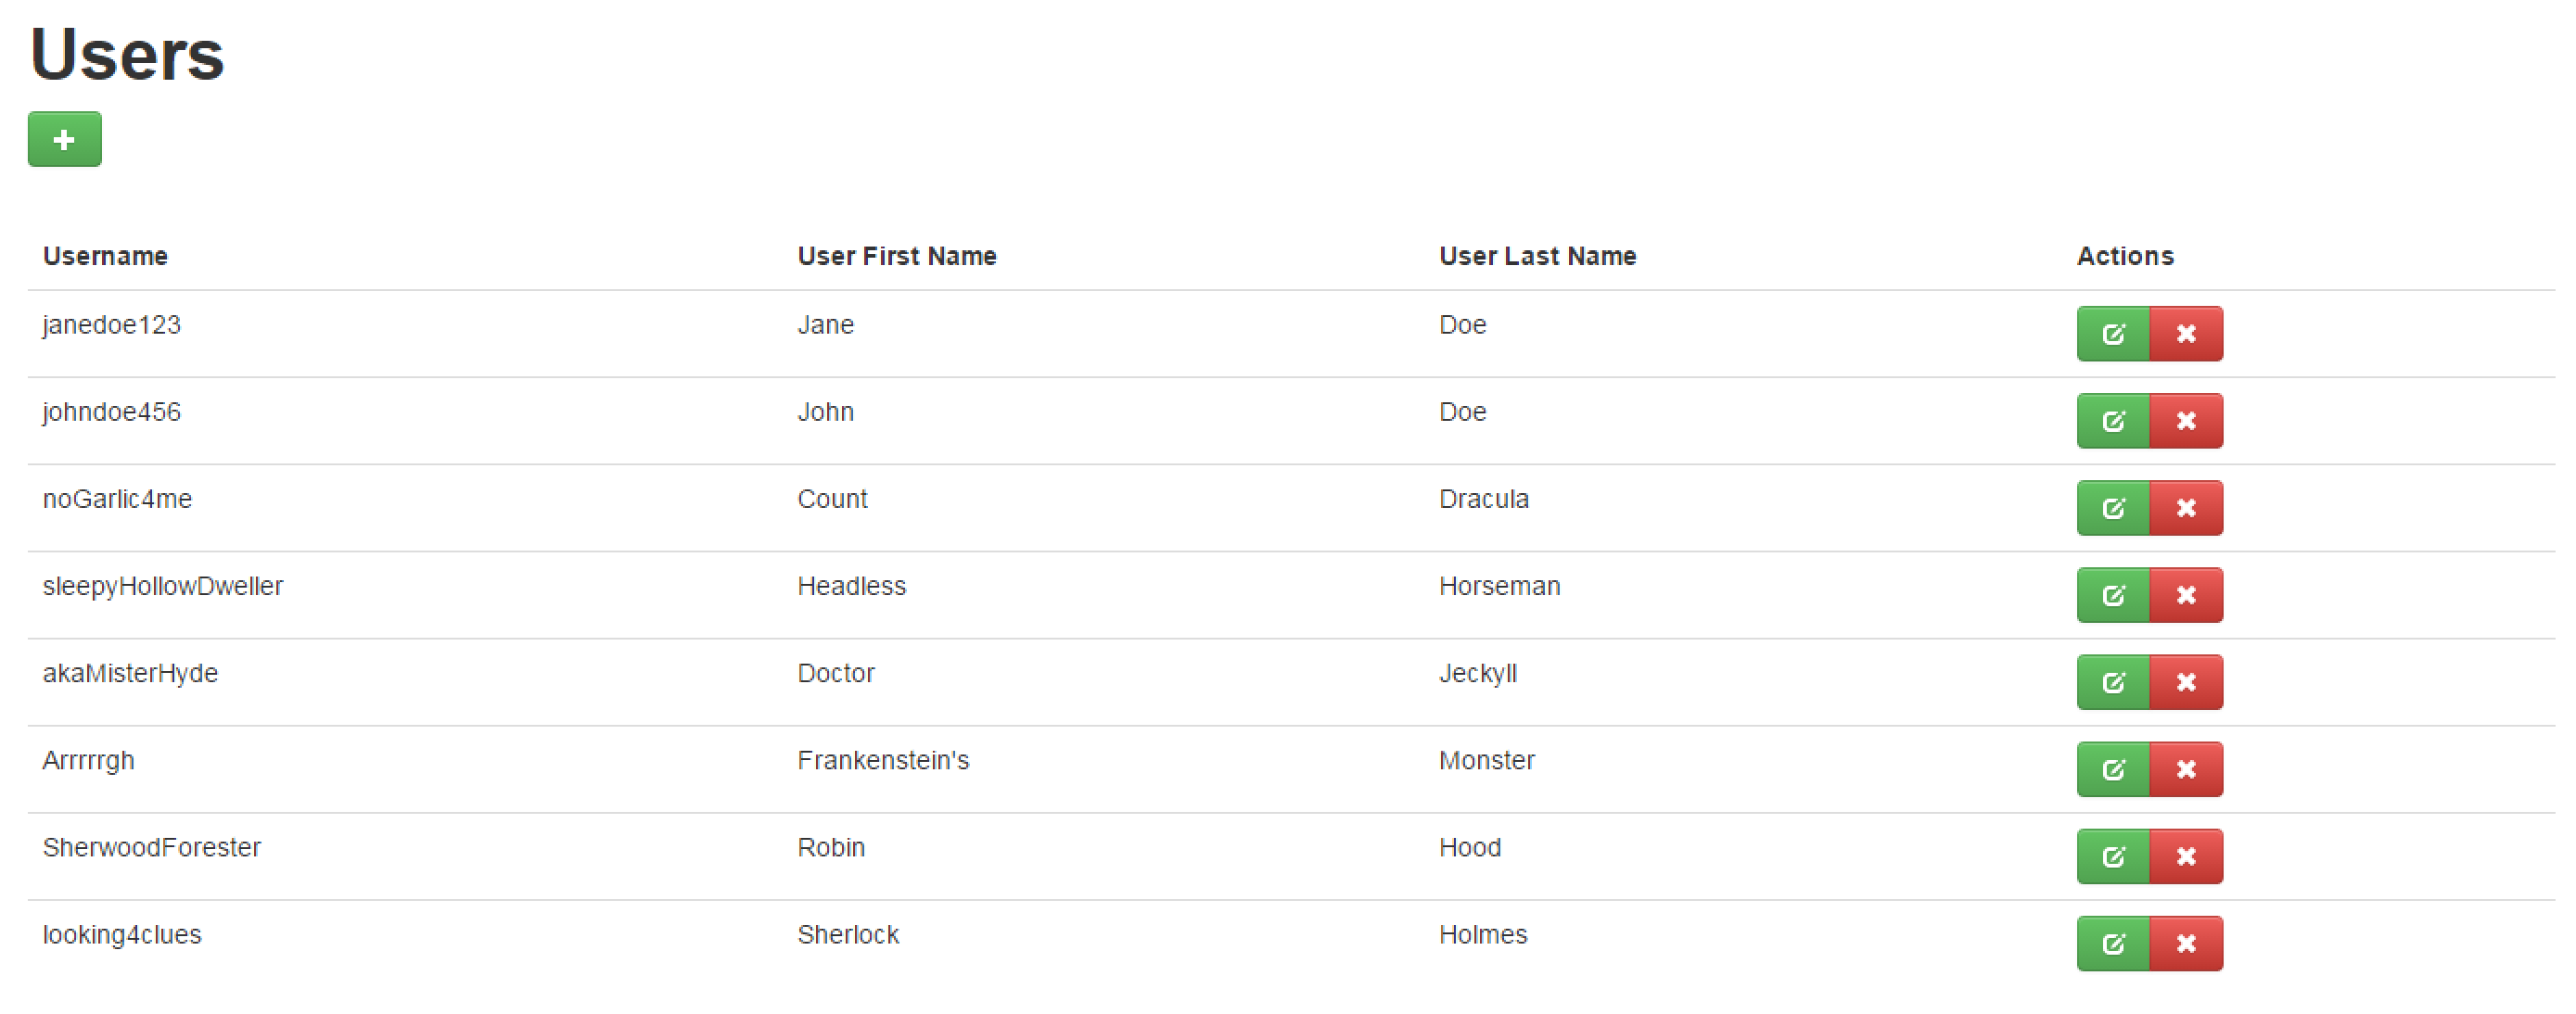
We can add other attributes to enhance the view even further. For example, we can customize the headers of each column:
public class UserListMvcModel : TweeterBS.MvcModelForEntity<User>
{
	[ListColumn] public TweeterBS.TextBoxForStringMvcModel Username { get; set; }
	[ListColumn(Header = "User First Name")] public TweeterBS.TextBoxForStringMvcModel FirstName { get; set; }
	[ListColumn(Header = "User Last Name")] public TweeterBS.TextBoxForStringMvcModel LastName { get; set; }
	[ListColumn] public TweeterBS.TextBoxForIntMvcModel Age { get; set; }

	public override string Label
	{
		get { return FirstName.Value + " " + LastName.Value; }
	}
}
To have the column headers be clickable to affect the sorting on the screen, we need to use an Enhanced CRUD Controller (Enhanced CRUD Controllers allow you to do searching, sorting, and paging. See the Enhanced Controllers section for more detail).
Supermodel provides another helper for multicolumn support, CRUDMultiColumnListNoActions( ). This method only displays the columns marked with [ListColumn] without displaying the "Actions" column. This is useful in cases where you do not want an "Actions" column, you want custom actions, or you want the "Actions" column to not be the last one in the table. The way you implement custom actions with this helper is by defining a property marked with the [ListColumn] attribute of the type MvcHtmlString. In that property you can put the HTML that would render for this particular column which gives you a completely open-ended way of defining custom columns, including placing buttons on them. Usually we setup this property in a custom mapper.
Also, CRUDMultiColumnListNoActions helper has another nice benefit: it does not require you to use MvcModelForEntity<>. For this one, you can get away with a class derived from just MvcModel, meaning that you can render multicolumn lists from MVC Models that are not backed by an Entity. MvcModelForEntity<> derives from MvcModel. MvcModelForEntity<> represents an MVC Model that has an Entity-backing whereas an MVC Model represents a Model that you want to display on your screen that does not have an Entity-backing.
Consider a scenario in which a User can add a collection of favorite quotes to their profile. Let's add another Entity called Quote to our domain.
A User Entity will have a one-to-many relationship with the Quote Entity, so we include a virtual property called ParentUser of type User to the Quote Entity.
public class Quote : Entity
{
	[Required] public virtual User ParentUser { get; set; }
	[Required] public string Quotation { get; set; }
	[Required] public string Author { get; set; }
}
We must add a list of Quotes to our User Entity. Let's make it virtual for just-in-time loading:
public class User : Entity
{
	[Required] public string Username { get; set; }
	public string FirstName { get; set; }
	public string LastName { get; set; }
	[Required] public int? Age { get; set; }
	public virtual List<Quote> Quotes { get; set; }
}
Our MVC Model will be of the type ChildMvcModelForEntity, which includes three methods that must be implemented: GetParentEntity( ), SetParentEntity( ) and Label. The GetParentEntity( ) and SetParentEntity( ) methods define the Parent-Child relationship between the User Entity and the Quote Entity.
public class QuoteMvcModel : TweeterBS.ChildMvcModelForEntity<Quote, User>
{
	[Required] public TweeterBS.TextBoxForStringMvcModel Quotation { get; set; }
	[Required] public TweeterBS.TextBoxForStringMvcModel Author { get; set; }

	public override string Label { get { "'" + Quotation.Value + "'" + " - " + Author.Value; } }

	public override User GetParentEntity(Quote Entity)
	{
		return Entity.ParentUser;
	}

	public override void SetParentEntity(Quote Entity, User parent)
	{
		Entity.ParentUser = parent;
	}
}
It is important to understand why the Parent-Child relationship is set up at the MVC Model-level rather than at the Entity-level. In early versions of Supermodel the Parent-Child relationship was actually set at the Entity-level. This proved to be an inflexible design because for different portions of the UI in an application, the Parent-Child relationships for the same Entities might be different. Consider an example where we have a Student Entity that references the University the Student attends (which is another Entity) and a Hometown of the Student (which is yet another Entity). We might want to browse the Students based on the University they attend. In this case, the University would be the parent of the Student. But we might also want to browse the Students based on their Hometown, in which case the Hometown would be the parent. If we had the Parent-Child relationship set up at the Entity-level, we would be forced to pick one but not the other. However, since we can have many MVC Models per Entity, we can have two different MVC Models for User both being Child MVC Models, but having one define their parent as University and the other define their parent as Hometown.
Next, we must add a list of QuoteMvcModels to our UserMvcModel and create a new list of QuoteMvcModels when we construct a new UserMvcModel:
public class UserMvcModel : TweeterBS.MvcModelForEntity<User>
{
	public UserMvcModel()
	{
		Quotes = new List<QuoteMvcModel>();
	}

	[Required] public TweeterBS.TextBoxForStringMvcModel Username { get; set; }
	public TweeterBS.TextBoxForStringMvcModel FirstName { get; set; }
	public TweeterBS.TextBoxForStringMvcModel LastName { get; set; }
	[Required] public TweeterBS.TextBoxForIntMvcModel Age { get; set; }
	public List<QuoteMvcModel> Quotes { get; set; }

	public override string Label
	{
		get { return FirstName.Value + " " + LastName.Value; }
	}
}
We also must create Controllers for our Quote Entity. We'll override the List method and have it redirect to the User Detail View, where the List of Quotes for a particular User is displayed:
public class QuoteController : SyncMvcChildCRUDController<Quote, User, QuoteMvcModel, MyFirstProjectDbContext>
{
	public override ActionResult List(int? parentId)
	{
		if (parentId == null) throw new Exception("SurveyController.List(): parentId = null");
		var route = HttpContext.Request.QueryString.Supermodel().ToRouteValueDictionary();
		return this.Supermodel().RedirectToActionStrong<UserController>(x => x.Detail((int)parentId, new HttpGet()), route);
	}
}
A Child MVC Model can be a parent for another Child MVC Model, and so on, without any limitation on the number of levels that we can have. However,
only the top-level/root Entity can have an Enhanced CRUD Controller (Enhanced CRUD Controllers allow you to do searching, sorting, and paging. These controllers will be explained later on in the Enhanced Controllers section). There is no such thing as an "Enhanced Child CRUD Controller." The reason for this is two-fold:
Finally, within the User View folder, add the list of Quotes to the User's profile. We will use the CRUDChildrenList HTML extension to create the list of Quotes:
@using Supermodel.Extensions
@using Domain
@using Web.Controllers
@model UserDetailMvcModel
@{
	Layout = "~/Views/Shared/MasterLayout.cshtml";
}
@(Html.Supermodel().TweeterBS.CRUDEdit<User, UserDetailMvcModel>("Update Profile"))
<hr/>
@(Html.Supermodel().TweeterBS.CRUDChildrenList<Quote, QuoteMvcModel>(Model.Quotes, typeof(QuoteController), "My Quotes", Model.Id))
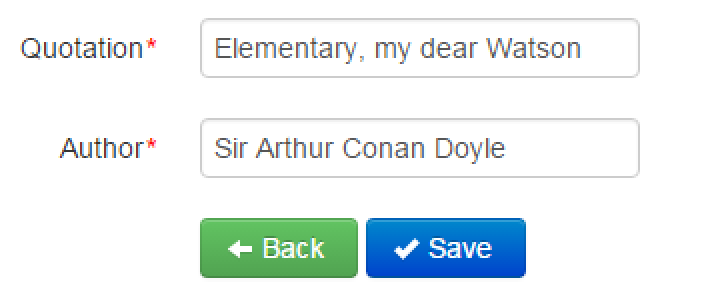
To add a Detail View for our Quote Entity, you can create a new folder under Views called Quote. To this folder, add a new View called "Detail.cshtml". This file will appear as follows:
@using Domain.Entities
@using Supermodel.Extensions
@using Web.Controllers
@{
    Layout = "~/Views/Shared/MasterLayout.cshtml";
}
@(Html.Supermodel().TweeterBS.CRUDEdit<Quote, QuoteMvcModel>())
Now a User has CRUD capabilities for their Quote Entity:
And a User's list of Quotes will appear below the form for updating their profile:

You'll notice that the default header "Name" doesn't make sense in this context. We can modify a few things to fix this. First, let's add ListColumn attributes to our QuoteMvcModel properties:
public class QuoteMvcModel : TweeterBS.ChildMvcModelForEntity<Quote, User>
{
	[ListColumn, Required] public TweeterBS.TextBoxForStringMvcModel Quotation { get; set; }
	[ListColumn, Required] public TweeterBS.TextBoxForStringMvcModel Author { get; set; }

	public override string Label { get { "'" + Quotation.Value + "'" + " - " + Author.Value; } }

	public override User GetParentEntity(Quote Entity)
	{
		return Entity.ParentUser;
	}

	public override void SetParentEntity(Quote Entity, User parent)
	{
		Entity.ParentUser = parent;
	}
}
Then, we'll simply change the HTML extension CRUDChildrenList to CRUDMultiColumnChildrenList so that the ListColumn attributes we added will be recognized:
@using Supermodel.Extensions
@using Domain
@using Web.Controllers
@model UserDetailMvcModel
@{
	Layout = "~/Views/Shared/MasterLayout.cshtml";
}
@(Html.Supermodel().TweeterBS.CRUDEdit<User, UserDetailMvcModel>("Update Profile"))
<hr/>
@(Html.Supermodel().TweeterBS.CRUDMultiColumnChildrenList<Quote, QuoteMvcModel>(Model.Quotes, typeof(QuoteController), "My Quotes", Model.Id))
Now our list of Quotes will have separate columns for the Quotation property and the Author property:

The UnitOfWork class in Supermodel manages a set of operations that happen within a single transaction, ensuring an all-or-nothing transactional outcome.
So how does the UnitOfWork, well, work?
There’s a way to define a static variable in C# in such a way that your static variable is unique per thread. If you have a static variable that is defined as unique per thread, then within a thread, all of the objects that try to access that static variable will get the same variable, but in a different thread, they will all get their own variable. Static variables per thread are useful for what’s called an Ambient Context Pattern. In an Ambient Context Pattern, you can put something in a static variable that is unique to your thread, and you can call another method, and that method is going to call another method, and so on. Then, in one of the subsequent methods, you can read that static variable. Since you’re not passing the static variable as a parameter, all of the methods in between do not need to be aware that the static variable is being passed.
This is important because the UnitOfWork stores the DbContext as an ambient variable. Now when a method is called on one of your domain objects, the domain object doesn’t need to know about DbContext. Furthermore, the method called on the domain object doesn’t need to know about the DbContext. However, the method will create a repository and that repository needs to know about the current DbContext. The repository can access the ambient variable and "see" the context we are currently running in, since an ambient DbContext has been created. For example:
using (new MyUnitOfWork())
{
	//Do some work, including calls to other methods.
	//All of this work will be saved as one transaction when we hit the closing curly.
}
Strictly speaking, starting with Supermodel 4.0, the Ambient Context is not stored as a thread-static variable. In order to play nicely with async programming, Supermodel now uses CallContext.LogicalGetData("UniqueIdentifier") and CallContext.LogicalSetData("UniqueIdentifier", data) instead of a thread-static variable, but it continues to implement the same Ambient Context Pattern.
Sometimes you need to access the ambient variable that stores the DbContext. For example, if you are writing your own repository or if you need to rollback a transaction. The following code will access the ambient DbContext to rollback a transaction:
UnitOfWorkContext<MyFirstProjectDbContext>.CurrentDbContext.CommitOnDispose = false;Supermodel allows you to create batch jobs in the form of a Command Line project. If you wish to create a Command Line project as opposed to a Web project, you can do it easily using Supermodel. The first thing you need to do is create a new Console Application project under the MyFirstProject project folder. Go ahead and name this project "CmdDbTest".
Next, you will need to add references to Supermodel, ReflectionMapper, Encryptor, and Domain. You also need to add NuGet packages for the usual suspects: Entity Framework, Json.NET, Microsoft ASP.NET MVC, and Microsoft ASP.NET Web API 2.2. Additionally, you must add the following connection string to the App.config file:
<connectionStrings>
	<add name="MyFirstProjectDb" providerName="System.Data.SqlClient" connectionString="Data Source=localhost\SQL_DEVELOPER; Initial Catalog=MyFirstProjectDb; Integrated Security=True; Pooling=False; MultipleActiveResultSets=True;" />
</connectionStrings>
Now, in the Program.cs file in your Command Line project, you can write code to add a new User to the database. First, you must use the SupermodelInitialization.Init( ) method and pass the DbContext and then you can create a new MyFirstProjectUnitOfWork instance and within that transaction you can perform operations. Below, we have added a new User, Rip Van Winkle:
namespace CmdDbTest
{
    public class Program
    {
        static void Main(string[] args)
        {
            SupermodelInitialization.Init<MyFirstProjectDbContext>();
            using (new MyFirstProjectUnitOfWork())
            {
                var user = new User
                {
                    FirstName = "Rip",
                    LastName = "Van Winkle",
                    Age = 40,
                    Username = "WhatYearIsIt",
                    Password = "0",
                    Active = true
                };
                user.Add();
            }
        }
    }
}
And, sure enough, when we run this program, the new User is added to the database.
We can also update our new User. For example, let's update Rip Van Winkle's age to be 60.
namespace CmdDbTest
{
    public class Program
    {
        static void Main(string[] args)
        {
            SupermodelInitialization.Init<MyFirstProjectDbContext>();
            using (new MyFirstProjectUnitOfWork())
            {
               	var user = RepoFactory.Create<User>().GetById(9);
               	user.Age = 60;
            }
        }
    }
}
When we run this program, Rip Van Winkle's Age property is updated. We can verify this in our database:

Now, let's try deleting our new User from the database. First, we need to load the Entity. We can do this by using the RepoFactory and calling the GetById( ) method. Then we need to call the Delete( ) method on the Entity.
namespace CmdDbTest
{
    public class Program
    {
        static void Main(string[] args)
        {
            SupermodelInitialization.Init<MyFirstProjectDbContext>();
            using (new MyFirstProjectUnitOfWork())
            {
                var user = RepoFactory.Create<User>().GetById(9);
                user.Delete();
            }
        }
    }
}
When we run this program, the User with Id 9, Rip Van Winkle, is deleted from the database.
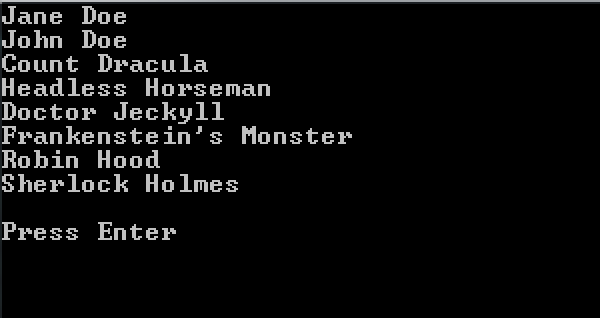
You can also have a list of Users written to the Console:
namespace CmdDbTest
{
    public class Program
    {
        static void Main(string[] args)
        {
            SupermodelInitialization.Init<MyFirstProjectDbContext>();
            using (new MyFirstProjectUnitOfWork())
            {
                var users = RepoFactory.Create<User>().GetAll();
                foreach (var user in users)
                {
                    Console.WriteLine(user.FirstName + " " + user.LastName);
                }
            }

            Console.WriteLine();
            Console.WriteLine("Press Enter");
            Console.ReadLine();
        }
    }
}
When we run the program, our Console appears as follows:
There are a number of methods that a repository can call, listed below. Note that many of the methods listed below also have async counterparts that can be accessed by simply adding "Async" to the end of each method name.
Returns the object with the specified Id. Throws an exception if an object with the given Id does not exist.
Returns the object with the specified Id. Returns null if an object with the given Id does not exist.
Returns a list of all of the objects within your database.
Returns IQueryable of all Entities of this type.
Returns an Entity Framework DbSet for this type.
RepoFactory returns an object of the type IDataRepo<Entity>. This interface intentionally does not include Items and DbSet properties in order to not be dependent on Entity Framework. However, the underlying object that the RepoFactory returns implements these two properties. In order to access them, you must cast the object to SqlLinqEFSimpleRepo<Entity>:
var repo = (SqlLinqEFSimpleRepo<User>) RepoFactory.Create<User>();
var president = repo.Items.Where(x => x.LastName == "Obama"); //Now we can use Item's propertyThe UnitOfWork pattern in Supermodel supports unlimited nesting. For example, the following is a perfectly valid piece of code:
using new MyFirstProjectUnitOfWork()
{
	//Do some work here in the context of the outer UnitOfWork.

	using new MyFirstProjectUnitOfWork()
	{
		//Do some work here in the context of the inner UnitOfWork.
		//When this work is done, it is committed as if no outer
		//UnitOfWork existed.
	}

	//Do some more work here in the context of the outer UnitOfWork.
	//When outer UnitOfWork completes, all of the operations inside the outer
	//UnitOfWork commit here. They do not include any operations from the inner
	//UnitOfWork.
}
Because UnitOfWork underneath uses EntityFramework DbContext, you cannot mix Entities from one UnitOfWork with another UnitOfWork. For more information, see Entity Framework documentation.
Supermodel's UnitOfWorkContext<> exposes four methods that allow you to manage the UnitOfWork stack:
In addition to UnitOfWork, there is a class called EFUnitOfWorkIfNoAmbientContext. This object does the following: if you are already inside a UnitOfWork, the using new EFUnitOfWorkIfNoAmbientContext(...) will simply use the current UnitOfWork. But if you are not inside of a UnitOfWorkContext, EFUnitOfWorkIfNoAmbientContext will create an ambient context for you.
Essentially, if you are not inside a transaction, it will begin the new transaction. But if you are already within a transaction, it will use that transaction instead. So, for example, if you need your application to complete a side task but want to make sure that task is committed as part of the existing transaction (if such exists), or as part of its own new transaction (if you are not in the context of any UnitOfWork), you can use EFUnitOfWorkIfNoAmbientContext.
A UnitOfWork takes a ReadOnly enum, determining whether it is a read and write transaction or a read-only transaction. A EFUnitOfWorkIfNoAmbientContext takes a MustBeWriteable enum. The combination of the current UnitOfWork's ReadOnly state and the MustBeWriteable parameter in EFUnitOfWorkIfNoAmbientContext determines whether the current UnitOfWork can be reused, or if a new one must be created:
| ReadOnly.Yes | ReadOnly.No | |
|---|---|---|
| MustBeWriteable.Yes | New UnitOfWork Created | UnitOfWork Reused |
| MustBeWriteAble.No | UnitOfWork Reused | UnitOfWork Reused |
For example, you can define UnitOfWorkIfNoAmbientContext for your application as follows. By convention, this would go in the same directory where your application's UnitOfWork resides, which is Supermodel/Persistance
public class MyFirstProjectUnitOfWorkIfNoAmbientContext : EFUnitOfWorkIfNoAmbientContext<MyFirstProjectDbContext>
{
	public MyFirstProjectUnitOfWorkIfNoAmbientContext(MustBeWritable mustBeWritable) : base(mustBeWritable) { }
}
Therefore, you can now use a statement like this:
//If we are inside of a writeable UnitOfWorkContext, we will reuse it.
//Otherwise, a new UnitOfWorkContext will be pushed up the stack.
using new MyFirstProjectUnitOfWorkIfNoAmbientContext(mustBeWriteable.Yes)
{
	...
}As you can see in these methods, UnitOfWorkContext allows you to access the CurrentDbContext and operate on it (for example, by calling the SaveChanges( ) method). For your convenience, Supermodel also exposes shortcuts right on the UnitOfWorkContext that give you access to the most commonly used DbContext methods:
For example,
UnitOfWorkContext<MyFirstProjectDbContext>.CurrentDbContext.CommitOnDispose = false;does the same thing as:
UnitOfWorkContext.CommitOnDispose = false;By setting CommitOnDispose to false, we are saying that we don't want the UnitOfWork to automatically save changes at the end of the transaction. Instead, the UnitOfWork will effectively rollback the transaction and no changes will be saved.
Supermodel 4.0 now implements async repositories. Up until Version 4.0, all of the data access in Supermodel was synchronous. Now, you have a choice between sync and async.
UnitOfWork implements the IDisposable interface. This means that there is a Dispose( ) method that is going to get called whenever the UnitOfWork completes and gets out of scope. The Dispose( ) method will call the SaveChanges( ) method. However, you can only call the synchronous version of SaveChanges( ) in the Dispose( ) method because Dispose( ) is a synchronous method. If you want to save changes asynchronously, you must call by hand:
await UnitOfWorkContext.SaveChangesAsync();However, when the UnitOfWork completes and the IDisposeable Dispose( ) method is called, a synchronous version of SaveChanges( ) will be run. It will have nothing to save if you have already saved things asynchronously. But it will use some CPU cycles to figure that out. Therefore, it is better performance-wise to save changes asynchronously using:
await UnitOfWorkContext.FinalSaveChangesAsync();This way, you indicate to the UnitOfWork that your work is done, that everything you intended to save is saved, and that there is no need to run the synchronous version of SaveChanges( ) on Dispose( ).
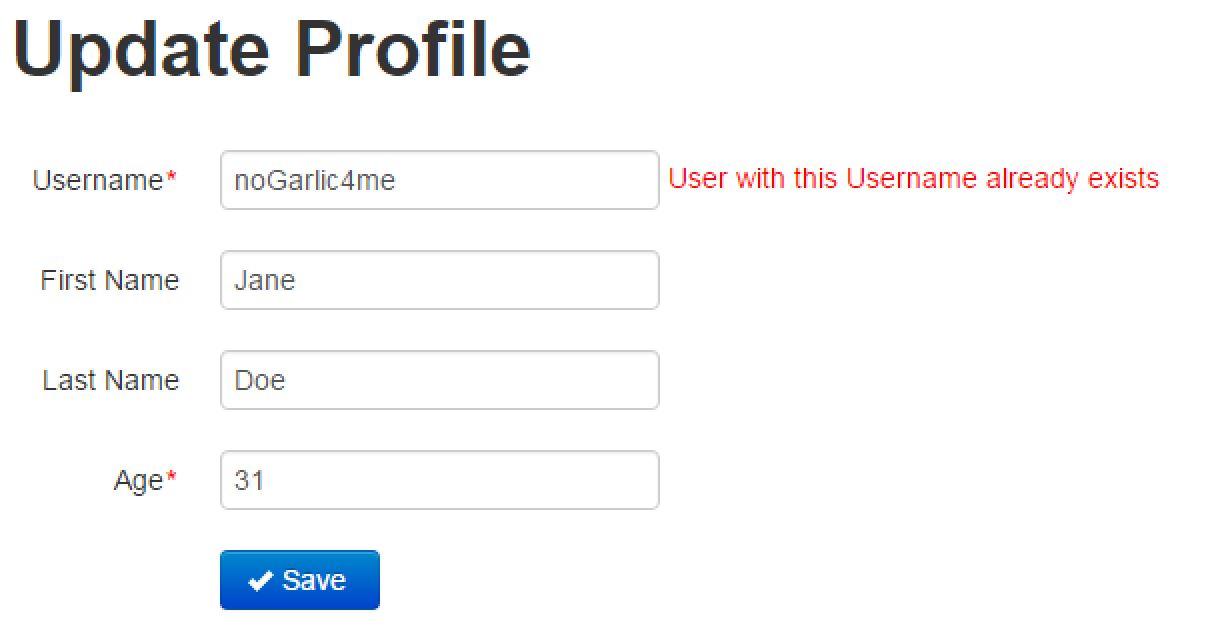
If you want to verify certain things about a new User on your website, you can do this easily using Microsoft's standard validation mechanism (IValidateableObject interface). For example, perhaps we want to make sure the Username of a User doesn't already exist within our application's database and that the User is over the age of 13:
public class User : Entity
{
public override IEnumerable<ValidationResult> Validate(ValidationContext validationContext)
{
var vr = base.Validate(validationContext) ?? new List<ValidationResult>;
if (Age < 13) vr.Add(new ValidationResult("Must be age 13 or older", new[]{"Age"}));
using (new UnitOfWork(ReadOnly.Yes))
{
var repo = (ISqlLinqEFDataRepo<User>)RepoFactory.Create<User>();
if (repo.Items.Any( x => x.Username == Username && x.Id != Id))
{
vr.Add(new ValidationResult("User with this Username already exists", new[]{"Username"}));
}
}
return vr;
}
[Required] public string Username { get; set; }
public string FirstName { get; set; }
public string LastName { get; set; }
[Required] public int? Age { get; set; }
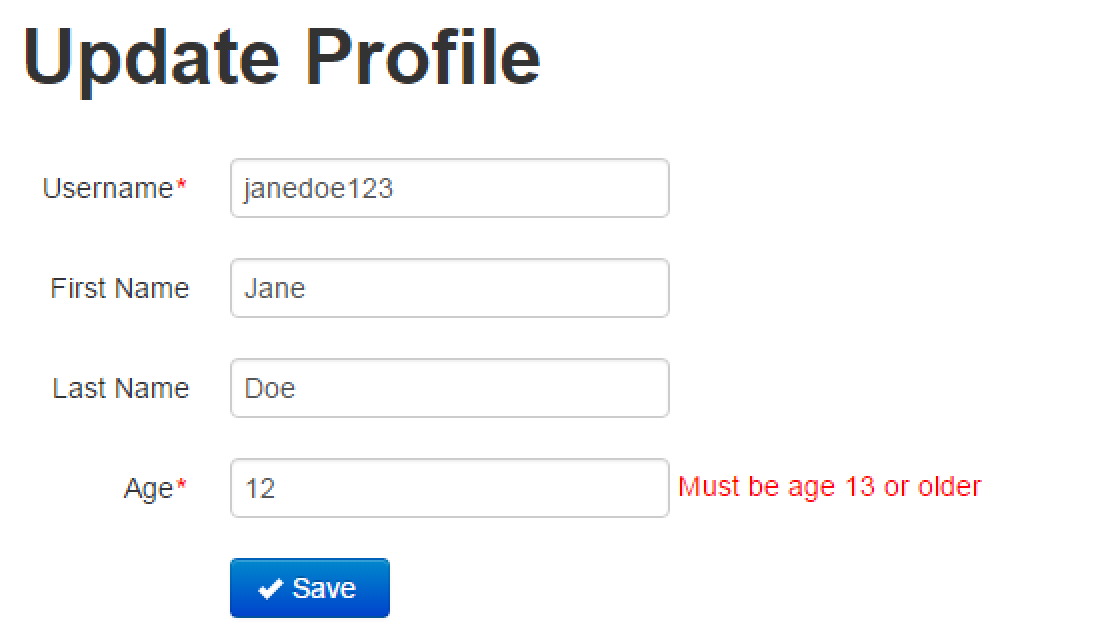
}The code snippet above is a standard "vanilla" IValidatableObject implementation. It has a significant shortcoming, though. That shortcoming is that the names of the properties that are causing errors are passed as strings. If the property names were ever renamed in the code but the strings were not updated, this validation would stop working properly. A better way to do it would be to pass the names of the properties that are causing errors in a strongly-typed fashion. Supermodel offers a convenient mechanism that allows you to do just that. The code below is effectively identical to the code snippet above:
public class User : Entity
{
	public override IEnumerable<ValidationResult> Validate(ValidationContext validationContext)
	{
		var vr = (ValidationResultList) base.Validate(validationContext) ??
			new ValidationResultList();

		if (Age < 13) vr.AddValidationResult(this, x => x.Age, "Must be age 13 or older");

		using (new UnitOfWork(ReadOnly.Yes))
		{
			var repo = (ISqlLinqEFDataRepo<User>)RepoFactory.Create<User>();
			if (repo.Items.Any( x => x.Username == Username && x.Id != Id))
			{
				vr.AddValidationResult(this, x=> x.Username, "User with this Username already exists.");
			}
		}
		return vr;
	}

	[Required] public string Username { get; set; }
	public string FirstName { get; set; }
	public string LastName { get; set; }
	[Required] public int? Age { get; set; }
}
The AddValidationResult( ) method has multiple overloads for situations when you need to identify more than one property that is causing an error. For example:
if (password1 != password2) vr.AddValidationResult(this, x => x.password1, x => x.password2, "Passwords must match");You can mix and match AddValidationResult( ) methods with the standard ways of adding errors.
Now, if we run the code and the User tries to enter in an Age of 12:
Or, if the User tries to use a Username that is already in the application's database:
In the above example, we added validations to the Entity, which means that for any screen or Web API, this validation will apply as well. If you want validations to only apply for particular screens or Web API calls, you can add the validation to those particular MVC Models or API Models through overriding the Validate( ) method.
As you just saw, Supermodel's stock views and controllers will wire up the errors on the screens appropriately, following the standard MVC patterns.
Validation we put on Entities will run on both model-binding and upon saving to the database. Validation we put on MVC Models will run on model-binding only.
Supermodel uses a clever way of reusing an Entity's validation for its MVC Models to keep code DRY. The way it works is the base implementation of the Validate( ) method on the MVC Model will create a blank Entity, reflection map itself to it, ask it to validate itself, and return the results of the Entity validation as if it were its own. This way, we can keep validations DRY while still allowing you to override the validate method on the MVC Model in cases where the MVC Model and Entity validation logics differ.
Supermodel Entities expose a few hooks that you can intercept to either override certain functionality or capture control at certain points in the Entity's life in order to do something.
Often times when an Entity is being deleted, business logic dictates that some changes might need to be made to other Entities, as well. For example, when we delete any Entity, our business logic might dictate that we have to delete all of its Children. Or, alternatively, when we delete any Entity, we may need to ensure that that Entity has no Children before we actually delete it. There could be other reasons, but these two are very common.
The business logic for this could potentially be implemented in the repository, overriding its Delete( ) method. However, this is not a good idea, the reason being that in the Supermodel world we want to keep the repositories "dumb". This means that we should not put any business logic in the repository, as it only needs to concern itself with persistance. Business logic really belongs in the Entity, hence the DeleteInternal( ) method. For example, the following code snippet will perform a cascading delete of all of the Children for the Entity (for this example, assume that Children is a navigational property on your Entity, representing a one-to-many relationship between the Entity and its Children):
protected override void DeleteInternal()
{
	foreach (var child in Children.ToList()) child.Delete();

	//This will actually delete our Entity
	base.DeleteInternal();
}
Note that we call ToList() on the Children before looping through them. If we did not do that, we would get a runtime error because the Delete() would change the Children collection, and foreach loops do not like when the collection is changing while you're running it.
Also notice that as we're calling a Delete( ) method on every child Entity, its own DeleteInternal( ) will be called. Thus, if we overrode that to delete the Entity's grandchildren from this child, then this DeleteInternal( ) will recursively work to do a cascading delete on any number of levels of children under the Entity.
If we wanted to ensure that only those Entities that do not possess Children can be deleted, we could do this inside the DeleteInternal( ) method:
protected override void DeleteInternal()
{
	if (Children.Any()) throw new Exception("Attempting to Delete Entity that has Children");

	//This will actually delete our Entity
	base.DeleteInternal();
}Each Entity implements a virtual BeforeSave( ) method that is called right before the Entity is about to be saved (added, modified, or deleted). This method, for example, is very useful for updating CreatedOn or ModifiedOn dates for your Entity. For example:
public override void BeforeSave(EntityState entityState)
{
	if (entityState == EntityState.Added) CreatedOn = ModifiedOn = DateTime.Now;
	if (entityState == EntityState.Modified) ModifiedOn = DateTime.Now;
	base.BeforeSave(entityState);
}
It is very important to understand that if you make any changes to other Entities inside the BeforeSave( ) method, the results could be unpredictable. That's because Supermodel detects changes to your Entities right before they're about to be persisted, and once it has created a list of Entities that have been either modified, deleted, or added, it will call BeforeSave( ) for every one of those Entities in the list. If inside one of those BeforeSave( ) methods you make changes to another Entity, that Entity's BeforeSave( ) will not run unless it's already in the list for another reason. Therefore, it is considered best practice to have an Entity only make changes to itself in the BeforeSave( ) method.
In Supermodel, MVC Models implement three template interfaces: ISupermodelEditorTemplate, ISupermodelDisplayTemplate, and ISupermodelHiddenTemplate. Any class (including MVC Models) which implements these interfaces, is able to render itself for the MVC Views for Edit, Display, and Hidden methods, respectively. For more information on this, see the Custom HTML Rendering section. Every property within our Supermodel MVC Model knows how to render itself if its type implements one of the aforementioned Supermodel interfaces. Within our MVC Model, we can override the template implementations that render the Model for a particular situation (Edit, Display, or Hidden).
For example, if you wanted to override the EditorTemplate for your UserMvcModel, you could write the following in the User class:
public override MvcHtmlString EditorTemplate(HtmlHelper html, int screenOrderFrom = Int32.MinValue, int screenOrderTo = Int32.MaxValue, string markerAttribute = null)
{
	//Even better to use html.Supermodel().Editor("FirstName").ToString();
	var result = html.Editor("FirstName").ToString();
	return MvcHtmlString.Create(result);
}
Our updated User.cs class would appear as follows:
namespace Domain
{
	public class UserMvcModel : TweeterBS.MvcModelForEntity<User>
	{
		[Required] public TweeterBS.TextBoxForStringMvcModel Username { get; set; }
		public TweeterBS.TextBoxForStringMvcModel FirstName { get; set; }
		public TweeterBS.TextBoxForStringMvcModel LastName { get; set; }
		[Required] public TweeterBS.TextBoxForIntMvcModel Age { get; set; }

		public override string Label
		{
			get { return FirstName.Value + " " + LastName.Value; }
		}

		public override MvcHtmlString EditorTemplate(HtmlHelper html, int screenOrderFrom = Int32.MinValue, int screenOrderTo = Int32.MaxValue, string markerAttribute = null)
		{
			//Even better to use html.Supermodel().Editor("FirstName").ToString();
			var result = html.Editor("FirstName").ToString();
			return MvcHtmlString.Create(result);
		}
	}
	public class User : Entity
	{
		[Required] public string Username { get; set; }
		public string FirstName { get; set; }
		public string LastName { get; set; }
		[Required] public int? Age { get; set; }
	}
}
This will result in the following Detail View for the User John Doe:

Supermodel MVC Model base classes provide a default implementation for these interfaces (ISupermodelEditorTemplate, ISupermodelDisplayTemplate, and ISupermodelHiddenTemplate). These implementations, using reflection, will render any class that derives from the MVC Model base classes property by property. We say "using reflection", but in this case the reflection is used by the MVC itself when compiling ViewData.ModelMetadata( ). For a code snippet on how Supermodel does it, see Custom MVC Model Attributes.
Philosophically, the ISupermodelEditorTemplate, ISupermodelDisplayTemplate, and ISupermodelHiddenTemplate enhance the functionality of MVC templates introduced in MVC 2.
Each MVC Model has a virtual property that's called IsDisabled. The default implementation returns "false", but you can override it and create any type of logic that you want, determining which MVC Models are disabled and which are not. Then, if you have a dropdown/radioselect/list-of-checkboxes/select-list that is based on this MVC Model, Disabled items will be grandfathered in.
Consider a scenario where you want to define your own attribute for an MVC Model. For example, you want a required label to be shown for a property if a boolean property on the MVC Model called Strict is set to True. Otherwise, you don't want the asterisk to be shown.
First, let's define the attribute:
[AttributeUsage(AttributeTargets.Property)]
public class RequiredIfStrictAttribute : Attribute {}
Next, what we need to do is define DataAnnotationsModelMetadataProvider. Normally, when you define your DataAnnotationsModelMetadataProvider, you must derive from the DataAnnotationsModelMetadataProvider class (see MVC Documentation for more details). However, if you use Supermodel, you must derive from the SupermodelTemplateMetaDataProvider class, which in turn derives from DataAnnotationsModelMetadataProvider. This class, by convention, would go in the Supermodel directory of your Domain project:
public class MyFirstProjectTemplateMetadataProvider : SupermodelTemplateMetadataProvider
{
	protected override ModelMetadata CreateMetadata(IEnumerable<Attribute> attributes, Type containerType, Func<object> modelAccessor, Type modelType, string propertyName)
	{
		var metadata = base.CreateMetadata(attributes, containerType, modelAccessor, modelType, propertyName);
		var additionalRequiredIfStrictValues = attributes.OfType<RequiredIfStrictAttribute>().FirstOrDefault();
		if (additionalRequiredIfStrictValues != null) metadata.AdditionalValues.Add("RequiredIfStrict", additionalRequiredIfStrictValues);
		return metadata;
	}
}
If you had defined SomeOtherAttribute, you could register it with the metadata provider in the same class like so:
public class MyFirstProjectTemplateMetadataProvider : SupermodelTemplateMetadataProvider
{
	protected override ModelMetadata CreateMetadata(IEnumerable<Attribute> attributes, Type containerType, Func<object> modelAccessor, Type modelType, string propertyName)
	{
		var metadata = base.CreateMetadata(attributes, containerType, modelAccessor, modelType, propertyName);
		var additionalRequiredIfStrictValues = attributes.OfType<RequiredIfStrictAttribute>().FirstOrDefault();
		if (additionalRequiredIfStrictValues != null) metadata.AdditionalValues.Add("RequiredIfStrict", additionalRequiredIfStrictValues);
		var additionalSomeOtherValues = attributes.OfType<SomeOtherAttribute>().FirstOrDefault();
		if (additionalSomeOtherValues != null) metadata.AdditionalValues.Add("SomeOther", additionalSomeOtherValues);
		return metadata;
	}
}
The only thing left is to register MyFirstProjectTemplateMetadataProvider with Supermodel:
SupermodelInitialization.Init<MyFirstProjectDbContext> (customModelMetaDataProvider : new MyFirstProjectTemplateMetadataProvider());We've taken care of making sure that our new custom MVC Model attribute will be passed into the metadata. Now we can use this attribute in our custom renders, for example in our ISupermodelEditorTemplate implementation:
public abstract class MyFirstProjectMvcModelForEntity<EntityT> : TweeterBS.MvcModelForEntity<EntityT> where EntityT : class, IEntity, new()
{
	public override MvcHtmlString EditorTemplate(HtmlHelper html, int screenOrderFrom = Int32.MinValue, int screenOrderTo = Int32.MaxValue, string markerAttribute = null)
	{
			if (html.ViewData.Model == null) throw new NullReferenceException(ReflectionHelper.GetCurrentContext() + " is called for a model that is null");

			if (!(html.ViewData.Model is Mvc.MvcModel)) throw new InvalidCastException(ReflectionHelper.GetCurrentContext() + " is called for a model of type different from MvcModel.");
			var result = new StringBuilder();

			if (html.ViewData.TemplateInfo.TemplateDepth <= 1)
			{
				var properties = html.ViewData.ModelMetadata.Properties.Where(
					pm => pm.ShowForEdit &&
						  !html.ViewData.TemplateInfo.Visited(pm) &&
						  (pm.AdditionalValues.ContainsKey("ScreenOrder") ? ((ScreenOrderAttribute)pm.AdditionalValues["ScreenOrder"]).Order : 100) >= screenOrderFrom &&
						  (pm.AdditionalValues.ContainsKey("ScreenOrder") ? ((ScreenOrderAttribute)pm.AdditionalValues["ScreenOrder"]).Order : 100) <= screenOrderTo)
									 .OrderBy(pm => pm.AdditionalValues.ContainsKey("ScreenOrder") ? ((ScreenOrderAttribute)pm.AdditionalValues["ScreenOrder"]).Order : 100);

				foreach (var prop in properties)
				{
					if (prop.ModelType.Name == typeof(ICollection<>).Name) continue;

					if (prop.HideSurroundingHtml || Attribute.GetCustomAttribute(prop.ModelType, typeof(HideLabelAttribute)) != null)
					{
						result.AppendLine(html.Supermodel().Editor(prop.PropertyName).ToString());
					}

					else
					{
						var propMarkerAttribute = markerAttribute;
						if (prop.AdditionalValues.ContainsKey("HtmlAttr")) propMarkerAttribute += " " + ((HtmlAttrAttribute)prop.AdditionalValues["HtmlAttr"]).Attr;
						result.AppendLine("<div class='control-group'" + propMarkerAttribute + " >");

						if (!prop.AdditionalValues.ContainsKey("HideLabel"))
						{
							var labelHtml = html.Label(prop.PropertyName, new { @class = ScaffoldingSettings.LabelCssClass }).ToString();

							if (!prop.AdditionalValues.ContainsKey("NoRequiredLabel"))
							{

								if ((prop.IsRequired && prop.ModelType != typeof(bool)) || prop.AdditionalValues.ContainsKey("ForceRequiredLabel")
								|| (prop.AdditionalValues.ContainsKey("RequiredIfStrict") && (bool)html.ViewData.Model.PropertyGet("Strict")))
								{
									labelHtml = labelHtml.Replace("</label>", "<em class='" + ScaffoldingSettings.RequiredAsteriskCssClass + "'>*</em></label>");
								}
							}
							result.AppendLine(labelHtml);
						}

						if (!prop.AdditionalValues.ContainsKey("DisplayOnly") || prop.IsReadOnly)
						{
							if (!prop.AdditionalValues.ContainsKey("HideLabel")) result.AppendLine("<div class='controls'>");
							result.AppendLine(html.Supermodel().Editor(prop.PropertyName).ToString());
							var validationMessage = html.ValidationMessage(prop.PropertyName);

							if (validationMessage != null) result.AppendLine(validationMessage.ToString());
						}

						else
						{
							if (!prop.AdditionalValues.ContainsKey("HideLabel")) result.AppendLine("<div class='controls displayOnly'>");
							result.AppendLine("<span " + UtilsLib.MakeClassAttribue(ScaffoldingSettings.DisplayCssClass) + ">");
							result.AppendLine(html.Supermodel().Display(prop.PropertyName).ToString());
							result.AppendLine("</span>");
						}

						if (!prop.AdditionalValues.ContainsKey("HideLabel")) result.AppendLine("</div>");
						result.AppendLine("</div>");
					}
				}
			}

		return MvcHtmlString.Create(result.ToString());
	}
}
In the code snippet above, we have created a new abstract class called MyFirstProjectMvcModelForEntity<>. This class derives from TweeterBS.MvcModelForEntity<>, but overrides the EditorTemplate method. For the EditorTemplate method, we actually copied the base class' code with one small change, marked in red:
|| (prop.AdditionalValues.ContainsKey("RequiredIfStrict") && (bool)html.ViewData.Model.PropertyGet("Strict")))You can peruse through this code at your leisure, but the bottom line is now if a property contains a [RequiredIfStrict] attribute, and the Strict boolean is set to True, an asterisk will be shown next to the field for that property. Keep in mind that:
Now, all of the MVC Models that derive from MyFirstProjectMvcModelForEntity<> will respect the [RequiredIfStrict] attribute
You could further improve this by having the attribute take a string parameter which would identify the boolean property to check instead of hardcoding the property name to be Strict, but it's not necessary for this exercise.
If you want to introduce paging, searching, and/or sorting to your application (but don't want to do the work), you might want to use the base Enhanced Controllers available to you through Supermodel.
In order to include searching capabilities, you will need to add a Search MVC Model for your Entity.
public class UserSearchMvcModel : TweeterBS.MvcModel, IValidatableObject
{
	public string SearchTerm { get; set; }
}
The Search MVC Model defines the search parameters and a UI for a portion of the screen that collects the search parameters from the User and represents the data that was entered as the search criteria.
Our UserSearchMvcModel includes only one property, but you can have as many properties as you want for your Search MVC Model.
Just like any MVC Model, you can specify a validate method on your Search MVC Model, validating the parameters being entered for search. For example, if you wanted to make sure that something is entered in the User Search field, you could do it using the following code snippet (of course, you could achieve the same result by simply marking the SearchTerm property with a [Required] attribute.):
public class UserSearchMvcModel : TweeterBS.MvcModel, IValidatableObject
{
	public IEnumerable<ValidationResult> Validate(ValidationContext validationContext)
	{
		var vr = new ValidationResultList();
		if (string.IsNullOrEmpty(SearchTerm)) vr.AddValidationResult(this, x => x.SearchTerm, "Search field is required.");
		return vr;
	}

	public string SearchTerm { get; set; }
}
Then, you'll create an Enhanced Controller for your Entity and override the ApplySearchBy( ) method.
public class UserController : SyncEnhancedMvcCRUDController<User, UserMvcModel, UserSearchMvcModel, MyFirstProjectDbContext>
{
	protected override IQueryable<User> ApplySearchBy(IQueryable<User> items, UserSearchMvcModel searchBy)
	{
		if (searchBy.SearchTerm != null) items = items.Where(x => x.FirstName.Contains(searchBy.SearchTerm)
			|| x.LastName.Contains(searchBy.SearchTerm)
			|| x.Username.Contains(searchBy.SearchTerm));
		return items;
	}
}
Enhanced CRUD Controllers List Action Methods return a type called ListWithCriteria, which derives from .NET List<>. A ListWithCriteria is a generic type that takes two type parameters: the type of the item in the list, and the type of the criteria. It represents a page with a set of parameters that define your search and a list of results. Because a ListWithCriteria derives from a standard .NET List of items, wherever you use a .NET List of items, you can use ListWithCriteria as well. In addition to the list of items, ListWithCriteria contains a property called Criteria (representing a search criteria) that is of the type of the second type parameter of the ListWithCriteria class. The second type parameter is our Search MVC Model. That is what we're referring to by using x => x.Criteria in the code sample below.
The two type parameters you will need to pass to the ListWithCriteria are the MVC Model and the Search MVC Model. So, if we wanted to add searching capability to our User Entity, our View would look like the following:
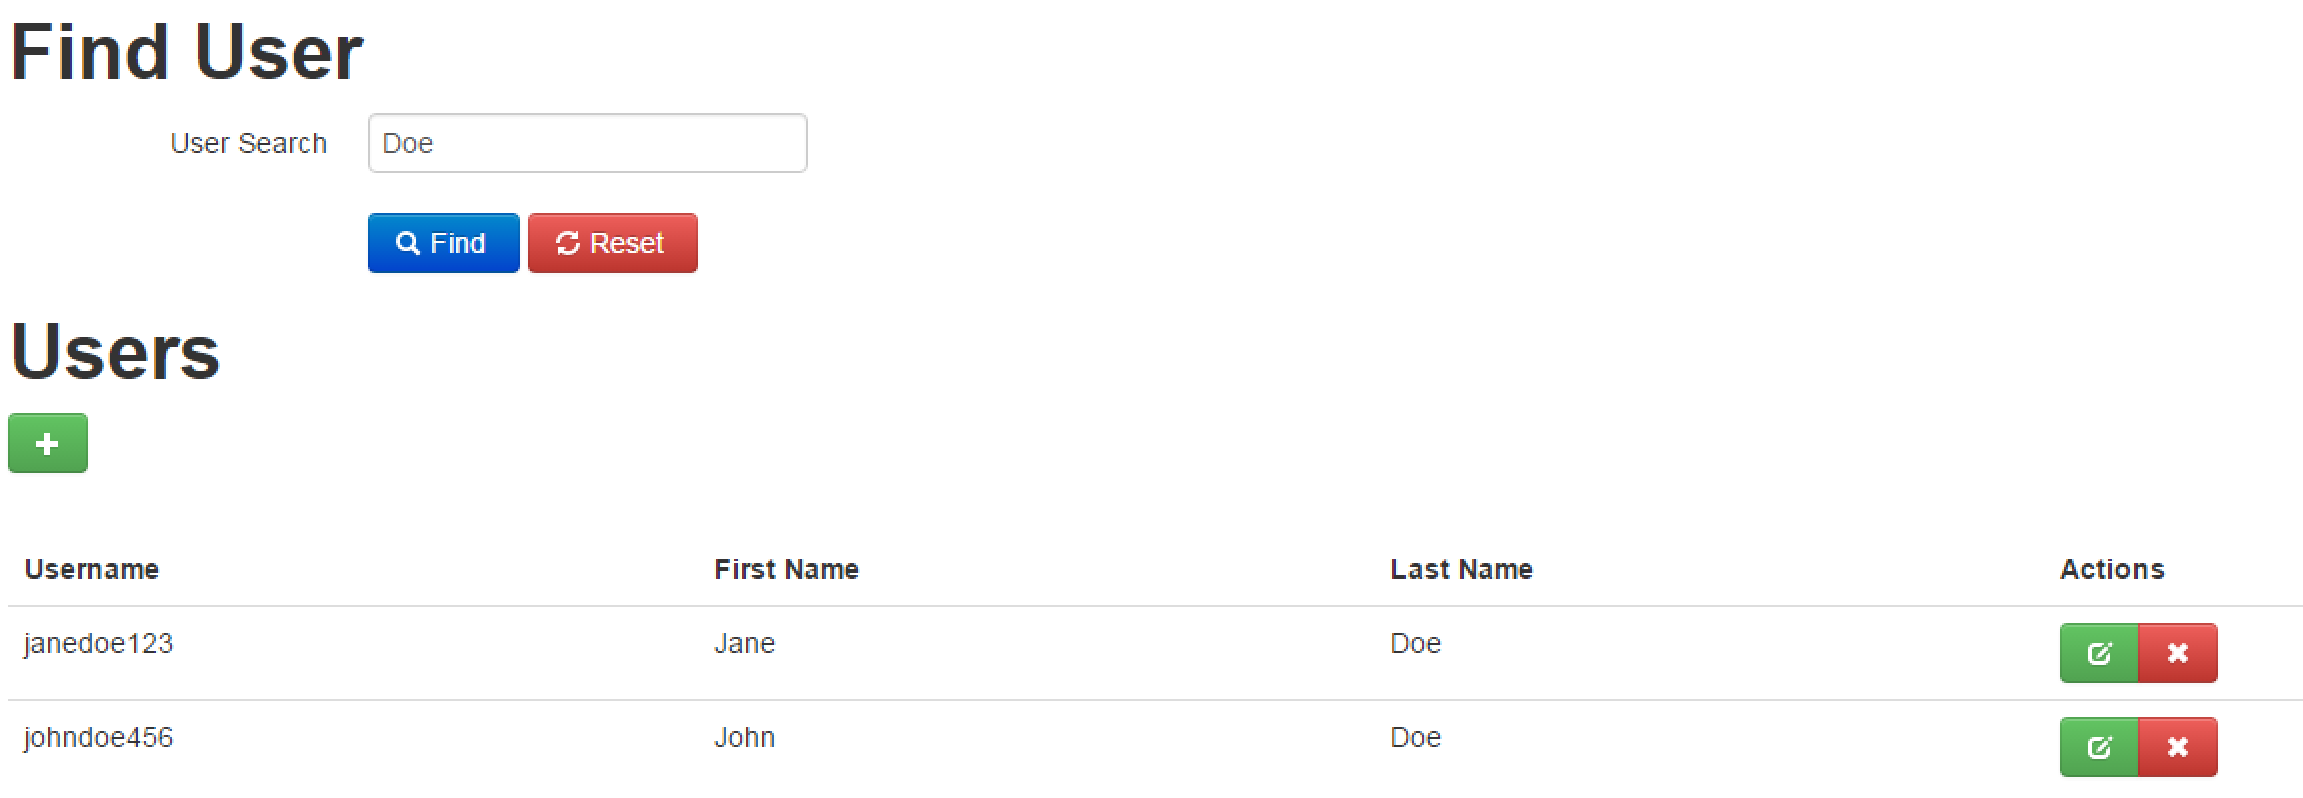
@model global :: Supermodel.MvcAndWebApi.Controllers.MvcControllers.ListWithCriteria<UserMvcModel, UserSearchMvcModel>

@Html.Supermodel().TweeterBS.CRUDSearchFormFor(x => x.Criteria, "Find User", null, null, true)
@(Html.Supermodel().TweeterBS.CRUDMultiColumnList<User, UserMvcModel>(Model, null, "Users", true, true))
Now, if we search for a User whose first name, last name, or username contains "Doe", we get the Users John Doe and Jane Doe.
Furthermore, the List Action method in the Enhanced CRUD Controllers will take into account the smSkip, smTake, and smSortBy parameters. In addition to that, the CRUDSearchFormFor will place all of the properties defined in your Search MVC Model into the query string and the Enhanced CRUD Controller will know how to bind to those properties. Therefore, the query string parameters in the URL for the List Action method will determine the paging (smSkip and smTake), the sort order (smSortBy), and the search parmeters (whatever properties you define in your Search MVC Model, in order case SearchTerm). For example, our URL could look like this:
http://localhost:#####/User/List?smSkip=10&smTake=25&smSortBy=Age&SearchTerm=JaneThis URL means that we want the list of Users, skipping 10 Users and taking the next 25, sorted by age, where the User matches the search term "Jane". In cases where the Search MVC Model contains more than one parameter, they would all be listed in the query string. Theoretically, you could just change the URL parameters in a very obvious way to control paging, sorting, and searching.
For this controller (or for any other Supermodel base CRUD Controller), there is an async version, and there is a version that takes separate List and Detail MVC Models (see Async Vs. Sync Controllers for more information).
Also notice that we had to override the ApplySearchBy( ) method in our UserController. This method tells the controller how to apply the Search MVC Model to IQueryable<Entity>. In other words, it specifies how the search is to be conducted. In our case, we wanted to be able to search for a User by their FirstName, LastName, and Username properties.
Keep in mind that you can add multiple Where clauses to an IQueryable<> variable, which is very convenient for ApplySearchBy( ) because you can incrementally build your query.
For example, let's add another component to our search called MaximumAge, in which we can enter the maximum age for returned Users.
public class UserSearchMvcModel : TweeterBS.MvcModel, IValidatableObject
{
	public IEnumerable<ValidationResult> Validate(ValidationContext validationContext)
	{
		var vr = new ValidationResultList();
		if (string.IsNullOrEmpty(SearchTerm)) vr.AddValidationResult(this, x => x.SearchTerm, "Search term field is required.");
		return vr;
	}

	public string SearchTerm { get; set; }
	public int? MaximumAge { get; set; }
}
public class UserController : SyncEnhancedMvcCRUDController<User, UserMvcModel, UserSearchMvcModel, MyFirstProjectDbContext>
{
protected override IQueryable<User> ApplySearchBy(IQueryable<User> items, UserSearchMvcModel searchBy)
{
if (searchBy.SearchTerm != null) items = items.Where(x => x.FirstName.Contains(searchBy.SearchTerm)
|| x.LastName.Contains(searchBy.SearchTerm)
|| x.Username.Contains(searchBy.SearchTerm));
if (searchBy.MaximumAge != null) items = items.Where(x => x.Age <= searchBy.MaximumAge);
return items;
}
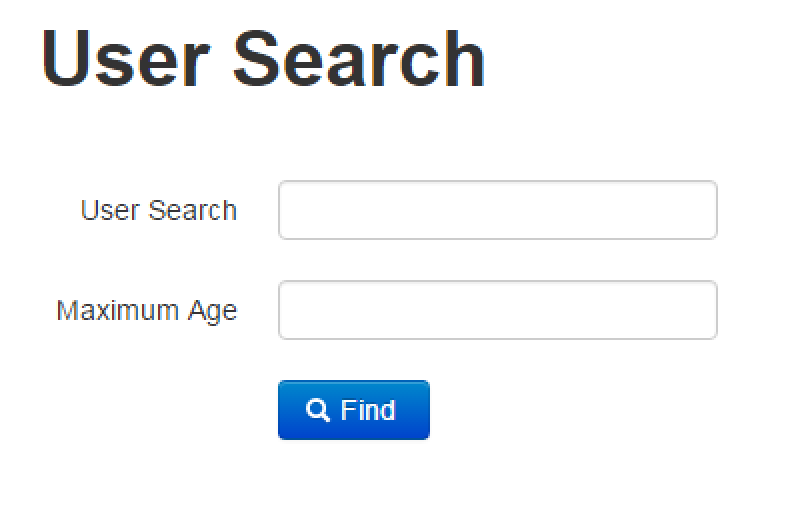
}You will need to create a separate View for your SearchMvcModel. You can do this by creating a new file under /Views/User called "Search.cshtml" (in addition to "List.cshtml" and "Detail.cshtml"). In this file, you will write the following:
@using Domain.Entities
@using Supermodel.Extensions
@model UserSearchMvcModel
@Html.Supermodel().TweeterBS.CRUDSearchFormForModel("User Search")
CRUDSearchFormForModel( ) will create the form fields for you into the query string as an HTTP Get. In the above code snippet, we also passed a string for the page title.
This will result in the following View:
To put the Search MVC Model and the List MVC Model on the same screen, you'll once again have to write the following in your View:
@model global :: Supermodel.MvcAndWebApi.Controllers.MvcControllers.ListWithCriteria<UserMvcModel, UserSearchMvcModel>

@Html.Supermodel().TweeterBS.CRUDSearchFormFor(x => x.Criteria, "Find User", null, null, true)
@(Html.Supermodel().TweeterBS.CRUDMultiColumnList<User, UserMvcModel>(Model, null, "Users", true, true))
Now, if we search for a User whose first name, last name, or username contains "Doe" and whose maximum age is 31, we only get the User Jane Doe.

To do searching, you must override the ApplySearchBy( ) method. However, the base controller provides a basic sorting mechanism (to be explained later), so normally you don't have to override the ApplySortBy( ) method unless you are doing custom sorting.
If you are only interested in doing paging or sorting or both, but not searching, you will need a "dummy" Search MVC Model to pass to the base controller in place of the Search MVC Model:
public class DummySearchMVCModel : MvcModel {}You can create one "dummy" Search MVC Model for your project and use it for all enhanced controllers where you don't need to search. Note that the MvcModel class that is used as a base class for the DummySearchMVCModel is a version of the MVC Model that does not have an underlying Entity. In other words, it knows how to render itself and model bind itself, but not how to map itself to an Entity (as opposed to MvcModelForEntity<>).
Additionally, you can add a sorting mechanism to your ListColumn attribute. Below you will see that we have added the OrderBy parameter to the ListColumn attribute and specified that the Username property be sorted alphabetically:
[ListColumn(OrderBy = "Username", OrderByDesc = "-Username")] public TweeterBS.TextBoxForStringMvcModel Username { get; set; }In this example, OrderByDesc is the reverse of OrderBy. If you omit OrderByDesc, Supermodel will automatically reverse OrderBy and assign it to OrderByDesc. The only reason to ever specify the OrderByDesc parameter is if you do not want the descending order to be the exact reverse of the ascending order. Thus, we can simplify the above code snippet to this:
[ListColumn(OrderBy = "Username")] public TweeterBS.TextBoxForStringMvcModel Username { get; set; }Below you'll see the result of adding the sorting mechanism to the Username property. Notice that a caret symbol has been added to denote whether the property is being sorted in ascending or descending order:

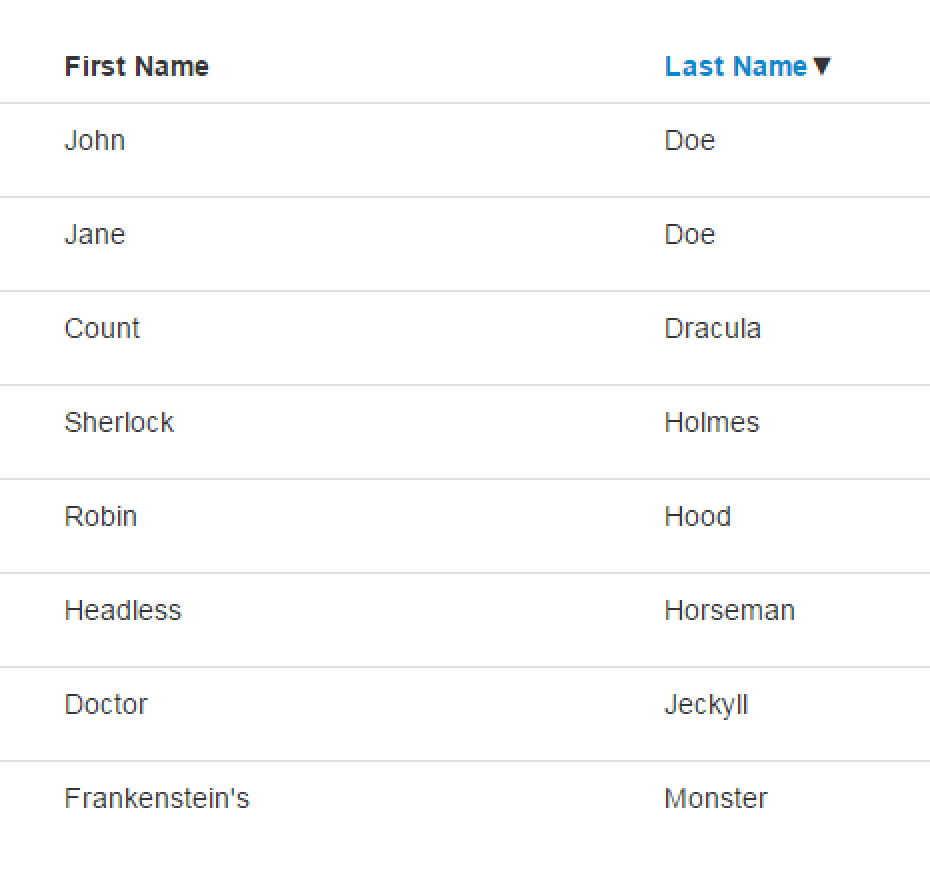
You can also use multiple sorting parameters on the same property separated by comma. For example, let's say you want to sort first by ascending LastName and then by descending FirstName.
[ListColumn(OrderBy = "LastName, -FirstName")] public TweeterBS.TextBoxForStringMvcModel LastName { get; set; }Now, when we sort, we first sort by the last name in ascending order, and then we sort by the first name in descending order:
The sorting mechanism works through the ApplySortBy( ) method. The base implementation will take the OrderBy parameter and attempt to match items in OrderBy (separated by comma) to the properties on the Entity (not the MVC Model!) and build the query for you. However, you can override the ApplySortBy( ) method if you're trying to do something different.
If you have a property that exists in your MVC Model, but that does not exist in your Entity, you can override the ApplySortBy( ) method to sort by that property (technically, you would be searching by the data this property is made up from within your domain). All you need to do is specify how you wish to sort the property. For example, consider our collection of Quotes in the User Entity. Let's add a property to our MVC Model called NumberOfQuotes that tallies the number of Quotes the User has added. We add the [NotRMapped] attribute because NumberOfQuotes doesn't exist in our UserEntity and we will be doing our own custom mapping. We add the ListColumn attribute so it appears in our User List View. Within the ListColumn attribute, we specify the OrderBy parameter, as well, but this will not work until we override the ApplySortBy( ) method within the UserController.
public class UserMvcModel : TweeterBS.MvcModelForEntity<User>
{
	[Required] public TweeterBS.TextBoxForStringMvcModel Username { get; set; }
	public TweeterBS.TextBoxForStringMvcModel FirstName { get; set; }
	public TweeterBS.TextBoxForStringMvcModel LastName { get; set; }
	[Required] public TweeterBS.TextBoxForStringMvcModel Age { get; set; }
	public List<QuoteMvcModel> Quotes { get; set; }
	[NotRMapped, ListColumn(OrderBy = "NumberOfQuotes")] public int NumberOfQuotes { get; set; }

	public override string Label
	{
		get { return FirstName.Value + " " + LastName.Value; }
	}
}
We must also add some custom mapping, which is discussed in more detail later in the tutorial (see Reflection Mapper). For now, just know that you need to override the MapFromObjectCustom( ) method to specify what the NumberOfQuotes property is by mapping user.Quotes.Count to it:
public override object MapFromObjectCustom(object obj, Type objType)
{
	var user = (User) obj;
	NumberOfQuotes = user.Quotes.Count;
	return base.MapFromObjectCustom(obj, objType);
}
Now, we can override the ApplySortBy( ) method. We use a switch statement and specify how NumberOfQuotes should be ordered (in both ascending and descending order), as well as what the default of ApplySortBy( ) should be:
protected virtual IOrderedQueryable<User> ApplySortBy(IQueryable<User> items, string sortBy)
{
	switch (sortBy)
	{
		case "NumberOfQuotes": return items.OrderBy(x => x.Quotes.Count());
		case "-NumberOfQuotes": return items.OrderByDescending(x => x.Quotes.Count());
		default: return base.ApplySortBy(items, sortBy);
	}
}
Now, we've added custom sorting!
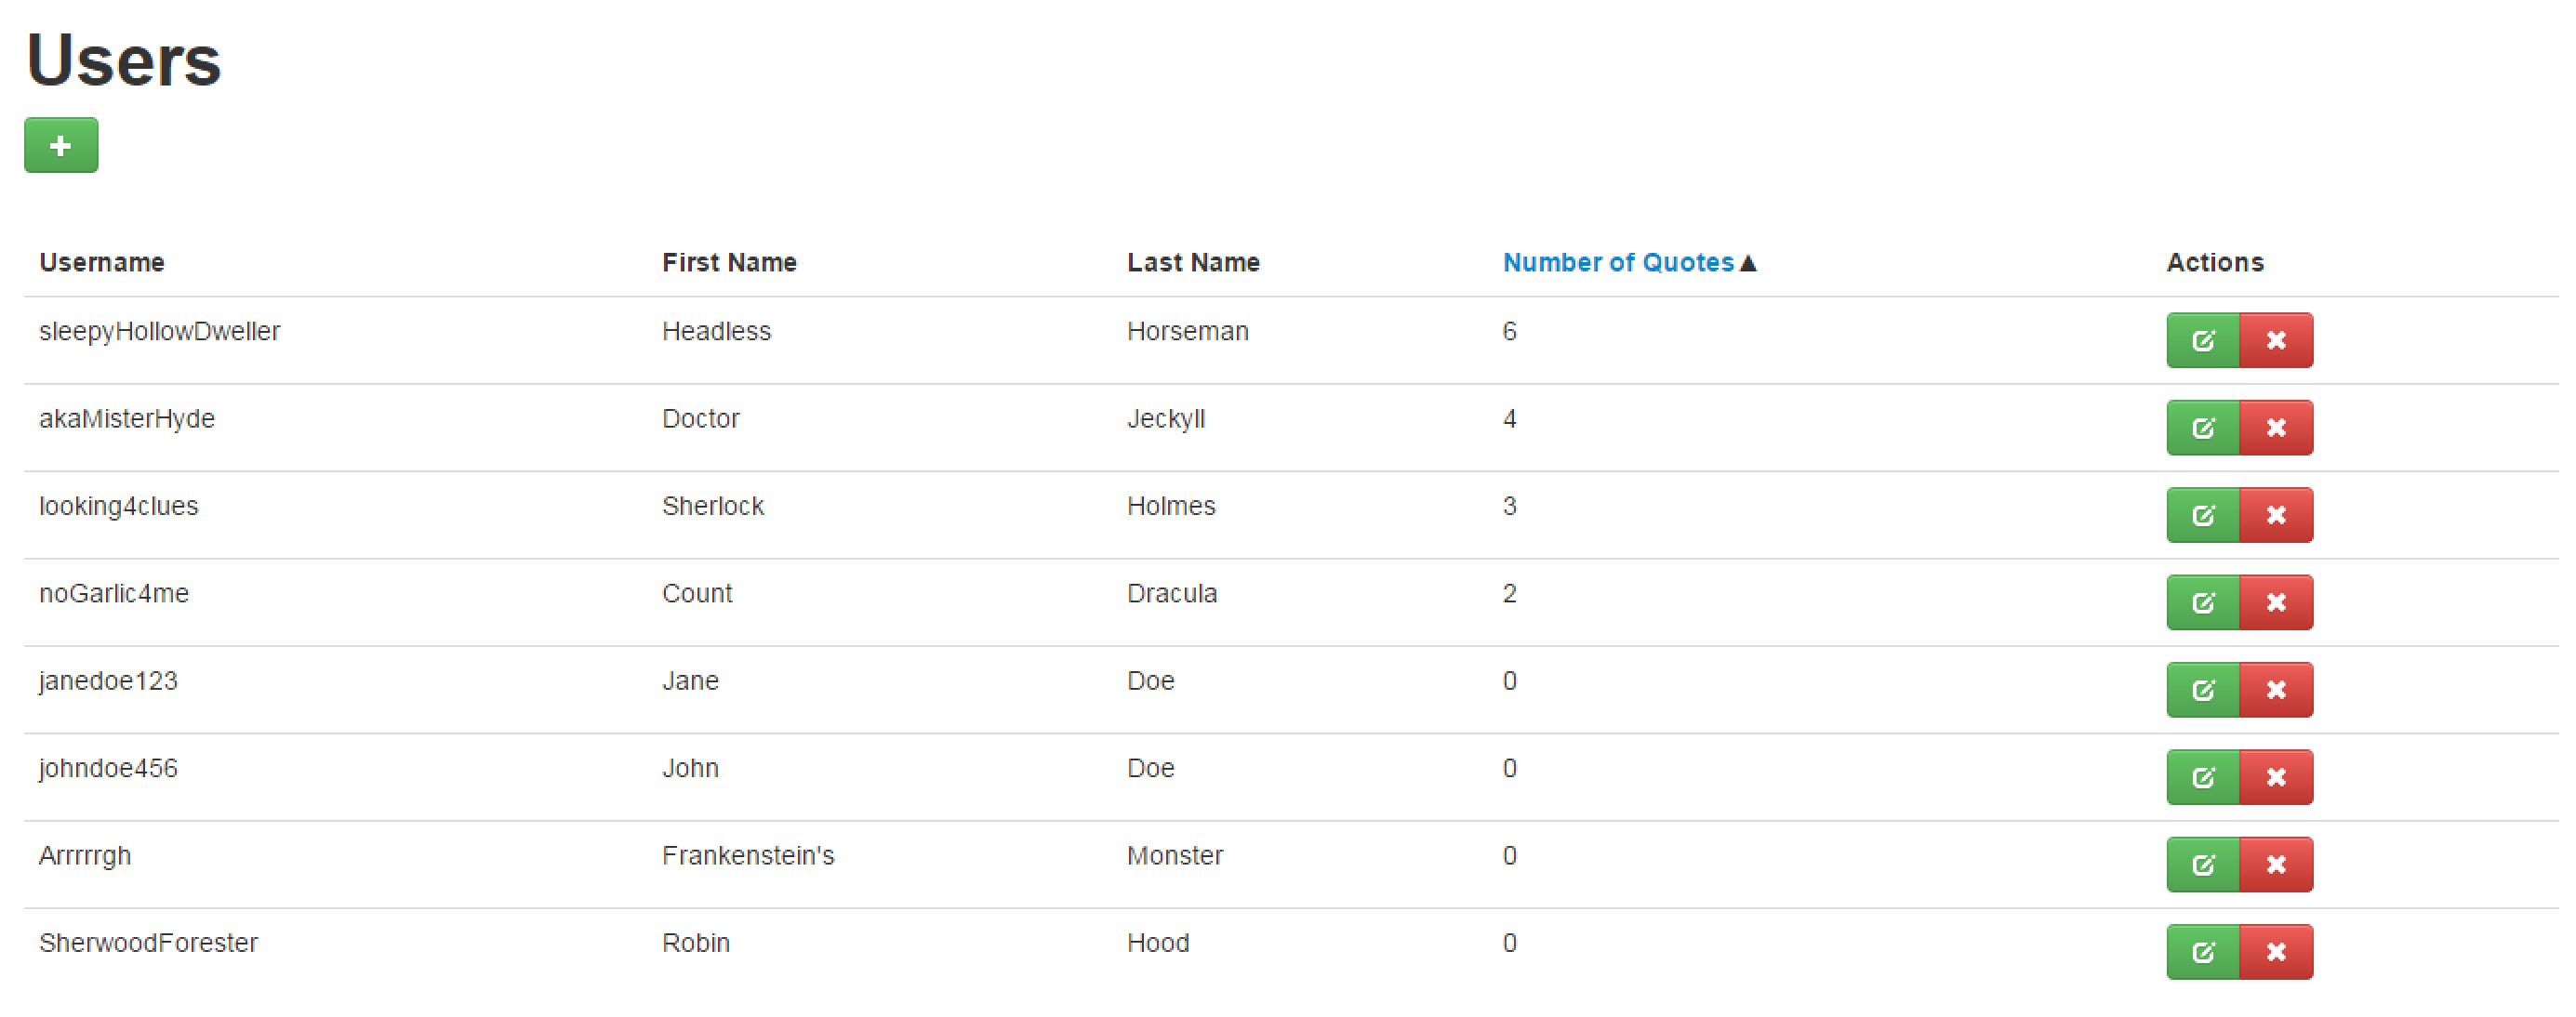
Finally, you can add a paging mechanism to your view. Your query string for the List ActionMethod contains two parameters, the smTake parameter and the smSkip parameter. The smTake parameter determines how many records will be displayed and the smSkip parameter determines how many records will be skipped. For example, if you would like your page to skip 0 records and display 3 records, your url would look like:
http://YourURL.com/User/List?smSkip=0smTake=3In order to add a pagination widget to your view, add the following code:
@Html.Supermodel().TweeterBS.Pagination(3)This will allow a user to go from page to page and also show the nearest 3 (for this example) page numbers to the page that they're on. Typically, you should use an odd number for this so the navigation looks right on the screen. For example, if you set pagination to 5 and you are on page 90, it will show links to pages 88, 89, 90, 91, 92. If you had an even number passed to pagination, then your pagination widget will look lopsided.
In the below example, smSkip = 0 and smTake = 3. So, on the second page, the only records shown from our database are that of the Users Headless Horseman, Doctor Jeckyll, and Frankenstein's Monster. The rest of the records are displayed on the subsequent pages:
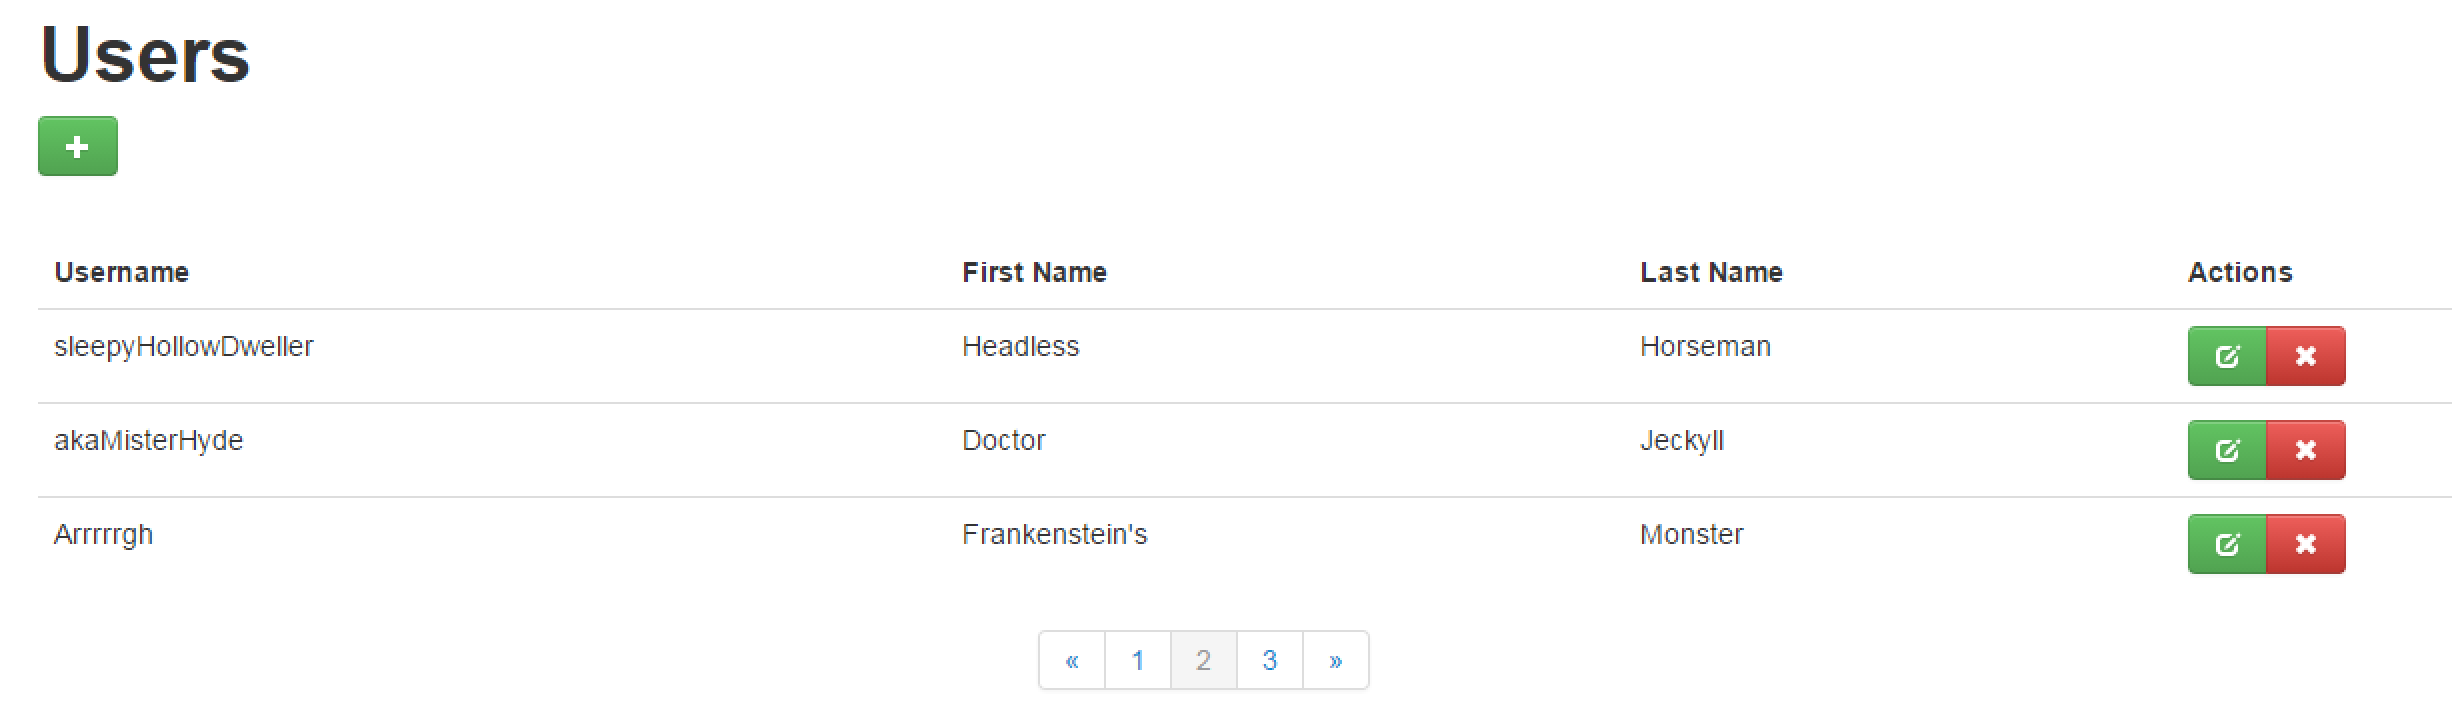
In Supermodel, we can choose between async or sync MVC Controllers. If your site handles a sizable amount of concurrent traffic, you might benefit from using async controllers as they allow greater scalability. Furthermore, if your MVC Model is very "heavy" or expensive to create (for example, it includes binary images or data coming from navigational properties or database joins), it may be useful for you to separate the MVC Model into a Detail MVC Model and List MVC Model, keeping the List MVC Model lightweight. This is important for performance reasons because a List Model will be created for every item on the List page. As you can see below, every Supermodel base Controller comes in four flavors: sync vs. async and single MVC Model vs. separate MVC Models for List and Detail:
| Sync | Async | |
|---|---|---|
| Single MVC Model | SyncMvcCRUDController<Entity, MvcModel, DbContext> |
AsyncMvcCRUDController<Entity, MvcModel, DbContext> |
| Separate List and Detail MVC Models | SyncMvcCRUDController<Entity, DetailMvcModel, ListMvcModel, DbContext> |
AsyncMvcCRUDController<Entity, DetailMvcModel, ListMvcModel, DbContext> |
| Sync | Async | |
|---|---|---|
| Single MVC Model | SyncEnhancedMvcCRUDController<Entity, MvcModel, SearchMvcModel, DbContext> |
AsyncEnhancedMvcCRUDController<Entity, MvcModel, SearchMvcModel, DbContext> |
| Separate List and Detail MVC Models | SyncEnhancedMvcCRUDController<Entity, DetailMvcModel, ListMvcModel, DbContext> |
AsyncEnhancedMvcCRUDController<Entity, DetailMvcModel, ListMvcModel, DbContext> |
| Sync | Async | |
|---|---|---|
| Single MVC Model | SyncChildMvcCRUDController<Entity, ParentMvcModel, ChildMvcModel, DbContext> |
AsyncChildMvcCRUDController<Entity, ParentMvcModel, ChildMvcModel, DbContext> |
| Separate List and Detail MVC Models | SyncChildMVcCRUDController<Entity, ParentMvcModel, ChildMvcModel, DbContext> |
AsyncChildMvcCRUDController<Entity, ParentMvcModel, ChildMvcModel, DbContext> |
You may find a few more protected methods useful with respect to overriding:
These methods are called before a transaction closes. There are two common reasons to use these methods:
Another useful method for overriding is:
This method will get all items from whatever data source you're using. By default, it will get the items from the database using Entity Framework, but if you override this method to get items from some other source, you can easily change your controller to go against an XML file, for example, instead of the database. Another possible usage of this would be to introduce a filter. For example, if the controller is only supposed to work with the items that belong to the User that is currently logged-in, you could override this method to only return items that belong to the currently logged-in User:
protected override IQueryable<EntityT> GetItems()
{
	var currentUserId = ... //Get Id of User currently logged-in
	return base.GetItems().Where(x => x.CreatedBy.Id == currentUserId);
}
Note that when using AfterCreate( ), the Entity has not yet been fully created and saved yet, so the Id of the Entity will not yet exist. In some cases, this is exactly what you need because you might want to tweak the Model before it is saved (for example, by setting a CreatedBy property to the current logged-in user). On the other hand, if you need to know the Id of the Entity that is about to be created, it's important to use the UnitOfWorkContext to save your Entity before you use the Id. In the example below, we want to tell the User that their profile was successfully created through a pop-up and keep them on the screen they were just on by redirecting them to the Update Profile screen for the Id that was just created.
protected override ActionResult AfterCreate(int id, User EntityItem, UserMvcModel mvcModelItem)
{
	UnitOfWorkContext<MyFirstProjectDbContext>.CurrentDbContext.FinalSaveChanges();
	tempData.Supermodel().NextPageModalMessage = "User was created successfully!";
	var routeValues = HttpContext.Request.QueryString.Supermodel().ToRouteValueDictionary();
	return this.Supermodel().RedirectToActionStrong(x => x.Edit(EntityItem.Id, new HttpGet()), routeValues);
}
Supermodel requires you to preserve query string parameters from the List to the Detail pages and back. This is important if you have some searching, paging, and sorting parameters (see the section on Paging, Sorting, and Searching for more information) that control your List. If you do not preserve those query string parameters, when you are done with the Detail screen, your search/page/sort state will be lost. That is why we use var routeValues = HttpContext.Request.QueryString.Supermodel().ToRouteValueDictionary(); to grab the query string route values and pass them to the RedirectToActionStrong( ) method.
For two of the most frequently used cases of redirects, Supermodel provides shortcut methods on the base CRUD Controllers: StayOnDetailScreen( ) and GoToList( ). Therefore, the code snippet above could be simplified to the following:
protected override ActionResult AfterCreate(int id, User EntityItem, UserMvcModel mvcModelItem)
{
	UnitOfWorkContext<MyFirstProjectDbContext>.CurrentDbContext.SaveChanges();
	tempData.Supermodel().NextPageModalMessage = "User was created successfully!";
	return StayOnDetailScreen(EntityItem);
}
If, on the other hand, you wanted the User to be redirected to the List View, you would use the GoToList( ) method:
protected override ActionResult AfterCreate(int id, User EntityItem, UserMvcModel mvcModelItem)
{
	UnitOfWorkContext<MyFirstProjectDbContext>.CurrentDbContext.SaveChanges();
	tempData.Supermodel().NextPageModalMessage = "User was created successfully!";
	return GoToList();
}
StayOnDetailScreen( ) and GoToList( ) take care of preserving the query string parameters for you.
As you can see in these methods, UnitOfWorkContext allows you to access the CurrentDbContext and operate on it (for example, by calling the SaveChanges( ) method). For your convenience, Supermodel also exposes shortcut methods right on the UnitOfWorkContext that give you access to the most commonly used DbContext methods. For example, the code snippet above could be further simplified to:
protected override ActionResult AfterCreate(int id, User EntityItem, UserMvcModel mvcModelItem)
{
	UnitOfWorkContext.SaveChanges();
	tempData.Supermodel().NextPageModalMessage = "User was created successfully!";
	return GoToList();
}
As mentioned in the UnitOfWorkContext Shortcuts section, UnitOfWorkContext provides the following shortcuts, all of which can also be accessed through DbContext:
If you wish to display a message after a User profile is updated but before redirecting to the next page, you can use the AfterUpdate( ) method. Note that you do not need to use the UnitOfWorkContext SaveChanges( ) method, as the User already exists in the database and its Id at this point is already set:
protected override ActionResult AfterUpdate(int id, User EntityItem, UserMvcModel mvcModelItem)
{
	TempData.Supermodel().NextPageModalMessage = “User was updated successfully!"
	return this.AfterUpdate(EntityItem.Id, new HttpGet()));
}You might be wondering what is underneath the NextPageModalMessage( ) method and how it works to display messages in the browser. Supermodel makes available three different NextPage properties:
If you are using Twitter Bootstrap or JQuery Mobile, the Master Layout page will respect these TempData variables in the following way:
If you're using a generic render (as opposed to Twitter Bootstrap or JQuery Mobile), these properties will not by default be wired up because there is no default MasterLayout. However, you can still use them and create your own MasterLayout that will respect those properties. For example, if you use Twitter Bootstrap and Bootbox, you might use the following in your MasterLayout.cshtml file:
@if (TempData.Supermodel().NextPageStartupScript != null)
{
	<text>
		@MvcHtmlString.Create(TempData.Supermodel().NextPageStartupScript.ToString())
	</text>
}
@if (TempData.Supermodel().NextPageAlertMessage != null)
{
	<text>
		alert("@TempData.Supermodel().NextPageAlertMessage");
	</text>
}
@if (TempData.Supermodel().NextPageModalMessage != null)
{
	<text>
		bootbox.alert("@TempData.Supermodel().NextPageModalMessage");
	</text>
}Within a Supermodel project, you can always create a normal custom View. For example, we can use @Html.EditorFor(x => x.PropertyName) type methods.
Even better, instead of using @Html.EditorFor, we can use @Html.Supermodel().EditorFor. This method does everything that the standard EditorFor method does, but in addition to it, it respects ISupermodelEditorTemplate, ISupermodelDisplayTemplate, and ISupermodelHiddenTemplate. For example:
@model QuoteMvcModel
@{
    Layout = "~/Views/Shared/MasterLayout.cshtml";
}
@using (Html.BeginForm())
{
	if (!Model.IsNewModel)
	{
		@Html.HttpMethodOverride(HttpVerbs.Put)
	}

	<div>@Html.LabelFor(x => x.Username)</div>
	<div>@Html.Supermodel().EditorFor(x => x.Username)</div>

	<div>@Html.LabelFor(x => x.FirstName)</div>
	<div>@Html.Supermodel().EditorFor(x => x.FirstName)</div>

	<div>@Html.LabelFor(x => x.LastName)</div>
	<div>@Html.Supermodel().EditorFor(x => x.LastName)</div>

	<div>@Html.LabelFor(x => x.Age)</div>
	<div>@Html.Supermodel().EditorFor(x => x.Age)</div>

	<input type="button" value="Back" href="/User/List">
	<input type="submit" value="Submit"/>
}
This will result in a view that looks like the following:
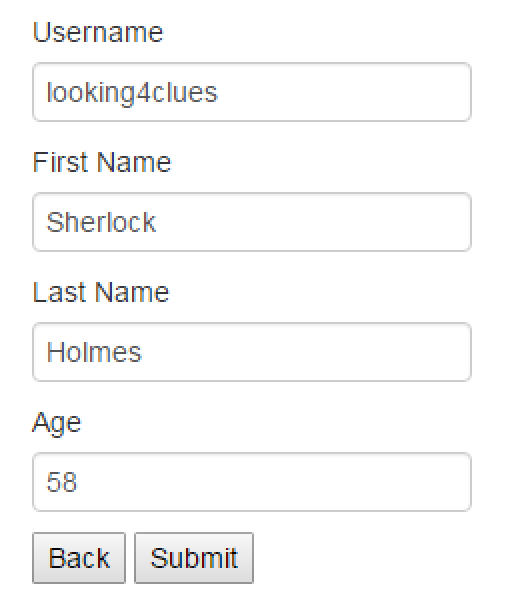
In the same way that @Html.Supermodel().EditorFor relies on the ISupermodelEditorTemplate, @Html.Supermodel().DisplayFor relies on the ISupermodelDisplayTemplate and @Html.Supermodel().HiddenFor relies on the ISupermodelHiddenTemplate.
For DRYer code, we can take advantage of the templates (in this case, we will be using ISupermodelEditorTemplate). Doing so will render all of the fields in our MVC Model. This way, when a property is added, removed, or changed, there is no need to update the View. For example, if we were to customize our Detail View for the QuoteMvcModel, we could do the following:
@model QuoteMvcModel
@{
    Layout = "~/Views/Shared/MasterLayout.cshtml";
}
@using (Html.BeginForm())
{
	if (!Model.IsNewModel)
	{
		@Html.HttpMethodOverride(HttpVerbs.Put)
	}

	@Model.EditorTemplate(Html)

	<input type="button" value="Back" href="/User/List">
	<input type="submit" value="Submit"/>
}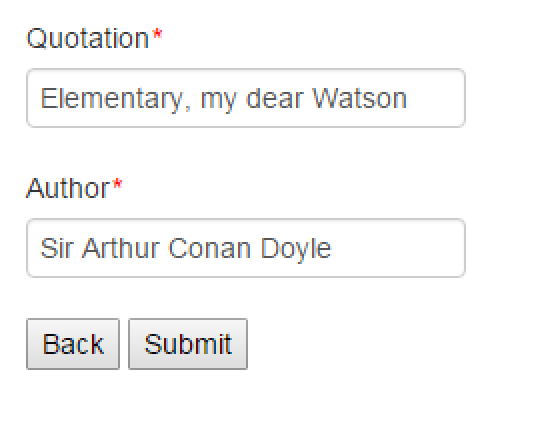
We can also replace the header and footer of the above code so that it looks like the following:
@model QuoteMvcModel
@{
    Layout = "~/Views/Shared/MasterLayout.cshtml";
}
@(Html.Supermodel().TweeterBS.CRUDEditHeader<Quote, QuoteMvcModel>())
@Model.EditorTemplate(Html)
@(Html.Supermodel().TweeterBS.CRUDEditFooter<Quote, QuoteMvcModel>())
Using CRUDEditHeader and CRUDEditFooter eliminates the need for us to create own "Back" and "Submit" buttons as well as the need to specify the beginning of an HTML form. Additionally, by using the TweeterBS HTML extension, our buttons and textfields will have the look and feel of a standard Twitter Bootstrap application:
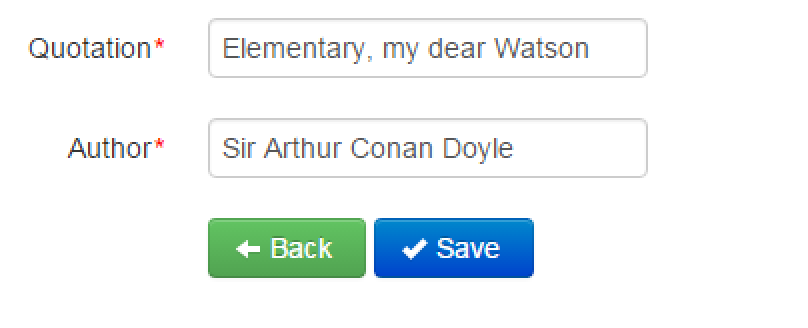
As you may have noticed, our View is equivalent to the View generated by:
@(Html.Supermodel().TweeterBs.CRUDEdit<Quote, QuoteMvcModel>())For further customization, we can add our own HTML and use ScreenOrder parameters to choose where to place fields on the screen. First, we will need to go into the UserMvcModel to specify the ScreenOrder attribute of the properties. If the ScreenOrder attribute is not specified, it is implicitly assumed to be "100." Properties with the same ScreenOrder are rendered in the order in which they are listed within the class.
For example, let's specify the screen order for the Quotation field to be below that of the Author field.
public class QuoteMvcModel : TweeterBS.ChildMvcModelForEntity<Quote, User>
{
	[ScreenOrder(300), ListColumn, Required] public TweeterBS.TextBoxForStringMvcModel Quotation { get; set; }
	[ScreenOrder(200), ListColumn, Required] public TweeterBS.TextBoxForStringMvcModel Author { get; set; }

	public override string Label { get { "'" + Quotation.Value + "'" + " - " + Author.Value; } }

	public override User GetParentEntity(Quote Entity)
	{
		return Entity.ParentUser;
	}

	public override void SetParentEntity(Quote Entity, User parent)
	{
		Entity.ParentUser = parent;
	}
}
As expected, the Author field now appears before the Quotation field:
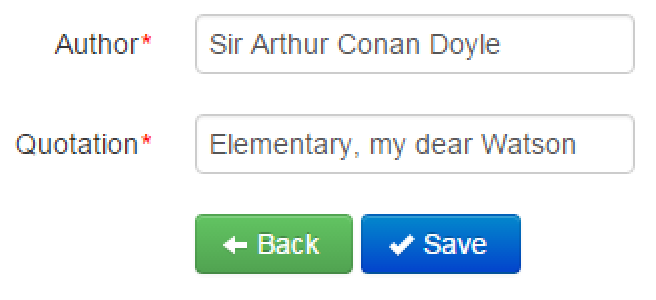
The ScreenOrder attribute is particularly useful when using inheritance, allowing us to order fields coming from base classes and derived classes in any way we want.
@model QuoteMvcModel
@{
    Layout = "~/Views/Shared/MasterLayout.cshtml";
}
@(Html.Supermodel().TweeterBs.CRUDEditHeader<Quote, QuoteMvcModel>())
@Model.EditorTemplate(Html, 200, 200)
<div>This is some custom HTML</div>
@Model.EditorTemplate(Html, 300, 300)
@(Html.Supermodel().TweeterBS.CRUDEditFooter<Quote, QuoteMvcModel>())
And, as you can see above, we can also insert our own custom HTML code on the screen.
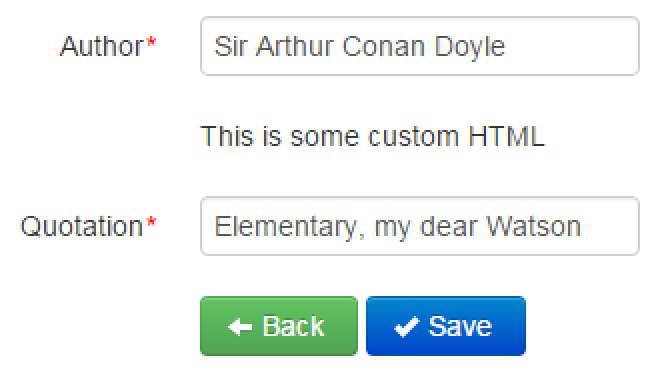
Reflection Mapper maps or compares two objects' properties using reflection by finding properties with the same name and type. With Reflection Mapper, there exists the concept of an active object and a passive object. Typically, in Supermodel, the active object is an MVC Model and/or API Model and a passive object is the Entity. Reflection Mapper will go through the properties in the MVC Model (the active object) and try to find their counterparts in the Entity (the passive object). The passive object is not aware of the existence of the active object, just as Entities should not know about/depend on the MVC Models. Unless it has been marked with [NotRMapped] or a similar attribute (which will be explained later), for every property in the active object, we must find a matching property in the passive object. If the match is not found, this results in a runtime error. On the other hand, a passive object might have properties that do not have matching properties in the active object, and that will not result in an error.
For example, let's define two unrelated classes, Person1 and Person2:
public class Person1
{
	public string FirstName { get; set; }
	public string LastName { get; set; }
	public DateTime DateOfBirth { get; set; }
}
public class Person2
{
	public string FirstName { get; set; }
	public string LastName { get; set; }
	public DateTime DateOfBirth { get; set; }
	public int AnnualIncome { get; set; }
}
Even though these classes are unrelated, they have similar properties. We can map one onto the other:
var a = new Person1 { FirstName = "Barack", LastName = "Obama", DateOfBirth = DateTime.Parse("8/4/1961") };
var b = new Person2;
//b has all the properties except for AnnualIncome set up to be equal to a
b = a.MapTo(b);
//This is how we could map it the other way
a = a.MapFrom(b);
A slightly outdated way of doing the same thing would look like this:
var a = new Person1 { FirstName = "Barack", LastName = "Obama", DateOfBirth = DateTime.Parse("8/4/1961") };
var b = new Person2;
//b has all the properties except for AnnualIncome set up to be equal to a
b = a.MapToObject(b, b.GetType());
//This is how we could map it the other way
a = a.MapFromObject(b, b.GetType());
While the first code snippet uses strongly-typed extension methods, the second one takes an object. That's why you must pass the type of the object as a separate parameter (in case the object is null).
The process of reflection mapping can be controlled to a large degree by attributes you put on the MVC Model's properties, which include NotRMapped, NotRCompared, NotRMappedTo, NotRMappedFrom, and RMapTo:
This attribute marks an active object's property not to be auto-mapped. Usually, when you mark a property as [NotRMapped] you provide your own custom mapping through the IRMapperCustom implementation.
[NotMappedFrom] marks a property of an active object that is only being auto-mapped to another property, but not from another property, i.e., mapping a property only one way. A combination of both NotRMappedFrom and NotRMappedTo (see next) is equivalent to NotRMapped.
[NotMappedTo] marks a property of an active object that is only being auto-mapped from another property, but not to another property, i.e., mapping a property only one way. A combination of both NotRMappedFrom and NotRMappedTo is equivalent to NotRMapped.
If your MVC Model property must map to a property on the Entity that has a different name, or even if it is at a different level of the hierarchy (Entities can be "deep", while MVC Models are almost always "flat"), then
you can use the ReflectionMapper attribute [RMapTo(PropertyName = "string")] or [RMapTo(PropertyName = "string", ObjectPath = "string")].
For example, perhaps we have an object "Address" within our domain, like so:
namespace Domain.Entities
{
    public class Address
    {
        public string Street { get; set; }
        public string City { get; set; }
        public string State { get; set; }
        public string Zip { get; set; }
    }
}public class User : Entity
{
public User()
{
UserAddress = new Address();
}
public Address UserAddress {get; set; }
[Required] public string Username { get; set; }
public string FirstName { get; set; }
public string LastName { get; set; }
[Required] public int? Age { get; set; }
}[RMapTo(PropertyName = "Street", ObjectPath="UserAddress")]
public TweeterBS.TextBoxForStringMvcModel Street { get; set; }
[RMapTo(PropertyName = "City", ObjectPath = "UserAddress")]
public TweeterBS.TextBoxForStringMvcModel City { get; set; }
[RMapTo(PropertyName = "State", ObjectPath = "UserAddress")]
public TweeterBS.TextBoxForStringMvcModel State { get; set; }
[RMapTo(PropertyName = "Zip", ObjectPath = "UserAddress")]
public TweeterBS.TextBoxForStringMvcModel Zip { get; set; }
Note that the ObjectPath parameter can take a path that consists of multiple levels of nesting. For example, we could say [RMapTo(PropertyName = "Abbreviation", ObjectPath = "UserAddress.State")] if on our Entity we had a UserAddress object that contained a State object which in turn contained a string property that's called Abbreviation that would have the abbreviation for the state.
public class UserMvcModel : MvcModelForEntity<User>
{
	public BinaryFileMvcModel UserImage { get; set; }
	[RMapTo(PropertyName = "UserImage")] public ImageMvcModel UserImageView { get; set; }
}
public class User : Entity
{
	...
	public BinaryFile UserImage { get; set; }
}Reflection mapper can compare instances of different classes. If a property of an active has a [NotRCompared] attribute, it will not be compared.
If you want ultimate control over how your properties are mapped, Reflection Mapper allows you to do custom mapping between unrelated objects of different types through the IRMapperCustom interface. This interface implements two methods: MapFromObjectCustom(object obj, Type objType) and MapToObjectCustom(object obj, Type objType). For example, let's say that our User Entity has the properties FirstName and LastName, but our MVC Model has the property FullName which should have the format "LastName, FirstName." We can map FirstName and LastName from our Entity to the FullName property by doing the following:
public class UserMvcModel : TweeterBS.MvcModelForEntity<User>
{
	[ListColumn, Required] public TweeterBS.TextBoxForStringMvcModel Username { get; set; }
	[ListColumn, Required, NotRMapped] public string FullName { get; set; }
	[ListColumn, Required] public TweeterBS.TextBoxForIntMvcModel Age { get; set; }
	//Note that we got rid of the FirstName and LastName properties here.
	public override string Label { get { return FullName; } }

	public override object MapFromObjectCustom(object obj, Type objType)
	{
		var user = (User) obj;
		FullName = user.LastName + ", " + user.FirstName;
		return base.MapFromObjectCustom(obj, objType);
	}
}
public class User : Entity
{
	[Required] public string Username { get; set; }
	public string FirstName { get; set; }
	public string LastName { get; set; }
	[Required] public int? Age { get; set; }
}
You must mark the property that we do not want to auto-map as [NotRMapped] so that Reflection Mapper will ignore it. As you can see in the MVC Model above, we take care of such properties ourselves in the custom mapper.
Within our MapFromObjectCustom method, we must call the base method base.MapFromObjectCustom(obj, objType) to auto-map the rest of the properties. We are able to do this because MvcModelForEntity and ApiModelForEntity already implement IRMapperCustom and call MapFromObjectCustomBase and MapToObjectCustomBase. Thus, if we're implementing the IRMapperCustom interface from scratch, we must remember to use this.MapFromObjectCustomBase and this.MapToObjectCustomBase, which will have the same effect.
Our resulting User List View will now have a column called "Full Name" instead of columns for "First Name" and "Last Name":
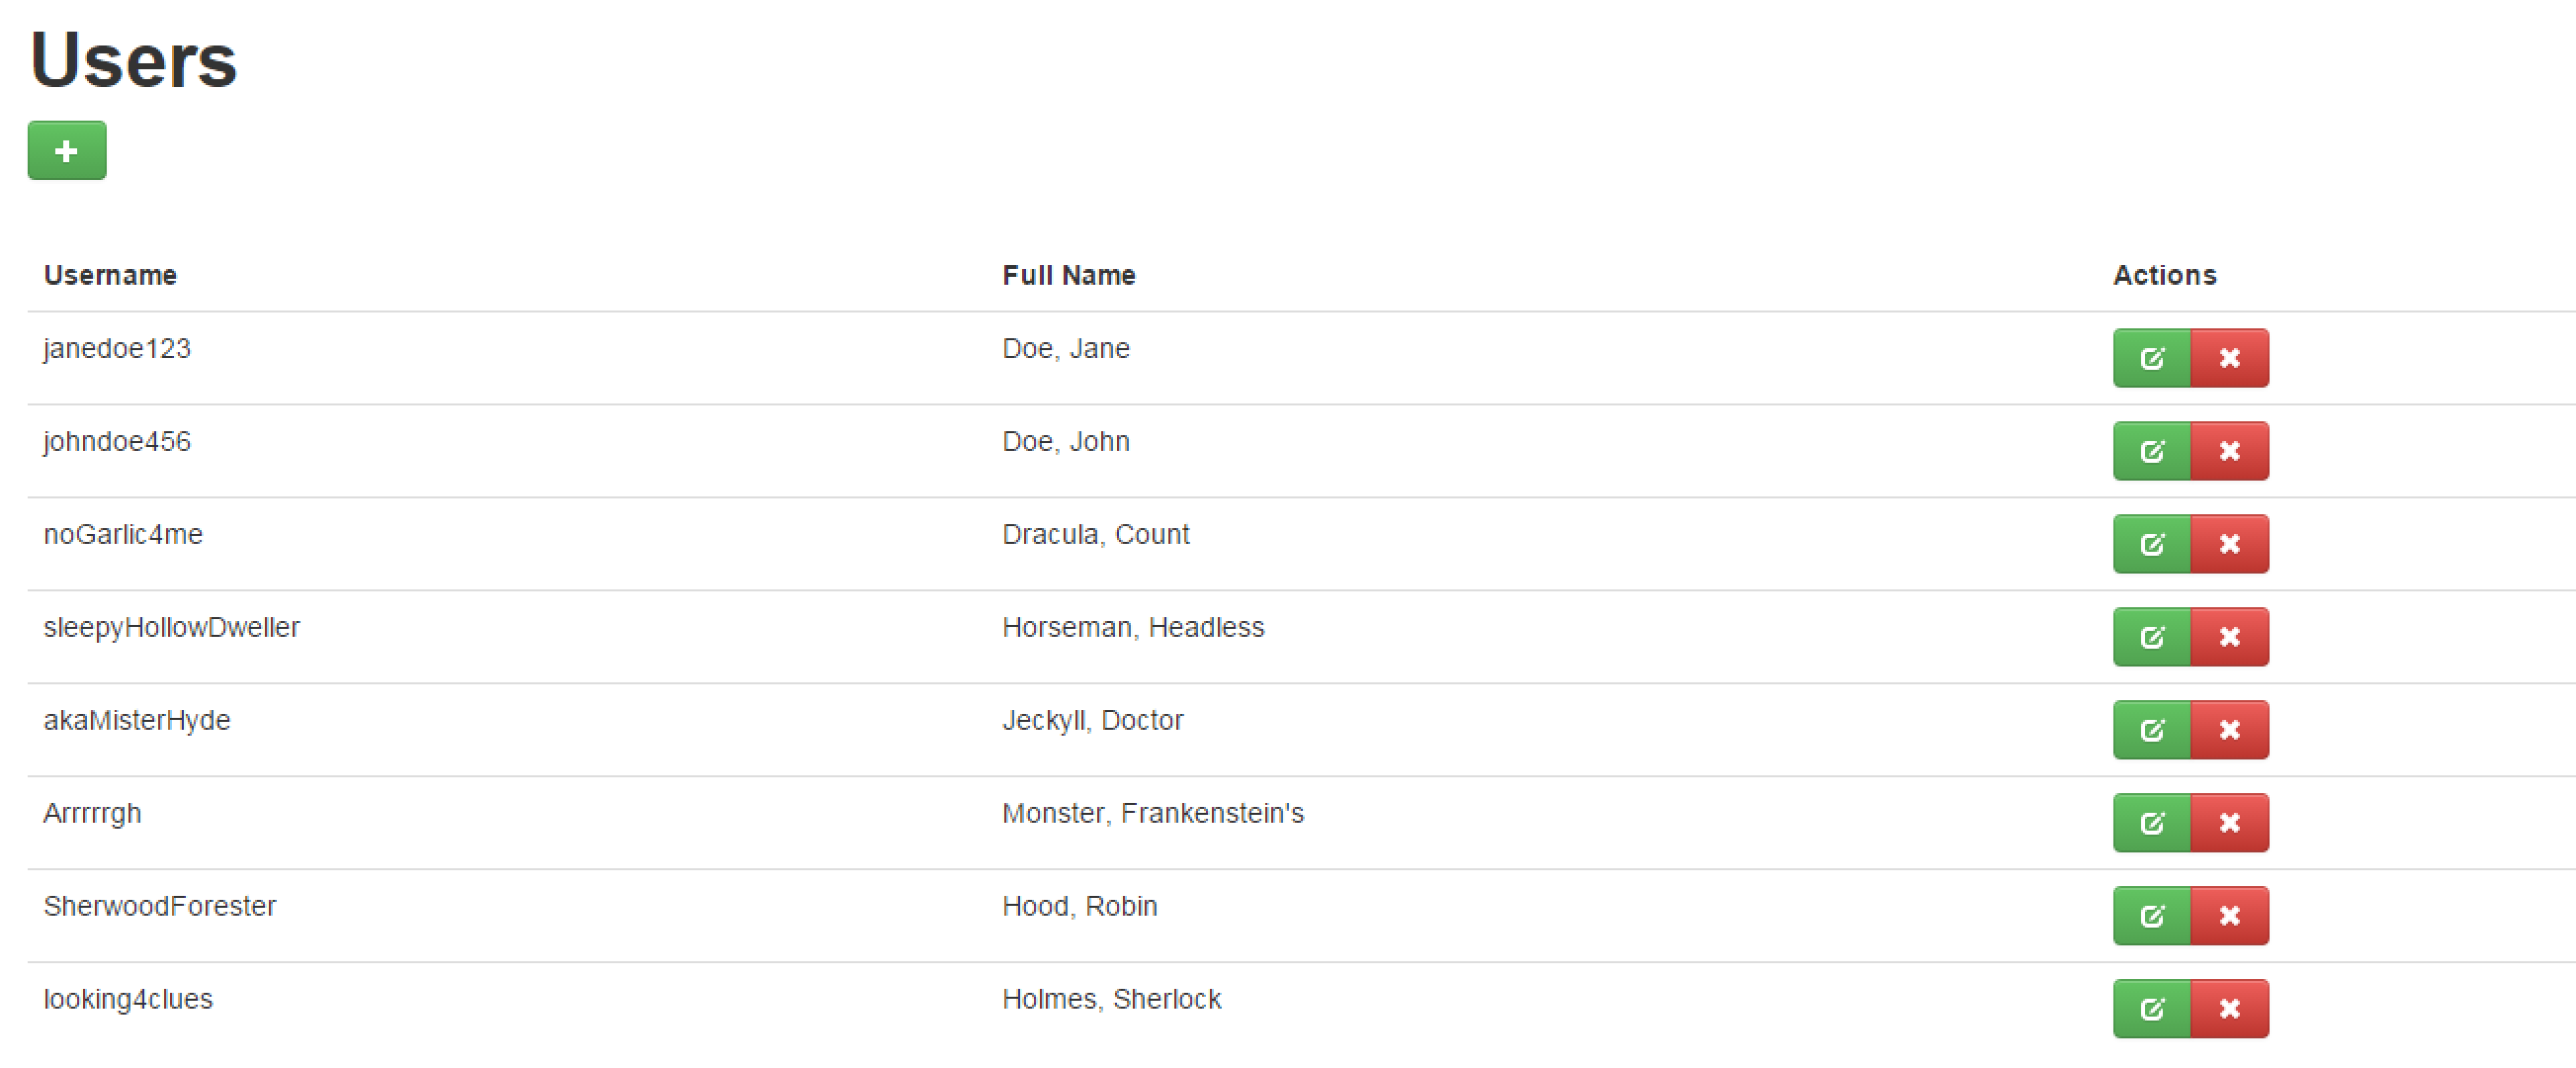
If you want to map the FullName back to the Entity as FirstName and LastName, you can use the method MapToObjectCustom(object obj, Type objType).
public override object MapToObjectCustom(object obj, Type objType)
{
	var user = (User)obj;
	var splitName = FullName.Split(',');
	if (splitName.Length != 2) throw new ValidationResultException("FullName must be in format LastName, FirstName", new [] {"FullName"});
	user.FirstName = splitName[1].Trim();
	user.LastName = splitName[0].Trim();
	return base.MapToObjectCustom(obj, objType);
}
Note the usage of ValidationResultException in the mapper. This exception is related to the ValidationResult object from the IValidatableObject interface. If this type of an exception is thrown during the mapping, any Supermodel CRUD Controller will catch it and add to the validation errors. This way, you can report validation errors from the custom mappers.
Consider a scenario in which we want to be able to let Users deactivate their accounts. First, we need to add an "Active" boolean flag to our User Entity.
public class UserDetailMvcModel : TweeterBs.MvcModelForEntity<User>
{
	[Required] public TweeterBS.TextBoxForStringMvcModel Username { get; set; }
	public TweeterBS.TextBoxForStringMvcModel FirstName { get; set; }
	public TweeterBS.TextBoxForStringMvcModel LastName { get; set; }
	[Required] public TweeterBS.TextBoxForIntMvcModel Age { get; set; }

	public override string Label
	{
		get { return FirstName.Value + " " + LastName.Value; }
	}
}
public class User : Entity
{
	public User()
	{
		Active = true;
	}

	public void Disable()
	{
		Active = false;
	}

	[Required] public bool Active { get; set; }
	[Required] public string Username { get; set; }
	public string FirstName { get; set; }
	public string LastName { get; set; }
	[Required] public int? Age { get; set; }
}
Let's add the Active property to our database initializer class so that certain Users are disabled and some are not.
If you are changing a database initializer without making changes to the database schema, you may need to delete the database after you update the database initializer because if this is the only thing that is updated, Entity Framework will not consider this a change to the database schema and nothing will happen. But if you delete the database, a new one will be created the database initializer Seed( ) method will run.
using System.Data.Entity;
using Domain.Entities;
namespace Domain
{
    public static class DataInfoInitializer
    {
        public static void Seed(MyFirstProjectDbContext context)
        {
            #region Users
            var users = new[]
            {
                new User
                {
                    FirstName = "Jane",
                    LastName = "Doe",
                    Age = 31,
                    Username = "janedoe123",
                    Password = "0",
                    Active = false
                },

                new User
                {
                    FirstName = "John",
                    LastName = "Doe",
                    Age = 33,
                    Username = "johndoe456",
                    Password = "0",
                    Active = false
                },

                new User
                {
                    FirstName = "Count",
                    LastName = "Dracula",
                    Age = 26,
                    Username = "noGarlic4me",
                    Password = "0",
                    Active = true
                },

                new User
                {
                    FirstName = "Headless",
                    LastName = "Horseman",
                    Age = 41,
                    Username = "sleepyHollowDweller",
                    Password = "0",
                    Active = true
                },

                new User
                {
                    FirstName = "Doctor",
                    LastName = "Jeckyll",
                    Age = 55,
                    Username = "akaMisterHyde",
                    Password = "0",
                    Active = false
                },
                new User
                {
                    FirstName = "Frankenstein's",
                    LastName = "Monster",
                    Age = 23,
                    Username = "Arrrrrgh",
                    Password = "0",
                    Active = true
                },

                new User
                {
                    FirstName = "Robin",
                    LastName = "Hood",
                    Age = 46,
                    Username = "SherwoodForester",
                    Password = "0",
                    Active = false
                },

                new User
                {
                    FirstName = "Sherlock",
                    LastName = "Holmes",
                    Age = 58,
                    Username = "looking4clues",
                    Password = "0",
                    Active = true
                }
            };

            foreach (var user in users) context.Set<User&62;().Add(user);
            #endregion
        }
    }

    public class MyFirstProjectDropCreateDatabaseIfModelChanges : DropCreateDatabaseIfModelChanges<MyFirstProjectDbContext>
    {
        protected override void Seed(MyFirstProjectDbContext context)
        {
            DataInfoInitializer.Seed(context);
            base.Seed(context);
        }
    }

    public class MyFirstProjectDropCreateDatabaseAlways : DropCreateDatabaseAlways<MyFirstProjectDbContext>
    {
        protected override void Seed(MyFirstProjectDbContext context)
        {
            DataInfoInitializer.Seed(context);
            base.Seed(context);
        }
    }

    public class MyFirstProjectCreateDatabaseIfNotExists : CreateDatabaseIfNotExists<MyFirstProjectDbContext>
    {
        protected override void Seed (MyFirstProjectDbContext context)
        {
            DataInfoInitializer.Seed(context);
            base.Seed(context);
        }
    }
}
Now we want disabled Users to act as if they're not there. For example, when we want to display all of our Users, we only want to display those that are still active. In order to do this, we can create a custom repository.
We'll create a file called "UserRepo.cs" within our domain and write the following code:
public class UserRepo : SqlLinqEFSimpleRepo<User>
{
	public virtual IQueryable<User> ItemsIncludingDisabled
	{
		get { return base.Items; }
	}

	public override IQueryable<User> Items
	{
		get { return base.Items.Where(x => x.Active); }
	}

	public override void Delete(User item)
	{
		item.Disable();
	}
}
Through normal stock methods of this repository, we will never see any User that has been disabled. Essentially, it will act as if the User has been deleted. However, we created the ItemsIncludingDisabled method to show all of the Users including disabled Users in case we wanted to get to them.
Now, if we run our application and look at the list of Users, we'll see that only the ones that we marked Active = true are displayed:
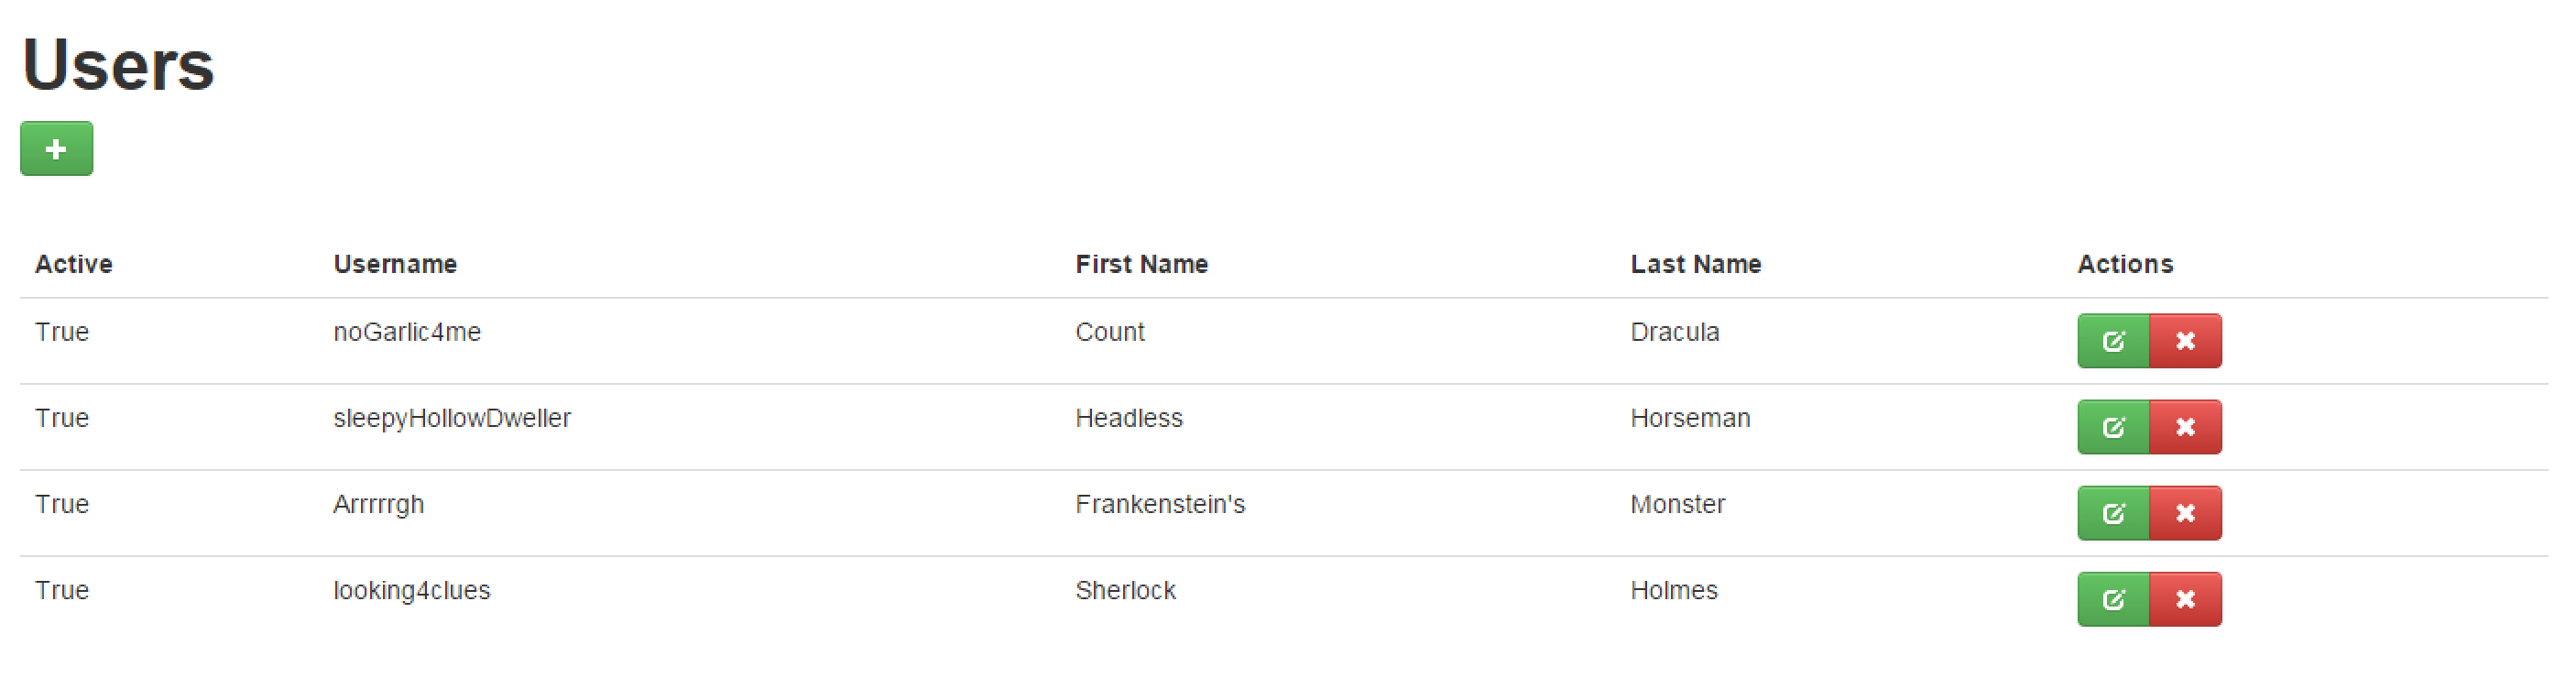
We must be careful with navigational properties, however, because they will not use Items from our repository and will return Entities that have been disabled. This could easily be dealt with by creating another read-only property that would use the navigational property and adding a Where clause to filter out all of the disabled Entities. For example:
public class UserGroup : Entity
{
	public string Name { get; set; }
	public string Description { get; set; }

	//Standard nav property
	public virtual List<Users> UsersWithDisabled { get; set; }

	//Custom List of Users property that only returns active users
	[NotMapped] public List<Users> Users
	{
		get { return UsersWithDisabled.Where(x => x.Active).ToList(); }
	}
}
If we wanted to be fancy/high-performance we could even add caching to that property:
public class UserGroup : Entity
{
	public string Name { get; set; }
	public string Description { get; set; }

	//Standard nav property
	public virtual List<Users> UsersWithDisabled { get; set; }

	//Custom List of Users property that only returns active users
	[NotMapped] public List<Users> Users
	{
		get
		{
			if (_users == null) _users = UsersWithDisabled.Where(x => x.Active).ToList();
			return _users;
		}
	}

	private List<Users> _users = null;
}
This pattern works great. Of course, you need to remember that if you need to add a User to the List through a nav property, you have to add it to the UsersWithDisabled List, because that is the one being tracked by Entity Framework.
Now, we need to register our new repo in a custom repo factory. In our domain, let's create a class called CustomRepoFactory which implements the interface IRepoFactory.
public class CustomRepoFactory : IRepoFactory
{
	public virtual IDataRepo<EntityT> CreateRepo<EntityT>() where EntityT :
		class, IEntity, new()
	{
		if (typeof(EntityT) == typeof(User)) return (IDataRepo<EntityT>) new UserRepo();
		return null;
	}
}
We must return null at the end so that if none of the other options work, a standard default repo is selected. Any additional custom repos can be added to this file, as well. Finally, we need to pass our custom RepoFactory instance to Supermodel.Init( ) in the Global.asax file.
SupermodelInitialization.Init<MyFirstProjectDbContext>(new CustomRepoFactory());Additionally, we need to pass our custom RepoFactory instance to any other Supermodel.Init( )<> calls we make (most likely in other projects within our solution).
We can also create custom methods within our custom repo. For example, we can create a method to find all Users over the age of 50.
public class UserRepo : SqlLinqEFSimpleRepo<User>
{
	...

	public List<Users> GetAllOverFifty()
	{
		return Items.Where(x => x.Age >= 50);
	}

	public Task<List<Users>> GetAllOverFiftyAsync()
	{
		return Items.Where(x => x.Age >= 50).ToListAsync();
	}
}
Note that these two methods will not return disabled Users because they are based off of the Items property that we overrode. That's probably what you would want anyways.
In order to access the two new custom methods we added, we will need to cast the repo we get from the repo factory to the UserRepo type. Here is an example:
var repo = (UserRepo) RepoFactory.Create<User>();
var allOverFifty = await repo.GetAllOverFiftyAsync();In Supermodel, there is a way to incorporate RESTful web services in your application based on ASP.NET Web API. REST, or Representational State Transfer, is a software architecture that allows you to build scalable web services. RESTful services communicate over HTTP using the HTTP verbs GET, PUT, POST, and DELETE.
For this part of the tutorial, you should install Fiddler, which is a free HTTP debugger. Fiddler can also act as an HTTP client to an HTTP server. Therefore, you can use Fiddler to test code from this part of the tutorial.
So how do you make RESTful web services using Supermodel?
Similarly to the MVC "world", Supermodel provides free CRUD for Web API as well. But before we delve into that, let's take a
look at creating a very simple CRUD service by hand using Supermodel. First, the API Model for your Entity should inherit from an API Model base class.
Just like in the Supermodel MVC "world", there is an ApiModel and ApiModelForEntity<>.
ApiModel implements the abstract class ViewModel without the Entity backing.
ApiModelForEntity<>, on the other hand,
takes an Entity parameter and inherits from the ApiModelForAnyEntity class. ApiModelForEntity<> implements IValidatableObject and IRMapperCustom and it includes
an Id property to match one on the Entity.
public class UserApiModel : ApiModelForEntity<User>
{
	[Required] public string Username { get; set; }
	public string FirstName { get; set; }
	public string LastName { get; set; }
	[Required] public int? Age { get; set; }
}
We will need to create a new API controller for our domain object in order to include Web API functionality. The convention is to place Web API Controllers in an APIControllers directory under your Web Project as opposed to the Controllers directory under the Web Project where your MVC Controllers reside.
It is important to place API and MVC Controllers in separate directories (and therefore separate namespaces) because they are likely to have the same names. For example, below you'll see that in the folder ApiControllers and in the folder Controllers, there is a controller class called UserController.
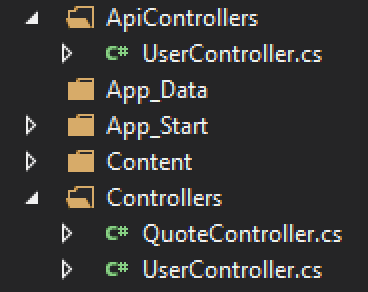
url/NameOfObject/NameOfActionMethod/id
However, using Web API, your url will include an HTTP verb instead of a traditional Action Method:
url/api/NameOfObject/id
For more information, see ASP.NET Web API documentation.
Our updated controller will need to include methods for each HTTP verb (GET, DELETE, POST, and PUT):
public class UserController : ApiController
{
	public HttpResponseMessage Get(int id)
	{
		using (new UnitOfWork(ReadOnly.Yes))
		{
			var user = RepoFactory.Create<User>().GetById(id);
			var userApiModel = new userApiModel().MapFrom(user);
			return Request.CreateResponse(HttpStatusCode.OK, userApiModel);
		}
	}

	public HttpResponseMessage Delete(int id)
	{
		using (new UnitOfWork())
		{
			var user = RepoFactory.Create<User>().GetById(id);
			user.Delete();
			return Request.CreateResponse(HttpStatusCode.OK);
		}
	}

	public HttpResponseMessage Post(UserApiModel userApiModel)
	{
		using (new UnitOfWork())
		{
			var user = userApiModel.MapTo(new User());
			user.Add();
			return Request.CreateResponse(HttpStatusCode.OK);
		}
	}

	public HttpResponseMessage Put(int id, UserApiModel userApiModel)
	{
		using (new UnitOfWork())
		{
			var user = userApiModel.MapTo(RepoFactory.Create<User>().GetById(id));
			return Request.CreateResponse(HttpStatusCode.OK);
		}
	}
}
In order to debug our Web API service, we will use a utility that's called Fiddler. Fiddler is an HTTP traffic analyzer, but it can also act as an HTTP Client. This is the role we are going to be using it in.
Now, we can run our API calls in Fiddler. Before we run our Web project though, let's go to Web properties (right-click Web and select properties). Under the tab "Web", select the option "Don't open a page. Wait for a request from an external application." This way, a web browser won't open when we start our Web project. Also, in the properties window, note that you can see what your localhost port number is (you will need this port number in Fiddler).
Let's go ahead and run our Web project and open Fiddler. We can write our first API request under the Composer tab. Let's try running a GET to return the User with an Id of 1. To do so, we will select our HTTP Verb from the dropdown menu and then type in the following to the text field: "http://localhost:#####/api/User/1". Remember to replace ##### with your localhost port number.
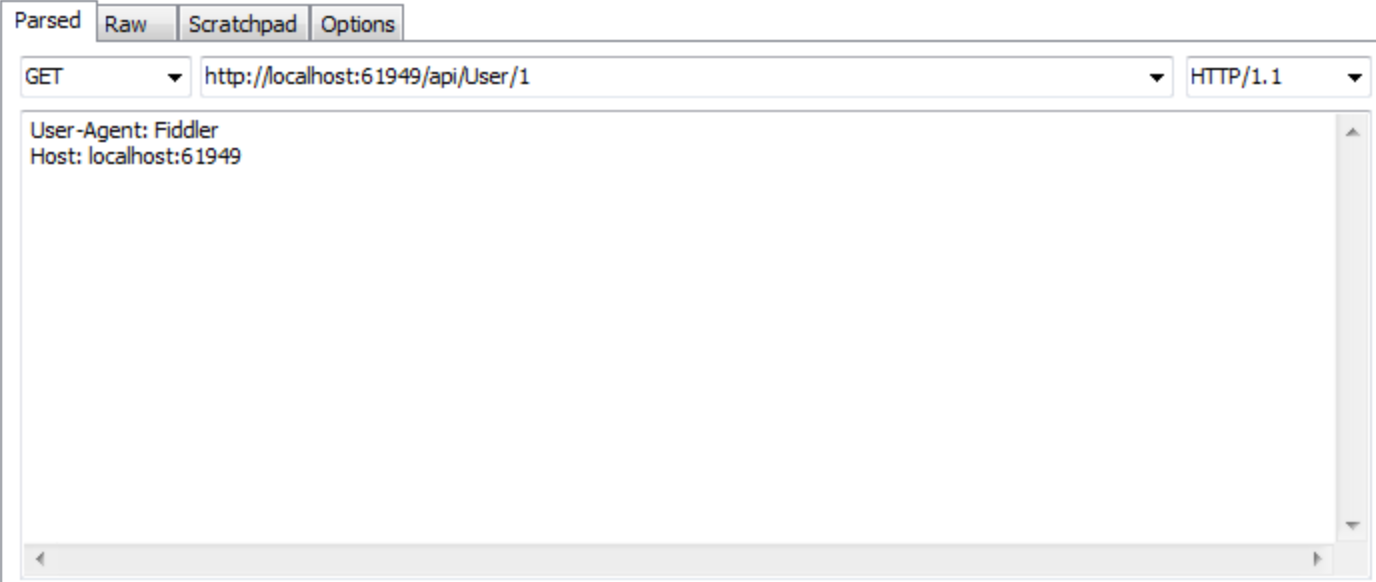
Click "Execute". You'll notice on the left side of the Fiddler window a list of results. A result of "200" signifies the HTTP status code for "Success," and, in our case, a successful return of the data from the API call.
If we click on the result, we'll see our User with Id "1" returned in JSON format:
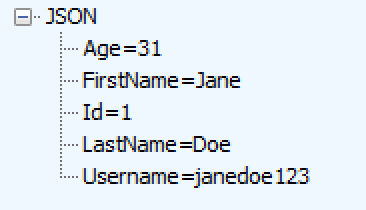
Let's try a few more API calls while we're at it. Let's try updating Jane Doe's information by using a PUT. We'll change her age from 99 to a more youthful 20. First, change the HTTP Verb to "PUT". Our URL will remain the same.

Then, in our header, we must specify the Content-Type of our Request Body. We'll pass our updated data in JSON format, so we'll add "Content-Type: application/json":
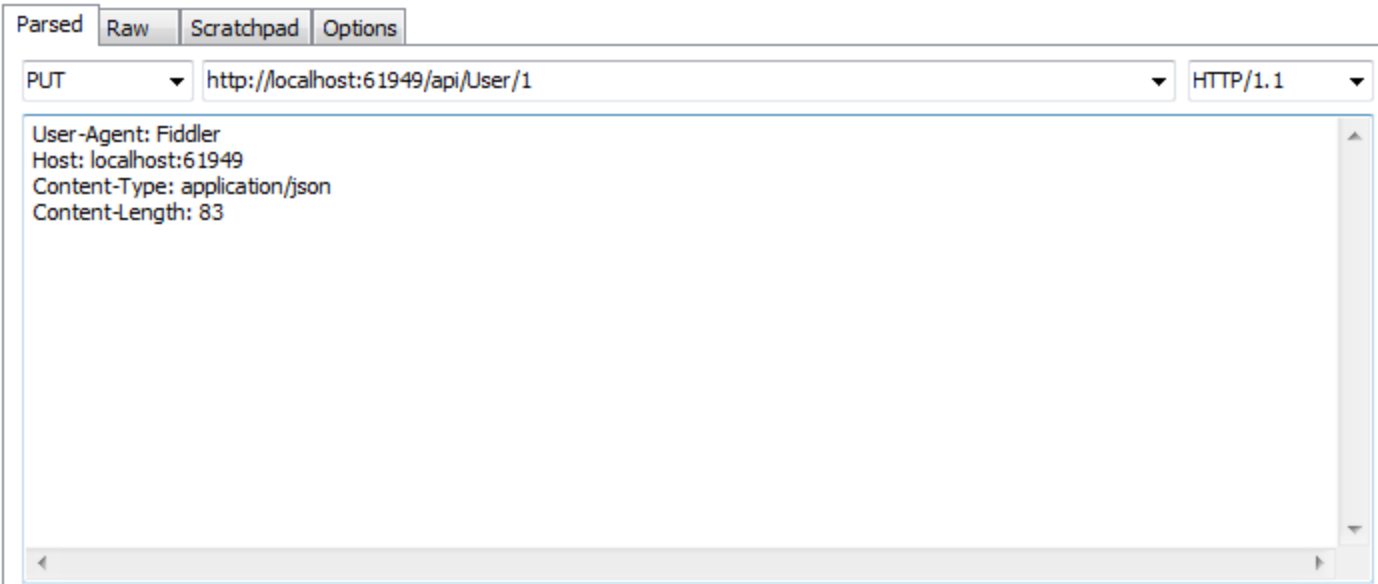
Finally, we'll need to add our updated data about Jane Doe to the Request Body:
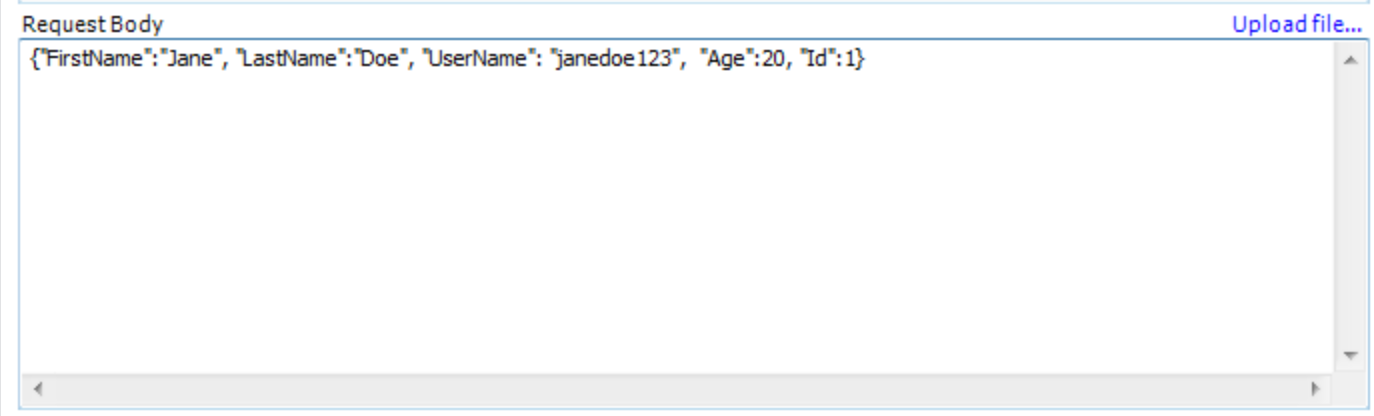
Now, if we execute our request, we should get a 200 HTTP status code as a result.

And sure enough, if we look at the User table in our database, we'll see that Jane's age has been updated there, too:
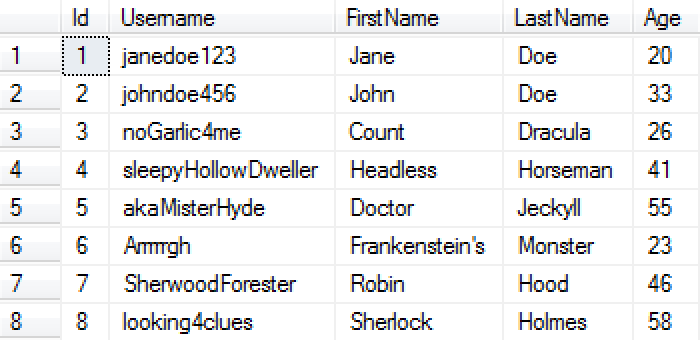
Now, let's try deleting Jane from our database. Remember to change the HTTP verb in the dropdown to DELETE. When we do this, the Request Body section will turn red. We'll go ahead and delete the text from the Request Body.

Go ahead and click "Execute". Once again, you should get a 200 HTTP status code. If we look in our database, we'll see that Jane no longer exists:
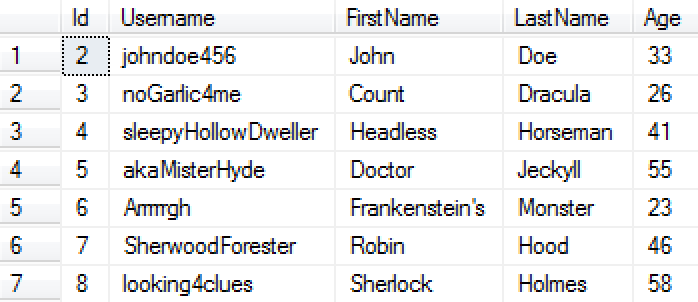
Finally, we can also add Users to our database through the HTTP verb POST. Now that we've deleted Jane, let's try adding her back to the database as a new User. First, change the HTTP verb in the dropdown to POST. Then, in the URL, remove the Id "1" (a new User won't have an Id yet).

In the Request Body, we'll need to pass the information about our new User in JSON format (also make sure that in the Header you've specified "Content-Type: application/json"). We must give our new User an Id of 0, or else we'll get an error.
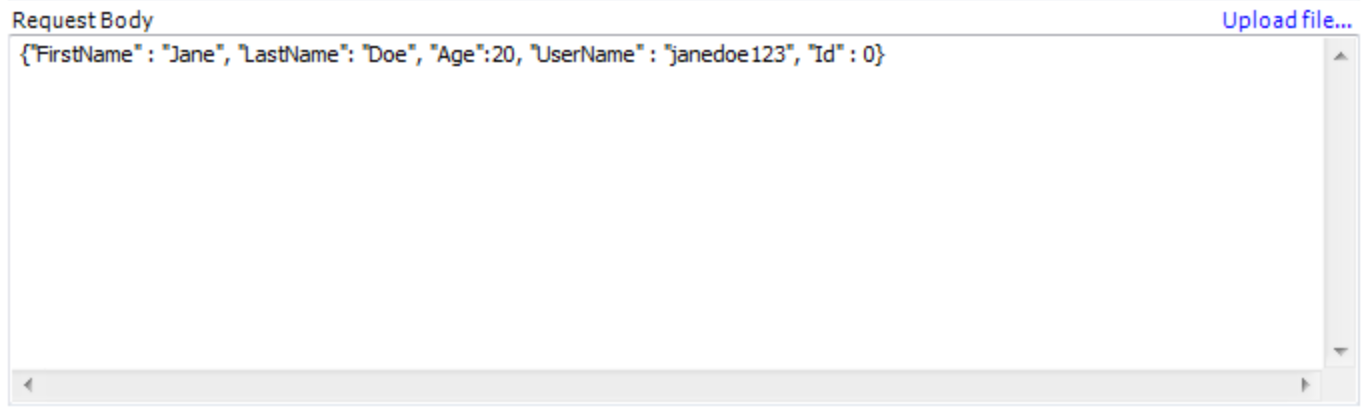
Once we execute this API call and receive a 200 HTTP status code, we can look in our database and see that Jane Doe has been added as a new User.
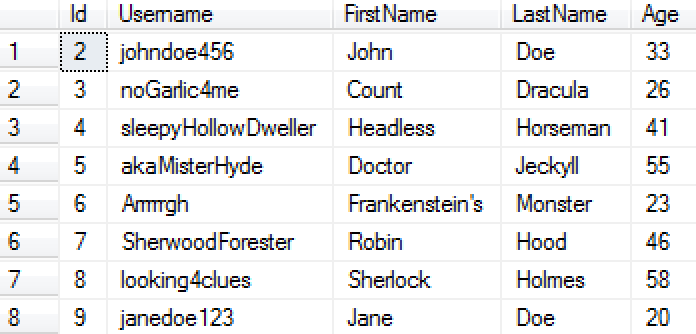
From the above, you just saw how easy it is to create a rudimentary custom CRUD Web API service. However, with Supermodel, we can do even better than that, and have completely free CRUD in the context of Web API just like we have free CRUD in the context of MVC. The free CRUD that we get with Supermodel base controllers is actually a lot more sophisticated with built-in validation, paging, sorting, and querying.
There are eight API controllers you can choose from depending on your application's needs. There are really just two controllers, but with four flavors each just like in MVC (sync vs. async and single API Model vs. separate List and Detail API Models): CRUD controller and Enhanced CRUD Controller.
In general, CRUD API Controllers mirror the CRUD MVC Controllers, having a simple CRUD Controller family with four controllers, and an Enhanced CRUD Controller family with four controllers. But there are a few notable differences:
| Sync | Async | |
|---|---|---|
| Single API Model | SyncApiCRUDController<Entity, ApiModel, DbContext> |
AsyncApiCRUDController<Entity, ApiModel, DbContext> |
| Separate List and Detail API Models | SyncApiCRUDController<Entity, DetailApiModel, ListApiModel, DbContext> |
AsyncApiCRUDController<Entity, DetailApiModel, ListApiModel, DbContext> |
| Sync | Async | |
|---|---|---|
| Single API Model | SyncEnhancedApiCRUDController<Entity, ApiModel, SearchApiModel, DbContext> |
AsyncEnhancedApiCRUDController<Entity, ApiModel, SearchApiModel, DbContext> |
| Separate List and Detail API Models | SyncEnhancedApiCRUDController<Entity, DetailApiModel, ListApiModel, DbContext> |
AsyncEnhancedApiCRUDController<Entity, DetailApiModel, ListApiModel, DbContext> |
Using an ApiCRUDController, you can do all of the things our very simple ApiController did, but without doing any of the work because it comes with default implementations for the HTTP Verbs GET, PUT, POST, and DELETE. For example, we could have an AsyncApiCRUDController like the following:
public class UserController : AsyncApiCRUDController<User, UserApiModel, MyFirstProjectDbContext> {}Let's try running the same GET method we ran earlier, but instead of the User with an Id of 1 (which no longer exists since we deleted and created a new Jane Doe), we'll get the User with an Id of 2:

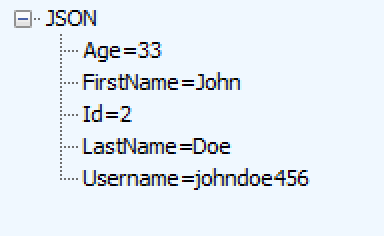
As you can see, our UserController works just as it did before, but it comes with default implementations for the HTTP Verb methods. In addition, we can now use the CountAll method to return the number of Users in the database. Let's try the CountAll method in Fiddler:

As expected, this method returns 8, the number of Users we currently have in the database.
Just like with MVC models, you can choose where to put the validation for your application. If you want the validation logic to apply to all Users over all aspects of the application and in any UI for the application, you should put the the validation in the Entity object. However, if you want the validation logic to apply to only those controllers that use a certain API Model, you should add the validation to the Model.
Let's add the validation logic to our User Entity so that no User under 21 years of age can be added to the system.
public class User : Entity
{
	public override IEnumerable<ValidationResult> Validate(ValidationContext validationContext)
	{
		var vr = (ValidationResultList)base.Validate(validationContext) ?? new ValidationResultList();
		if (Age < 21) vr.AddValidationResult(this, x => x.Age, "Must be of legal drinking age");
		return vr;
	}

	[Required] public string Username { get; set; }
	public string FirstName { get; set; }
	public string LastName { get; set; }
	[Required] public int? Age { get; set; }
}
Now, if we try to update the age property of one of the Users in our system to be 19 years old, we will get an error. For example, let's attempt to change John Doe's age to 19:
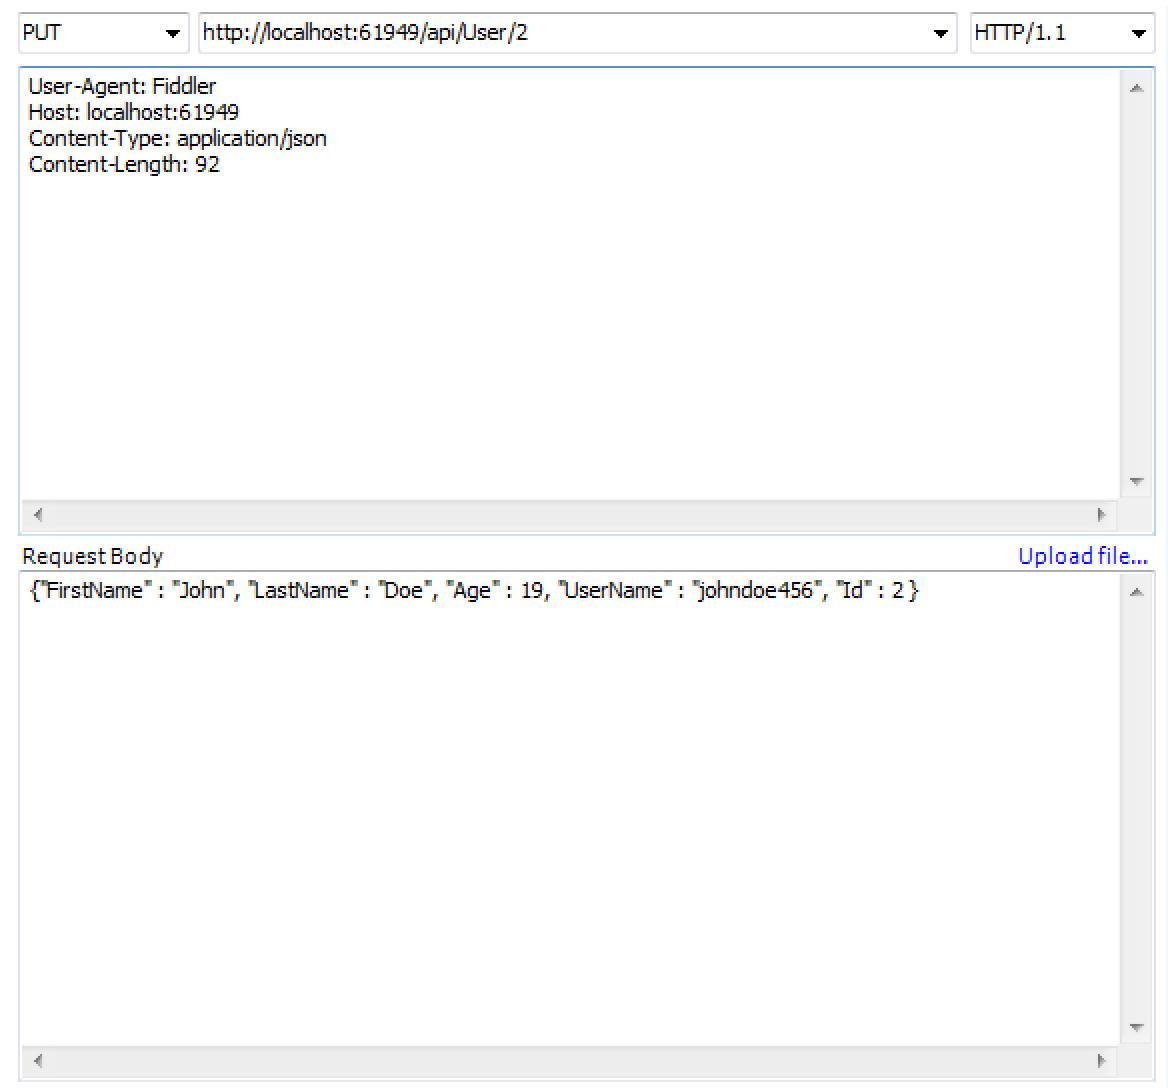
When we execute the API call in Fiddler, we will receive an HTTP Status code of 417: Expectation Failed.

And if we look at the returned JSON, we will see that the error message we created for our age validation method, "Must be of legal drinking age," was returned.
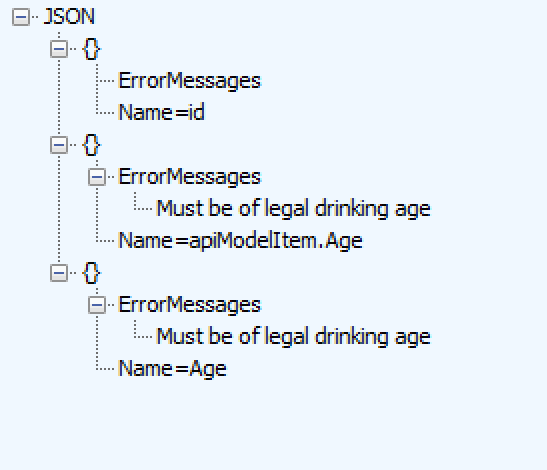
You can add searching, sorting, and paging functionality by adding a SearchApiModel for your Entity and modifying your controller to be an Enhanced API CRUD Controller:
We'll add a new Search API Model for our User Entity. Let's create some new fields, FromAge and ToAge to find Users in a certain age range.
public class UserSearchApiModel : SearchApiModel
{
	public string Username { get; set; }
	public string FirstName { get; set; }
	public string LastName { get; set; }
	public int? FromAge { get; set; }
	public int? ToAge { get; set; }
}
Now we must change the UserController from a simple API CRUD controller to an Enhanced API CRUD Controller, which comes with built-in searching, sorting, and paging capabilities.
namespace Web.ApiControllers
{
	public class UserController : AsyncEnhancedApiCRUDController<User, UserApiModel, UserSearchApiModel, MyFirstProjectDbContext>
}
By default, our controller will know how to do paging and simple sorting. However, we still need to tell it how to do searching. You can do this by overriding the ApplySearchBy( ) method.
namespace Web.ApiControllers
{
	public class UserController : AsyncEnhancedApiCRUDController<User, UserApiModel, UserSearchApiModel, MyFirstProjectDbContext>
	{
		protected override IQueryable<User> ApplySearchBy(IQueryable<User> items, UserSearchApiModel searchBy)
		{
			if (!string.IsNullOrEmpty(searchBy.FirstName))
			{
				items = items.Where(x => x.FirstName.ToLower().Contains(searchBy.FirstName.ToLower()));
			}

			if (!string.IsNullOrEmpty(searchBy.LastName))
			{
				items = items.Where(x => x.LastName.ToLower().Contains(searchBy.LastName.ToLower()));
			}

			if (!string.IsNullOrEmpty(searchBy.Username))
			{
				items = items.Where(x => x.Username.ToLower().Contains(searchBy.Username.ToLower()));
			}

			if (searchBy.FromAge != null) items = items.Where(x => x.Age >= searchBy.FromAge);
			if (searchBy.ToAge != null) items = items.Where(x => x.Age <= searchBy.ToAge);
			return items;
		}
	}
}
To run a search, you will use the GET API call in Fiddler. Try running a search to find all the Users whose first names contain the letter "J":

Our database has two Users whose first names contain the letter "J", John Doe and Jane Doe. Our returned JSON data reflects this.
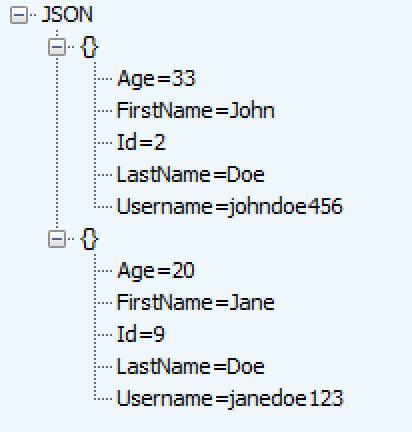
Now, try running a search using the FromAge and ToAge properties.

There are two Users whose ages fit the bill: Doctor Jeckyll and Sherlock Holmes, 55 and 58 years of age, respectively. This is accurately reflected in the JSON data that is returned.
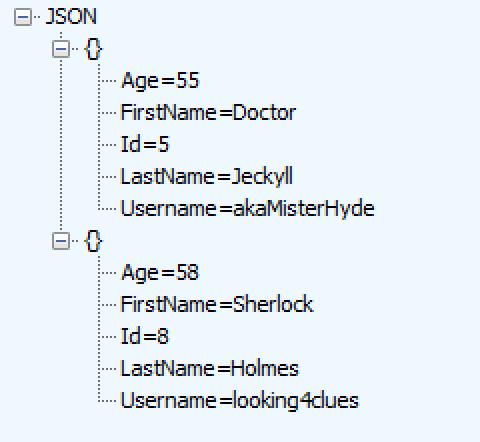
We can also sort our search results using Fiddler. Let's sort the Users between the ages of 50 and 100 by their last name by tacking the query "smSortBy=LastName" onto our URL:

Now, the Users returned by our query are sorted by last name in the returned JSON data:
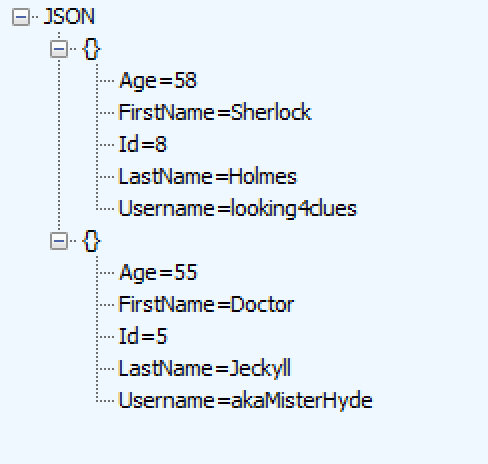
In order to prevent users from accessing things they should not be able to access, you can implement authorization and authentication in your Web API application.
Microsoft provides a very convenient authorization mechanism for Web API that works much the same way that it works in MVC, through the [Authorize] attribute and an optional RoleProvider. For more information on how this works, please see Microsoft's documentation.
Web API Authentication, on the other hand, is a different story. If you are using your Web Service in an AJAX application, your authentication is taken care of by (most likely) Web Forms Authentication that already exists for your web pages. In other words, if your User has logged-in to your website, the individual website pages that make AJAX calls to the server will pass along the session cookie that will authenticate you for the web server. However, if you are writing a mobile application, or if you have two servers talking to each other using web services, using Web Forms Authentication is not an option. For those scenarios, Supermodel offers several solutions based on industry standards.
Authentication in Web API can be done through Basic Authentication. Basic Authentication uses what's called an Authorization Header. The information contained within the Authorization Header is a Base-64 encoding of your login credentials in the format Authorization: Basic username : password.
Let's try to authorize a controller without any authentication:
namespace Web.ApiControllers
{
	[Authorize]
	public class UserController : AsyncEnhancedApiCRUDController<User, UserApiModel, UserSearchApiModel, MyFirstProjectDbContext>
	{
		protected override IQueryable<User> ApplySearchBy(IQueryable<User> items, UserSearchApiModel searchBy)
		{
			if (!string.IsNullOrEmpty(searchBy.FirstName))
			{
				items = items.Where(x => x.FirstName.ToLower().Contains(searchBy.FirstName.ToLower()));
			}

			if (!string.IsNullOrEmpty(searchBy.LastName))
			{
				items = items.Where(x => x.LastName.ToLower().Contains(searchBy.LastName.ToLower()));
			}

			if (!string.IsNullOrEmpty(searchBy.Username))
			{
				items = items.Where(x => x.Username.ToLower().Contains(searchBy.Username.ToLower()));
			}

			if (searchBy.FromAge != null) items = items.Where(x => x.Age >= searchBy.FromAge);
			if (searchBy.ToAge != null) items = items.Where(x => x.Age =< searchBy.ToAge);
			return items;
		}
	}
}
At this point, if we try to run an API call within Fiddler, we will receive an HTTP status code of 401: Unauthorized. This is because we haven't authenticated any Users yet, so we can't authorize them.

In order to implement security on your server, we will create a folder in your Domain under "Supermodel" called "Auth". Within this folder, we'll add a class called "MyFirstProjectAuthenticateAttribute.cs". This class will derive from the Supermodel base class AuthenticateAttribute. AuthenticateAttribute is an abstract class, so we will need to implement the missing members within our class. There are three missing members, AuthenticateBasicAndGetIdEntityByName( ), AuthenticateEncryptedAndGetIdEntityName( ), and EncryptionKey. The second and third missing members are used for more advanced security, which will look at later. For Basic Authentication, just throw System.NotImplementedException() in those methods. We will implement the AuthenticateBasicAndGetIdEntityByName( ) shortly:
public class MyFirstProjectAuthenticateAttribute : AuthenticateAttribute
{
	protected override string AuthenticateBasicAndGetIdentityName(string username, string password) {}

	protected override string AuthenticateEncryptedAndGetIdentityName(string[] args, out string password)
	{
		throw new System.NotImplementedException();
	}

	protected override byte[] EncryptionKey
	{
		get { throw new NotImplementedException(); }
	}
}
In our UserController, let's add the second attribute [MyFirstProjectAuthenticate].
namespace Web.ApiControllers
{
	[Authorize, MyFirstProjectAuthenticate]
	public class UserController : AsyncEnhancedApiCRUDController<User, UserApiModel, UserSearchApiModel, MyFirstProjectDbContext>
	{
		protected override IQueryable<User> ApplySearchBy(IQueryable<User> items, UserSearchApiModel searchBy)
		{
			if (!string.IsNullOrEmpty(searchBy.FirstName))
			{
				items = items.Where(x => x.FirstName.ToLower().Contains(searchBy.FirstName.ToLower()));
			}
			if (!string.IsNullOrEmpty(searchBy.LastName))
			{
				items = items.Where(x => x.LastName.ToLower().Contains(searchBy.LastName.ToLower()));
			}
			if (!string.IsNullOrEmpty(searchBy.Username))
			{
				items = items.Where(x => x.Username.ToLower().Contains(searchBy.Username.ToLower()));
			}

			if (searchBy.FromAge != null) items = items.Where(x => x.Age >= searchBy.FromAge);
			if (searchBy.ToAge != null) items = items.Where(x => x.Age =< searchBy.ToAge);
			return items;
		}
	}
}
For simplicity's sake, we'll go ahead and hardcode this information into our AuthenticateBasicAndGetIdentityName( ) method in our MyFirstProjectAuthenticateAttribute class:
public class MyFirstProjectAuthenticateAttribute : AuthenticateAttribute
{
	protected override string AuthenticateBasicAndGetIdentityName(string username, string password)
	{
		if (username == "Aladdin" && password == "open sesame") return "1";
		return null;
	}

	protected override string AuthenticateEncryptedAndGetIdentityName(string[] args, out string password)
	{
		throw new System.NotImplementedException();
	}

	protected override byte[] EncryptionKey
	{
		get { throw new NotImplementedException(); }
	}
}
AuthenticateBasicAndGetIdentityName( ) and AuthenticateEncryptedAndGetIdentityName( ) methods return null if the User can not be authenticated, or return a string that will be used by Windows as the Principal Identity of the logged-in User. It is common to return the integer Id converted to string for the User in the database. For this hardcoded example, we're just returning "1".
To add an authenticated User, we'll use the following Authorization Header and paste it into the header on Fiddler:
Authorization: Basic QWxhZGRpbjpvcGVuIHNlc2FtZQ==Encoded in the above header is the Username "Aladdin" and the Password "open sesame".
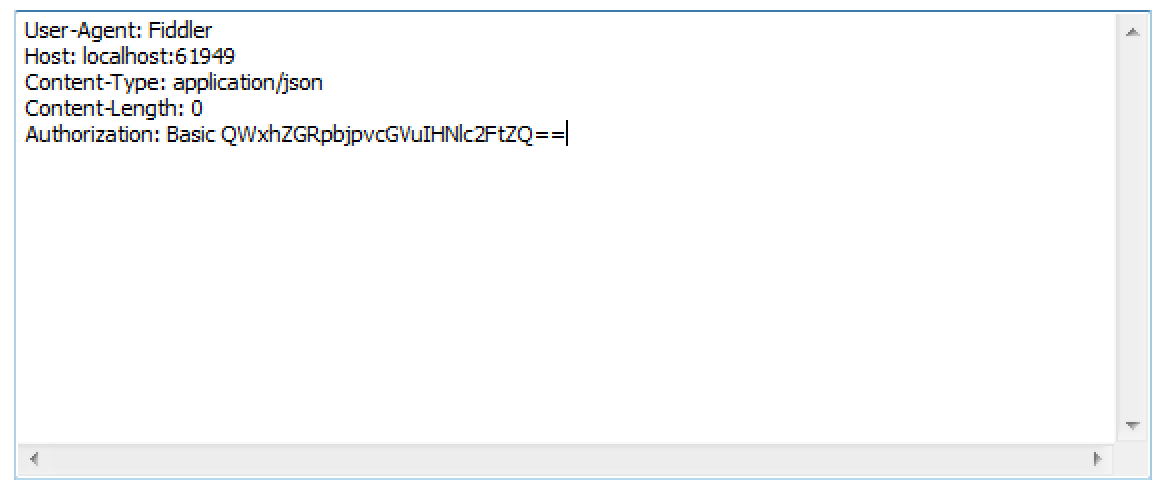
Now, if you run an API call in Fiddler, it will return a 200 HTTP Success code and return the data from the API call.
Also, any CRUD API controller will have a ValidateLogin method. Let's try using the ValidateLogin method if we don't have an AuthHeader:
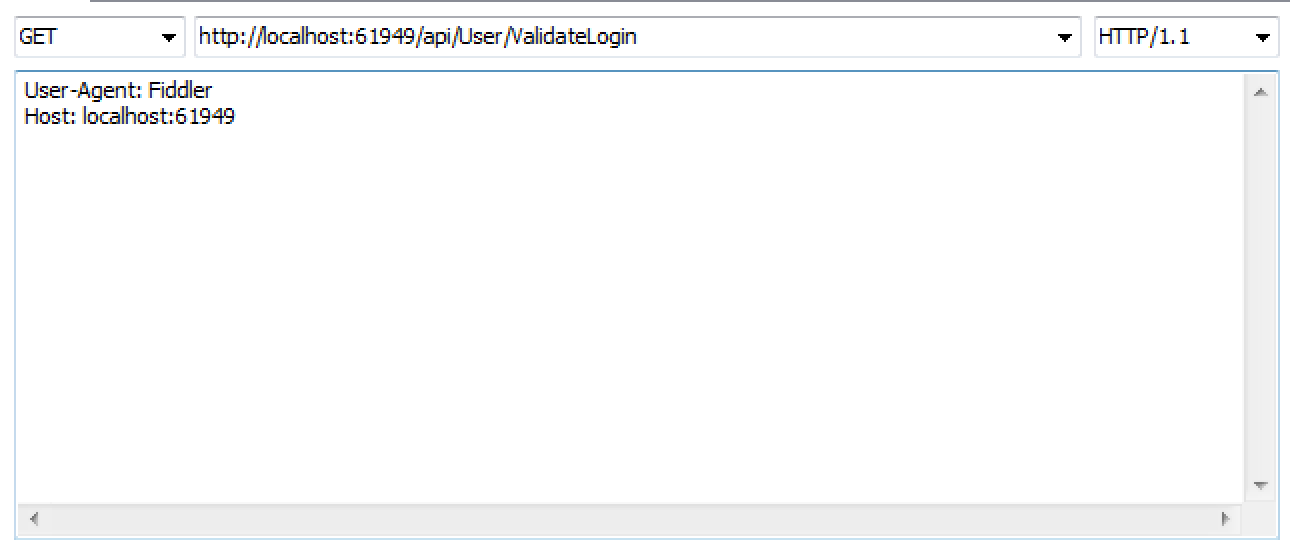
As expected, we receive a 401: Unauthorized response:

However, if we add the AuthHeader, our ValidateLogin method should work:
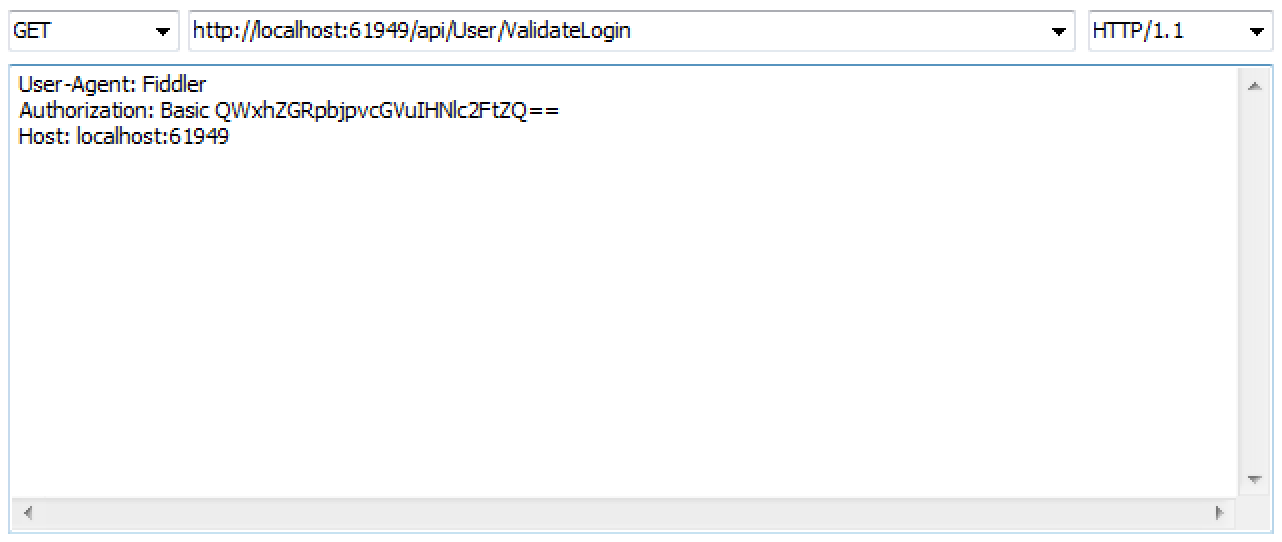
And, as we predicted, we receive a 200 HTTP success response:

ValidateLogin( ) is particularly useful in mobile apps that need to validate credentials to log in the users without performing any other operation.
Since it could get tiresome to add the MyFirstProjectAuthenticate attribute to every controller, there is a way to streamline this. You can do this by going into your Global.asax file and adding a parameter to your SupermodelInitialization.Init( ) method called webApiAuthFilter. This way, all Web API methods will authenticate using this filter. They may or may not allow an anonymous user still. That would be determined by whether or not the authorization is required.
public class Global : HttpApplication
{
	void Application_Start(object sender, EventArgs e)
	{
		//Code that runs on application startup
		AreaRegistration.RegisterAllAreas();

		SupermodelInitialization.Init<MyFirstProjectDbContext>(webApiAuthFilter: new MyFirstProjectAuthenticateAttribute());
		InitializerManager.InitPerConfig(new List<IDatabaseInitializer<MyFirstProjectDbContext>>
		{
			new MyFirstProjectCreateDatabaseIfNotExists(),
			new MyFirstProjectDropCreateDatabaseIfModelChanges(),
			new MyFirstProjectDropCreateDatabaseAlways()
		});
	}
}
Batch processing makes it easier to create Enterprise Systems (large-scale systems) with Web API. Supermodel gives you a mechanism to create batch jobs, which are a combination of different Web API operations that are submitted in one HTTP request and treated by the server as one transaction. This means that batch processing is an all-or-nothing operation: either all of the Web API operations succeed or they all fail.
Supermodel implements an industry emerging standard for batch processing using HTTP multicast.
Let's walk through batch processing usage.
We'll need to specify a few things in our header in Fiddler. First, our Content-Type will be "multipart/mixed;". We also need to specify the boundary, which is a long string of characters that is unique and will be used as an escape character for your request.
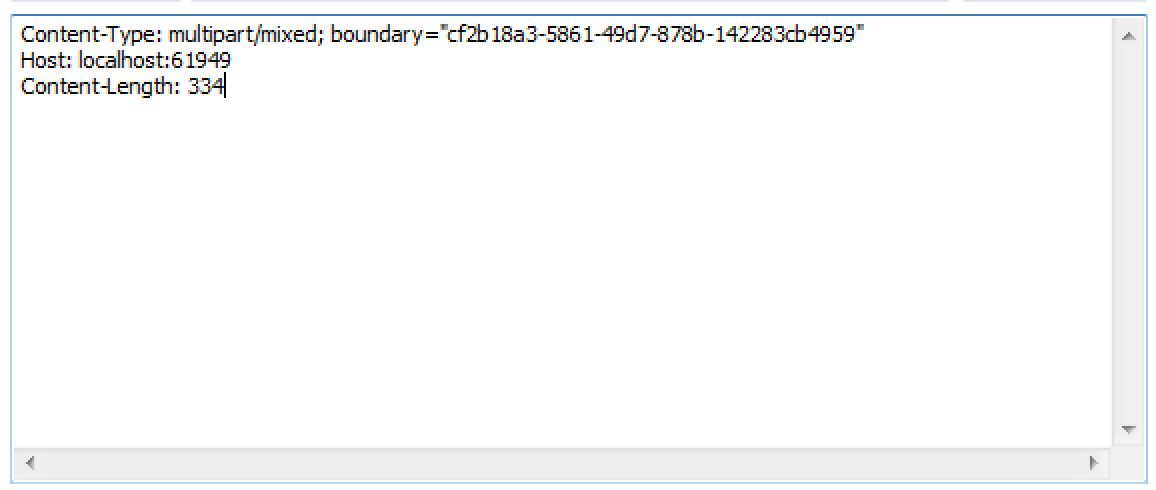
We also need to update our HTTP request. Our HTTP Verb needs to be changed to POST and URL will point to api/$batch. All batch requests will be posted to this URL. This is an emerging industry standard that Supermodel followed.

Finally, we need to update the Request Body in Fiddler. The Request Body should be formatted like so:
--boundary string
Content-Type: application/http; msgtype=request

GET /api/User/Query HTTP/1.1
Host: localhost:#####


--boundary string
Content-Type: application/http; msgtype=request

GET /api/User/AnotherQuery HTTP/1.1
Host: localhost:#####


--boundary string--
Note that spacing is important for the batch process to execute correctly. Furthermore, you don't have to stop at two requests. In fact, you can have an unlimited number of requests. Below is an example of an actual Request Body for a batch process:
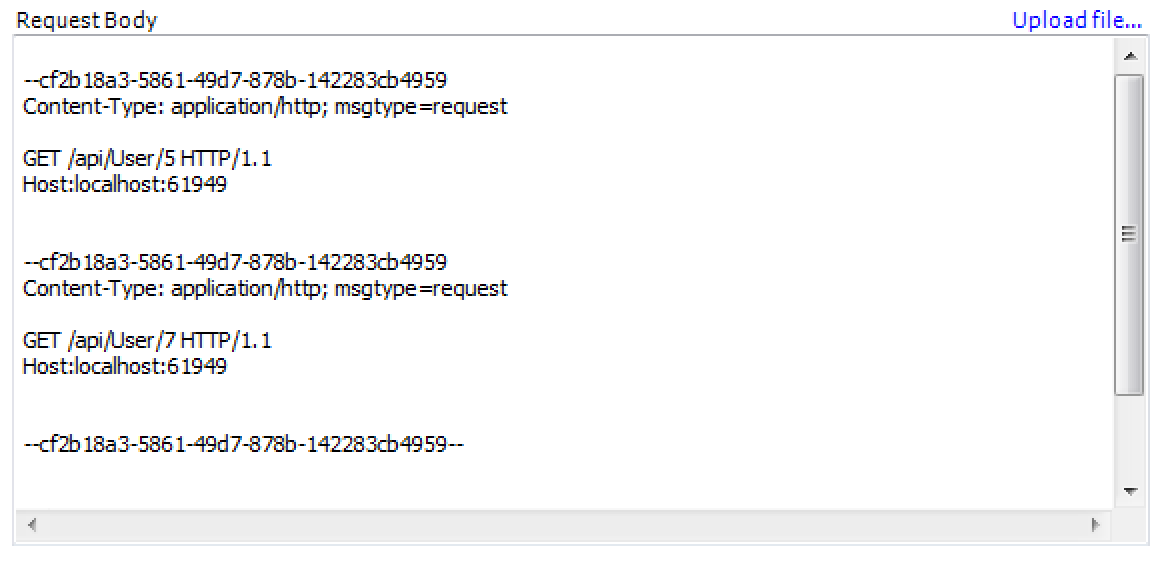
When we execute the batch processing request, the following raw data is returned to us:
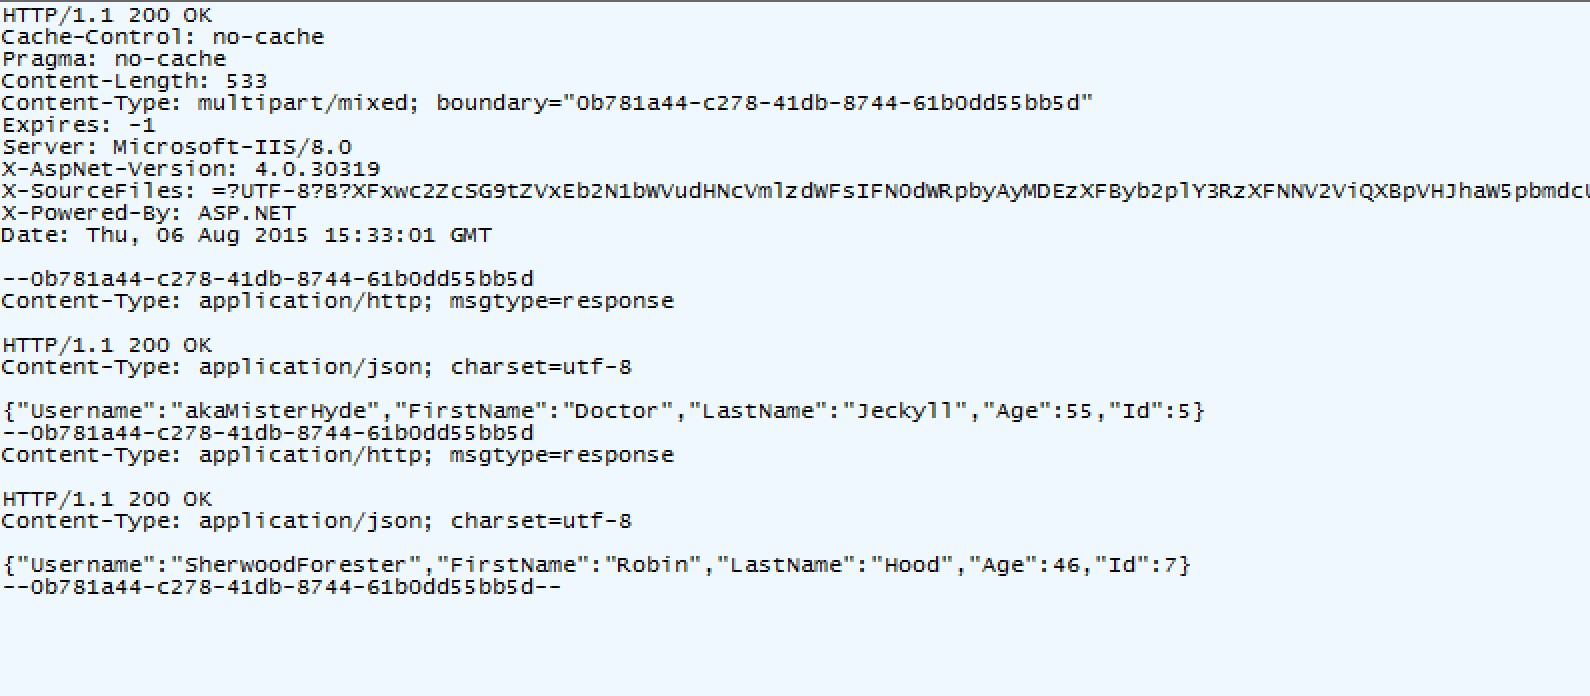
As you can see, we were returned the Users with Ids 5 and 7, as requested.
You can have any number of requests in a batch and the action methods for those don't need to be written in any special way.
Let's create a command line utility that will communicate with our web service. Before getting started, it should be noted that there is no such thing as synchronous Web API calls on the client. This is because the new HttpClient class by Microsoft
only allows async. Besides, it would be a very bad practice to make HTTP calls in a blocking way.
To start, add a new Console Application project within your project directory called "HttpClientCmd". This program will be what communicates with our web service.
Then, create a Util directory within your project. Add a new Console Application project under Util called "ModelGenerator", which is a program that will generate the models for our web service.
For both HttpClientCmd and ModelGenerator, you will need to reference the WebProject, ReflectionMapper, and Supermodel. In addition, add the NuGet packages Entity Framework, JSON.NET, MVC, and WebAPI to both projects.
Within "ModelGenerator", write the following code:
namespace ModelGenerator
{
	class Program
	{
		static void Main()
		{
			var modelGenerator = new Supermodel.Mobile.Xamarin.ModelGenerator(typeof (UserController).Assembly);
			var modelsCS = modelGenerator.GenerateModels();
			File.WriteAllText(@"..\..\" + "Supermodel.Mobile.ModelsAndRuntime.cs", modelsCS.ToString());
			File.WriteAllText(@"..\..\..\HttpClientCmd\Supermodel.Mobile.ModelsAndRuntime.cs", modelsCS.ToString());

			Console.WriteLine("All done! Press enter.");
			Console.ReadLine();
		}
	}
}
In the above code snippet, Supermodel will inspect the Web API (that belongs in the assembly that we passed to the ModelGenerator. In this case: typeof (UserController).Assembly.) and generate Models and runtime libraries. You should set this up to copy new models and rumtime to any project that needs an HTTP Client and you should rerun this command line utility to regenerate your Models every time you change your Web API on the server.
When you run the ModelGenerator code, a new file called Supermodel.ModelsAndRuntime.cs will be created under both the HttpClientCmd and the ModelGenerator directory.
In your Solution Explorer, you will need to select "Show All Files" before the new files appear. Right-click on each of these files and select "Include in Project". We only want Supermodel.ModelsAndRuntime.cs to compile in HttpClientCmd, so under ModelGenerator, right-click
Supermodel.ModelsAndRuntime.cs and select Properties. Next to the section Build Action, select "None".
Within this file are two regions: Models and Supermodel.Mobile.Runtime. Within the Models region, you will find that the Models for your Entity, as well as all dependent classes and enums, have been generated and are grouped by
their respective controllers. The Supermodel.Mobile.Runtime region contains a runtime library for your Web Service client application.
At the top of the Supermodel.ModelsAndRuntime.cs file, you will see a section called Project Setup Instructions, which tells you what references you need to include in your project in order for it to successfully compile.
First, under HttpClientCmd, right-click References and select "Add Reference..." Select the Assemblies tab and search for each of the following:
//PROJECT SETUP INSTRUCTIONS:
//
//1) Please add the following references:
//   a. System.Net.Http
//   b. If programming on the server, System.Net.Http.Formatting
//   c. System.Data.Sqlite (if using Visual Studio) or Mono.Data.Sqlite (if using Xamarin Studio). If programming for server, add it as a Mono.Data.Sqlite NuGet
//   d. System.Data
//   e. If programming on the server, System.Web
//   f. System.ComponentModel.DataAnnotations
//   g. System.Runtime.Serialization
//   h. System.Web.Services
//   i. Json.NET (NuGet package)
//   j. ModernHttpClient (NuGet package) -- this one is only for Mobile
//   k. Xamarin.Forms (NuGet package) -- this one is only for Mobile
//
//2) For iOS only: under build options please add --nolinkaway to Additional mtouch arguments
//   For more info on this, pleasee see:
// https://spouliot.wordpress.com/2011/11/01/linker-vs-linked-away-exceptions/namespace HttpClientCmd
{
public class MyFirstProjectWebApiDataContext : WebApiDataContext
{
public override string BaseUrl
{
get { return "http://localhost:#####/api/"; }
}
}
}Now, let's specify the UnitOfWork for our client. Under HttpClientCmd, add a class called MyFirstProjectWebApiUnitOfWork. The UnitOfWork on the client is almost symmetrical to the UnitOfWork on the server. Note that it also implements a stack (see UnitOfWork Stack), but their stacks are independent. Just like the UnitOfWork stack on the server, the UnitOfWork on the client supports unlimited nesting. One key difference between the two, however, is that the UnitOfWork on the client does not support UnitOfWorkIfNoAmbientContext. Otherwise, the client's UnitOfWork possesses all of the same functionality as the server's UnitOfWork, managing a set of operations that happen within a single transaction. Note that the UnitOfWork class our MyFirstProjectWebApiUnitOfWork derives from is Supermodel.Mobile.DataContext. Within our UnitOfWork, we need to specify the default constructor as well as a constructor that takes the ReadOnly enum:
namespace HttpClientCmd
{
	public class MyFirstProjectWebApiUnitOfWork : UnitOfWork<MyFirstProjectWebApiDataContext>
	{
		public MyFirstProjectWebApiUnitOfWork() { }
		public MyFirstProjectWebApiUnitOfWork (ReadOnly readOnly) : base(readOnly) { }
	}
}
We can now start writing code that will allow the client to communicate with the server. Remember that everything on the client must be async. We can only call async methods from another async method that returns void or a Task. We cannot make the Main( ) method async, so we need to create another method that will allow us to run asynchronously. We'll call this method RunAsync( ). Go to Program.cs under HttpClientCmd and write the following:
namespace HttpClientCmd
{
	class Program
	{
		static void Main()
		{
			RunAsync();
			Console.WriteLine("Running. Press enter at any time to quit...");
			Console.WriteLine();
			Console.ReadLine();
		}

		public static async void RunAsync()
		{
			using (new MyFirstProjectWebApiUnitOfWork(ReadOnly.Yes))
			{
				var repo = RepoFactory.Create<User>();
				var all = await repo.GetAllAsync( );
				foreach (var user in all) Console.WriteLine("First Name: {0} Age: {1}", user.FirstName, user.Age);
				Console.WriteLine();
				Console.WriteLine("Done.");
			}
		}
	}
}
Note the use of await before the GetAllAsync( ) call in the code snippet above. This means RunAsync( ) will not wait for the call to be completed and return, and the rest of the method will be run as a completion handler.
If the Authenticate Attribute is still included in your UserController (see the previous section "Adding Security and Authentication to your Web API"), you will need to specify the AuthenticationHeader in your client application, or else you will not be able to authorize your Web API client. If you do not wish to include security features in your Web API, simply remove the Authenticate Attribute and do not include the following added line of code (in red).
namespace HttpClientCmd
{
	class Program
	{
		static void Main()
		{
			RunAsync();
			Console.WriteLine("Running. Press enter at any time to quit...");
			Console.WriteLine();
			Console.ReadLine();
		}

		public static async void RunAsync()
		{
			using (new MyFirstProjectWebApiUnitOfWork(ReadOnly.Yes))
			{
				UnitOfWorkContext.AuthHeader = HttpAuthAgent.CreateBasicAuthHeader("Aladdin", "open sesame");
				var repo = RepoFactory.Create<User>();
				var all = await repo.GetAllAsync( );
				foreach (var user in all) Console.WriteLine("First Name: {0} Age: {1}", user.FirstName, user.Age);
				Console.WriteLine();
				Console.WriteLine("Done.");
			}
		}
	}
}
Be sure to always include the following line in your RunAsync( ) method:
UnitOfWorkContext.AuthHeader = HttpAuthAgent.CreateBasicAuthHeader("Aladdin", "open sesame");In order to run/debug the code, we have to run two projects in the same solution: first, we will run our Web project (which we will set as our startup project) and then we can right-click your HttpClientCmd project and under "Debug", select "Start New Instance". Now you have two projects running within the same solution.
When the code runs, we'll get the following as a result:
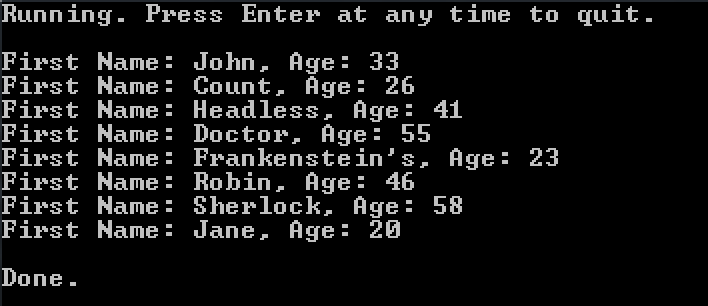
Furthermore, there are a number of read-only async methods that the repo can call. These include the following:
Returns the object with the specified Id. Throws an exception if an object with the given Id does not exist.
Returns the object with the specified Id. Returns null if an object with the given Id does not exist.
Returns all of the objects within your database.
Returns the count of all of the objects within your database.
Allows you to specify a searchBy parameter and a sortBy parameter and returns the objects in the database that fit the search criteria.
Allows you to specify a searchBy parameter and returns the number of objects in the database that fit the search criteria.
Let's try a few of these methods now. Let's start by using the GetCountAllAsync() method.
namespace HttpClientCmd
{
	class Program
	{
		static void Main()
		{
			RunAsync();
			Console.WriteLine("Running. Press enter at any time to quit...");
			Console.WriteLine();
			Console.ReadLine();
		}

		public static async void RunAsync()
		{
			using (new MyFirstProjectWebApiUnitOfWork(ReadOnly.Yes))
			{
				var repo = RepoFactory.Create<User>();
				var all = await repo.GetAllAsync( );
				foreach (var user in all) Console.WriteLine("First Name: {0} Age: {1}", user.FirstName, user.Age);

				Console.WriteLine();

				var countAll = await repo.GetCountAllAsync();
				Console.WriteLine("Count All: " + countAll);

				Console.WriteLine();
				Console.WriteLine("Done.");
			}
		}
	}
}
When we run this, we will get a count of all the users in the database:
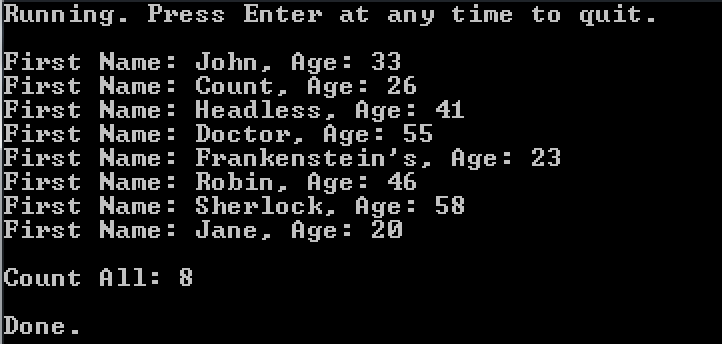
Let's add another method to our program that counts all of the Users whose first name contains the letter "J". To do this, we'll use the GetCountWhereAsync( ) method. This method takes our UserSearchApiModel that we defined earlier and our search parameters.
public class UserSearchApiModel : SearchApiModel
namespace HttpClientCmd
{
	class Program
	{
		static void Main()
		{
			RunAsync();
			Console.WriteLine("Running. Press enter at any time to quit...");
			Console.WriteLine();
			Console.ReadLine();
		}

		public static async void RunAsync()
		{
			using (new MyFirstProjectWebApiUnitOfWork(ReadOnly.Yes))
			{
				var repo = RepoFactory.Create<User>();
				var all = await repo.GetAllAsync( );
				foreach (var user in all) Console.WriteLine("First Name: {0} Age: {1}", user.FirstName, user.Age);

				Console.WriteLine();

				var countAll = await repo.GetCountAllAsync();
				Console.WriteLine("Count All: " + countAll);

				Console.WriteLine();

				var countWhereContainsJ = await repo.GetCountWhereAsync(new UserSearchApiModel {FirstName = "j"});
				Console.WriteLine("Count Where Contains J: " + countWhereContainsJ);

				Console.WriteLine();
				Console.WriteLine("Done.");
			}
		}
	}
}
In our database, there are two users who have first names that contain the letter "J": Jane Doe and John Doe. Sure enough, the count returned is 2.
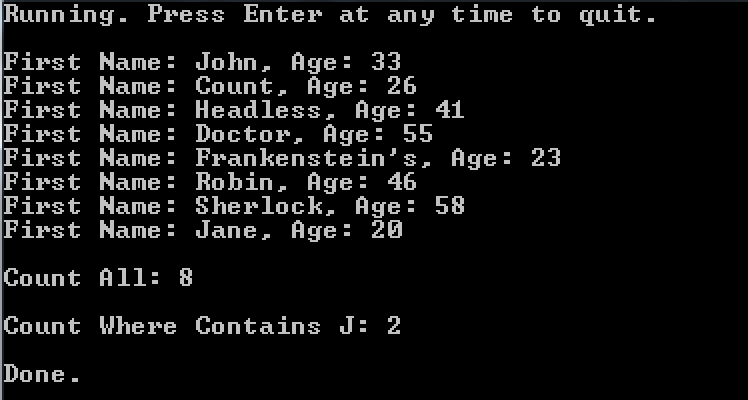
You can also make changes to the database using the client. The first thing we must do is change the UnitOfWork within our program to be Read/Write. To do this, change ReadOnly.Yes to ReadOnly.No:
using (new MyFirstProjectWebApiTrainingUnitOfWork(ReadOnly.No))You can also just leave it blank, as the UnitOfWork is ReadOnly.No by default:
using (new MyFirstProjectWebApiTrainingUnitOfWork())We'll now attempt to delete all users with the first name "Jane" in the database. Try running the code below:
namespace HttpClientCmd
{
	class Program
	{
		static void Main()
		{
			RunAsync();
			Console.WriteLine("Running. Press enter at any time to quit...");
			Console.WriteLine();
			Console.ReadLine();
		}

		public static async void RunAsync()
		{
			using (new MyFirstProjectWebApiUnitOfWork(ReadOnly.Yes))
			{
				var repo = RepoFactory.Create<User>();
				var all = await repo.GetAllAsync( );
				foreach (var user in all) Console.WriteLine("First Name: {0} Age: {1}", user.FirstName, user.Age);

				Console.WriteLine();

				var countAll = await repo.GetCountAllAsync();
				Console.WriteLine("Count All: " + countAll);

				Console.WriteLine();

				var countWhereContainsJ = await repo.GetCountWhereAsync(new UserSearchApiModel {FirstName = "j"});
				Console.WriteLine("Count Where Contains J: " + countWhereContainsJ);

				var janes = await repo.GetWhereAsync(new UserSearchApiModel {FirstName = "Jane"});
				foreach (var jane in janes) jane.Delete();

				Console.WriteLine();
				Console.WriteLine("Done.");
			}
		}
	}
}
If you tried running this code, you will see that we get an exception:
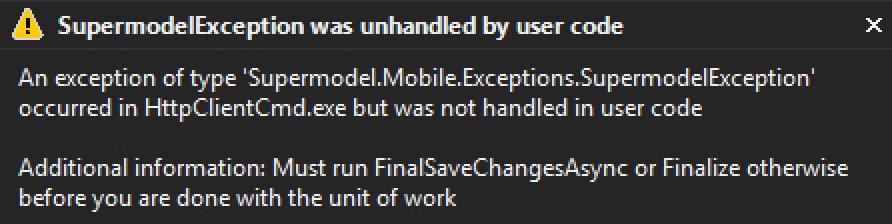
The exception reads "Must run FinalSaveChangesAsync or Finalize otherwise before you are done with the unit of work". So, what happened?
Within the server, UnitOfWork implements IDisposable Interface. This means that there is a dispose method that is going to get called whenever UnitOfWork becomes out of scope. On the server, it is within the Dispose( ) method that the SaveChanges( ) method is called.
On the server side, we're used to changes being saved automatically. However, you cannot do the same thing on the client. This is because you can only save changes asynchronously on the client and on the client you cannot call an asynchronous method within the synchronous IDisposable implementation.
So, if you make any changes to your database through your client application (Add or Delete or modifications to your Entities), it's fundamental that, after you have made all of the changes you plan to make to the database, you call the function:
await UnitOfWorkContext.FinalSaveChangesAsync();Note that the call to FinalSaveChangesAsync( ) doesn't need to be at the very end of the program. Rather, it simply needs to be after you have made all of the changes you plan to make to the database. This is because the FinalSaveChangesAsync( ) method marks the UnitOfWork as finalized, so any changes made after the method is called will not be persisted to the database.
namespace HttpClientCmd
{
	class Program
	{
		static void Main()
		{
			RunAsync();
			Console.WriteLine("Running. Press enter at any time to quit...");
			Console.WriteLine();
			Console.ReadLine();
		}

		public static async void RunAsync()
		{
			using (new MyFirstProjectWebApiUnitOfWork(ReadOnly.Yes))
			{
				var repo = RepoFactory.Create<User>();
				var all = await repo.GetAllAsync( );
				foreach (var user in all) Console.WriteLine("First Name: {0} Age: {1}", user.FirstName, user.Age);

				Console.WriteLine();

				var countAll = await repo.GetCountAllAsync();
				Console.WriteLine("Count All: " + countAll);

				Console.WriteLine();

				var countWhereContainsJ = await repo.GetCountWhereAsync(new UserSearchApiModel {FirstName = "j"});
				Console.WriteLine("Count Where Contains J: " + countWhereContainsJ);

				var janes = await repo.GetWhereAsync(new UserSearchApiModel {FirstName = "Jane"});
				foreach (var jane in janes) jane.Delete();

				await UnitOfWorkContext.FinalSaveChangesAsync();

				Console.WriteLine();
				Console.WriteLine("Done.");
			}
		}
	}
}
Now that we have added FinalSaveChangesAsync( ), our program will now work:
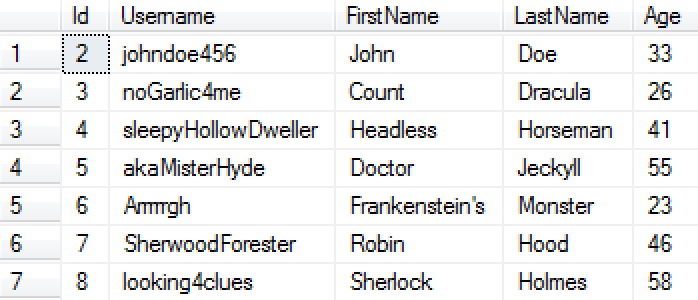
You will also need to use FinalSaveChangesAsync( ) when using the Add( ) method to add an object to the database. Let's try adding a new User to the database:
namespace HttpClientCmd
{
	class Program
	{
		static void Main()
		{
			RunAsync();
			Console.WriteLine("Running. Press enter at any time to quit...");
			Console.WriteLine();
			Console.ReadLine();
		}

		public static async void RunAsync()
		{
			using (new MyFirstProjectWebApiUnitOfWork(ReadOnly.Yes))
			{
				var repo = RepoFactory.Create<User>();
				var all = await repo.GetAllAsync( );
				foreach (var user in all) Console.WriteLine("First Name: {0} Age: {1}", user.FirstName, user.Age);

				Console.WriteLine();

				var countAll = await repo.GetCountAllAsync();
				Console.WriteLine("Count All: " + countAll);

				Console.WriteLine();

				var countWhereContainsJ = await repo.GetCountWhereAsync(new UserSearchApiModel {FirstName = "j"});
				Console.WriteLine("Count Where Contains J: " + countWhereContainsJ);

				var janes = await repo.GetWhereAsync(new UserSearchApiModel {FirstName = "Jane"});
				foreach (var jane in janes) jane.Delete();

				var newUser = new User {FirstName="Julius", LastName="Caesar", Username="EtTuBrute", Age=54};
				newUser.Add();
				await UnitOfWorkContext.FinalSaveChangesAsync();

				Console.WriteLine();
				Console.WriteLine("Done.");
			}
		}
	}
}
After running this code, our new User, Julius Caesar, appears in our database:
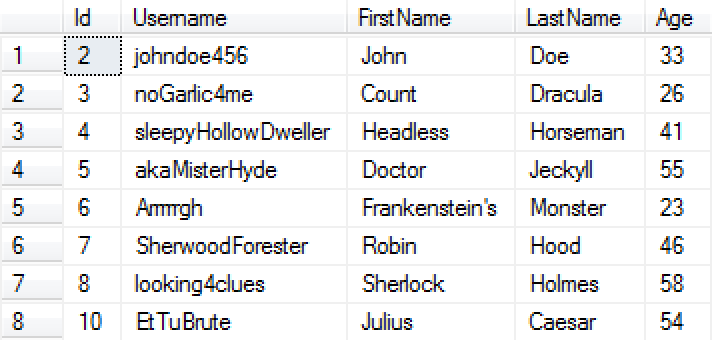
While on the server, the IDisposable implementation will save whatever pending changes it can find synchronously, the same cannot be done on the client (only an asynchronous way exists). In order to prevent the programmer from accidentally forgetting to save changes, IDisposable implementation on the client will throw an exception if we are inside a read/write UnitOfWork and some pending changes were not saved. Checking if pending changes exists will take some CPU cycles, even if no pending changes are there. Thus, for performance reasons, it's better to use FinalSaveChangesAsync( ). The method will tell the UnitOfWork that no more changes will be made, so there's no need for the IDisposable implementation to check for unsaved pending changes.
In order to further improve your application's performance, you can use Delayed Reads. Delayed Reads register the read, but don’t return any data until the changes are saved. This allows for better performance because your client application will only make one big call to the server, as opposed to many smaller calls. The delayed reads are rolled into one batch call with the rest of the pending changes.
Let's first implement the class DelayedModels, which takes the type of the Model as a parameter. Additionally, there are delay methods that are symmetric to the async methods listed previously in this section (scroll down for the full list of delayed read methods). We will then call the method DelayedGetAll( ) on the repo. We need to specify where the returned data goes, which we will do by passing it the Delayed Model we created:
DelayedModels<User> delayedAll;
repo.DelayedGetAll(out delayedAll);
When the DelayedGetAll(out delayedAll) method is called, delayedAll will be registered. However, it will remain empty until changes are saved. Once FinalSaveChangesAsync( ) is called, the delayedAll object will be populated. Then, after the call to save changes, we can print out all the read data by doing the following:
await UnitOfWorkContext.FinalSaveChangesAsync();
foreach (var user in delayedAll.Values) Console.WriteLine("First name:{0}, Age:{1}", user.FirstName, user.Age);
The full code would appear like so (note that the methods that write to the database have been deleted):
namespace HttpClientCmd
{
	class Program
	{
		static void Main()
		{
			RunAsync();
			Console.WriteLine("Running. Press enter at any time to quit...");
			Console.WriteLine();
			Console.ReadLine();
		}

		public static async void RunAsync()
		{
			using (new MyFirstProjectWebApiUnitOfWork(ReadOnly.Yes))
			{
				var repo = RepoFactory.Create<User>();
				var all = await repo.GetAllAsync( );
				foreach (var user in all) Console.WriteLine("First Name: {0} Age: {1}", user.FirstName, user.Age);

				Console.WriteLine();

				var countAll = await repo.GetCountAllAsync();
				Console.WriteLine("Count All: " + countAll);

				Console.WriteLine();

				var countWhereContainsJ = await repo.GetCountWhereAsync(new UserSearchApiModel {FirstName = "j"});
				Console.WriteLine("Count Where Contains J: " + countWhereContainsJ);

				Console.WriteLine();

				DelayedModels<User> delayedAll;
				repo.DelayedGetAll(out delayedAll);

				await UnitOfWorkContext.FinalSaveChangesAsync();

				foreach (var user in delayedAll.Values) Console.WriteLine("First Name:{0}, Age:{1}", user.FirstName, user.Age);

				Console.WriteLine();
				Console.WriteLine("Done.");
			}
		}
	}
}
As a result, our console will print out the same results that the GetAllAsync( ) method outputs:
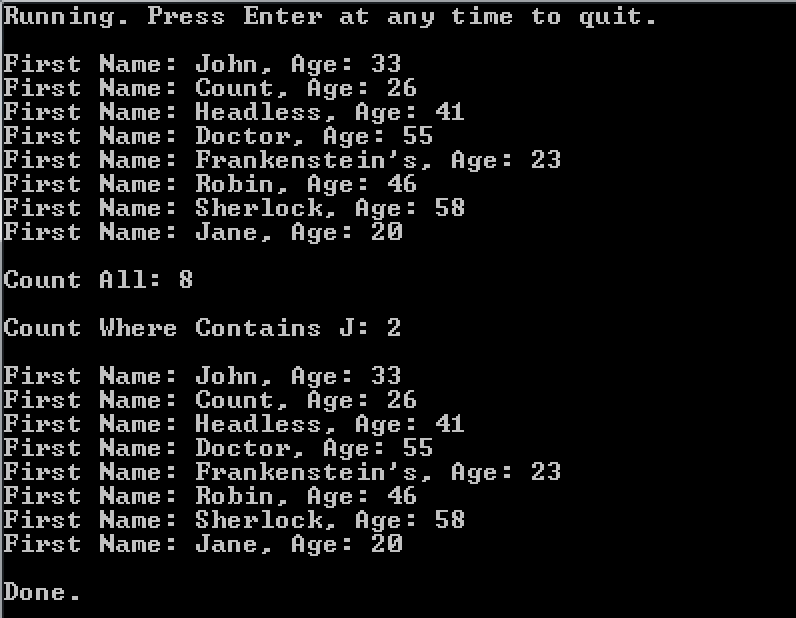
Let's add another method called DelayedGetById, which we will pass the Delayed Model and the Id of the User we wish to get. Note that since only one User will be returned, we specify DelayedModel<User>, as opposed to the plural DelayedModels<User> we used previously:
DelayedModel<User> delayedUserId7;
repo.DelayedGetById(out delayedUserId7, 7);
As with the delayedAll object, the delayedUserId1 object will not be populated until after the FinalSaveChangesAsync( ) method is called. Once it has been called, we can print out the read data:
await UnitOfWorkContext.FinalSaveChangesAsync();
...
Console.WriteLine("User with Id #7: First Name: {0} Last Name: {1}", delayedUserId7.Value.FirstName, delayedUserId7.Value.LastName);
The full code would appear like so:
namespace HttpClientCmd
{
	class Program
	{
		static void Main()
		{
			RunAsync();
			Console.WriteLine("Running. Press enter at any time to quit...");
			Console.WriteLine();
			Console.ReadLine();
		}

		public static async void RunAsync()
		{
			using (new MyFirstProjectWebApiUnitOfWork(ReadOnly.Yes))
			{
				var repo = RepoFactory.Create<User>();
				var all = await repo.GetAllAsync( );
				foreach (var user in all) Console.WriteLine("First Name: {0} Age: {1}", user.FirstName, user.Age);

				Console.WriteLine();

				var countAll = await repo.GetCountAllAsync();
				Console.WriteLine("Count All: " + countAll);

				Console.WriteLine();

				var countWhereContainsJ = await repo.GetCountWhereAsync(new UserSearchApiModel {FirstName = "j"});
				Console.WriteLine("Count Where Contains J: " + countWhereContainsJ);

				Console.WriteLine();

				DelayedModels<User> delayedAll;
				repo.DelayedGetAll(out delayedAll);

				DelayedModel<User> delayedUserId7;
				repo.DelayedGetById(out delayedUserId7, 7);

				await UnitOfWorkContext.FinalSaveChangesAsync();

				foreach (var user in delayedAll.Values) Console.WriteLine("First Name:{0}, Age:{1}", user.FirstName, user.Age);

				Console.WriteLine();

				Console.WriteLine("Person with Id #7: First Name: {0} Last Name: {1}", delayedUserId7.Value.FirstName, delayedUserId7.Value.LastName);

				Console.WriteLine();
				Console.WriteLine("Done.");
			}
		}
	}
}
As a result, the User with Id 7, Robin Hood, is returned and printed to the console:
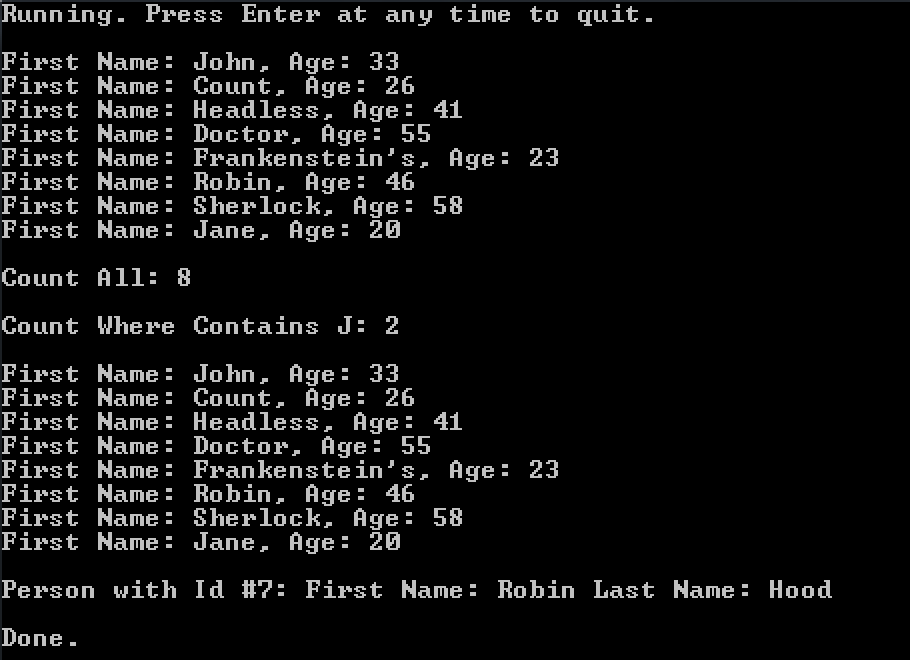
Below are all of the delayed read methods that you can make use of. Note that you must specify where to store the data:
Returns the object with the specified Id. Throws an exception if an object with the given Id does not exist.
Returns the object with the specified Id. Returns null if an object with the given Id does not exist.
Returns all of the objects within your database.
Returns the count of all of the objects within your database.
Allows you to specify a searchBy parameter and a sortBy parameter and returns the objects in the database that fit the search criteria.
Allows you to specify a searchBy parameter and returns the number of objects in the database that fit the search criteria.
Delayed reads happen in the order in which they are listed within your UnitOfWork. In other words, if you just added an Entity before the delayed read, you'll be able to read it with the delayed read. Furthermore, if you delete an Entity after the delayed read, it will still be visible at the time of the delayed read because you haven't deleted it yet. This applies to Add and Delete, but doesn't work the same way with Update. The reason for that is that updates always happen last in a transaction because when you call a save changes method, any Models that have been updated are detected at that time and added to the list of pending changes that you need to make. Therefore, making updates will always be at the end of the list of pending changes regardless of when the Model was actually modified within the UnitOfWork.
If you do not wish to use the standard Basic Authentication header, you can use your own custom header by overriding a method called AuthHeaderName() within your MyFirstProjectAuthenticateAttribute class. All custom headers, by convention, need to start with "X-":
protected override string AuthHeaderName
{
	get { return "X-MyFirstProject-Authorization"; }
}
Then, within your client application, you must register the header within the UnitOfWorkContext:
namespace HttpClientCmd
{
	class Program
	{
		static void Main()
		{
			RunAsync();
			Console.WriteLine("Running. Press enter at any time to quit...");
			Console.WriteLine();
			Console.ReadLine();
		}

		public static async void RunAsync()
		{
			using (new MyFirstProjectWebApiUnitOfWork(ReadOnly.Yes))
			{

				UnitOfWorkContext.AuthHeader = HttpAuthAgent.CreateBasicAuthHeader("Aladdin", "open sesame");
				UnitOfWorkContext.AuthHeader.HeaderName = "X-MyFirstProject-Authorization";
				var repo = RepoFactory.Create<User>();
				var all = await repo.GetAllAsync( );
				foreach (var user in all) Console.WriteLine("Name: {0} Age: {1}", user.FullName, user.Age);
				Console.WriteLine();
				Console.WriteLine("Done.");
			}
		}
	}
}
You can also make the Authentication Header encrypted. Instead of using the AuthenticateBasicAndGetIdEntityName( ) method, we will implement the AuthenticateEncryptedandGetIdEntityName( ) method. This method takes an array of strings of any length that are encrypted and will use the provided encryption key. You will need to implement the EncryptionKey( ) method to return the encryption key. You will want to change the sample key provided below for your own project.
public class MyFirstProjectAuthenticateAttribute : AuthenticateAttribute
{
	public readonly static byte[] _key = { 0xFF, 0xFF, 0xFF, 0xFF, 0xFF, 0xFF, 0xFF, 0xFF, 0xFF, 0xFF, 0xFF, 0xFF, 0xFF, 0xFF, 0xFF, 0xFF };

	protected override string AuthenticateBasicAndGetIdEntityName(string Username, string password)
	{
		return null;
	}

	protected override string AuthenticateEncryptedAndGetIdEntityName(string[] args, out string password)
	{
		if (args.Length != 2)
		{
			password = null;
			return null;
		}

		var Username = args[0];
		password = args[1];

		if (Username == "Aladdin" && password == "open sesame") return "1";
		return null;
	}

	protected override byte[] EncryptionKey
	{
		get { return _key; }
	}
}
Now, on the client-side, we need to provide the key and change the AuthHeader to use the Encrypted AuthHeader by calling the method CreateCustomEncryptedAuthHeader(key, Username, password).
namespace HttpClientCmd
{
	class Program
	{
		public readonly static byte[] _key = { 0xFF, 0xFF, 0xFF, 0xFF, 0xFF, 0xFF, 0xFF, 0xFF, 0xFF, 0xFF, 0xFF, 0xFF, 0xFF, 0xFF, 0xFF, 0xFF };

		static void Main()
		{
			RunAsync();
			Console.WriteLine("Running. Press enter at any time to quit...");
			Console.WriteLine();
			Console.ReadLine();
		}

		public static async void RunAsync()
		{
			using (new MyFirstProjectWebApiUnitOfWork(ReadOnly.Yes))
			{
				UnitOfWorkContext.AuthHeader = HttpAuthAgent.CreateCustomEncryptedAuthHeader(_key, "Aladdin", "open sesame");
				var repo = RepoFactory.Create<User>();
				var all = await repo.GetAllAsync( );
				foreach (var user in all) Console.WriteLine("Name: {0} Age: {1}", user.FullName, user.Age);
				Console.WriteLine();
				Console.WriteLine("Done.");
			}
		}
	}
}
The encrypted AuthHeader can also go into a custom authorization header:
namespace HttpClientCmd
{
	class Program
	{
		public readonly static byte[] _key = { 0xFF, 0xFF, 0xFF, 0xFF, 0xFF, 0xFF, 0xFF, 0xFF, 0xFF, 0xFF, 0xFF, 0xFF, 0xFF, 0xFF, 0xFF, 0xFF };

		static void Main()
		{
			RunAsync();
			Console.WriteLine("Running. Press enter at any time to quit...");
			Console.WriteLine();
			Console.ReadLine();
		}

		public static async void RunAsync()
		{
			using (new MyFirstProjectWebApiUnitOfWork(ReadOnly.Yes))
			{
				UnitOfWorkContext.AuthHeader = HttpAuthAgent.CreateCustomEncryptedAuthHeader(_key, "Aladdin", "open sesame");
				UnitOfWorkContext.AuthHeader.HeaderName = "X-MyFirstProject-Authorization";
				var repo = RepoFactory.Create<User>();
				var all = await repo.GetAllAsync( );
				foreach (var user in all) Console.WriteLine("Name: {0} Age: {1}", user.FullName, user.Age);
				Console.WriteLine();
				Console.WriteLine("Done.");
			}
		}
	}
}Just like Entities, each Model implements a virtual BeforeSave( ) method that is called right before the Model is about to be saved. Just like with Entities, this method, for example, is very useful for updating CreatedOn or ModifiedOn dates for your Entity. For example:
public override void BeforeSave(PendingAction.OperationEnum entityState)
{
	if (entityState == PendingAction.OperationEnum.AddWithExistingId || entityState == PendingAction.OperationEnum.GenerateIdAndAdd)
	{
		CreatedOn = ModifiedOn = DateTime.Now;
	}

	if (entityState == PendingAction.OperationEnum.Update)
	{
		ModifiedOn = DateTime.Now;
	}

	base.BeforeSave(entityState);
}
Just as with Entities, it is very important to understand that if you make any changes to other Models inside the BeforeSave( ) method, the results could be unpredictable. That's because Supermodel detects changes to your Models right before they're about to persisted, and once it has created a List of Models that have been either modified, or deleted, or added, it will call BeforeSave( ) for every one of those Models in the List. If inside one of those BeforeSave( ) methods you make changes to another Model, that Model's BeforeSave( ) will not run unless it's already in the List for another reason. Therefore, it is considered best practice to have a Model only make changes to itself in the BeforeSave( ) method.
Documenting your Web API is incredibly easy using the NuGet package Microsoft ASP.NET Web API 2.2 Help Page. Once you have installed the package, all you need to do is make sure you have the following line in your Global.asax file:
AreaRegistration.RegisterAllAreas();Now, if you go to the url localhost:#####/Help (replacing "#####" with your localhost number), you'll see the entire API Documentation for your Web API application.
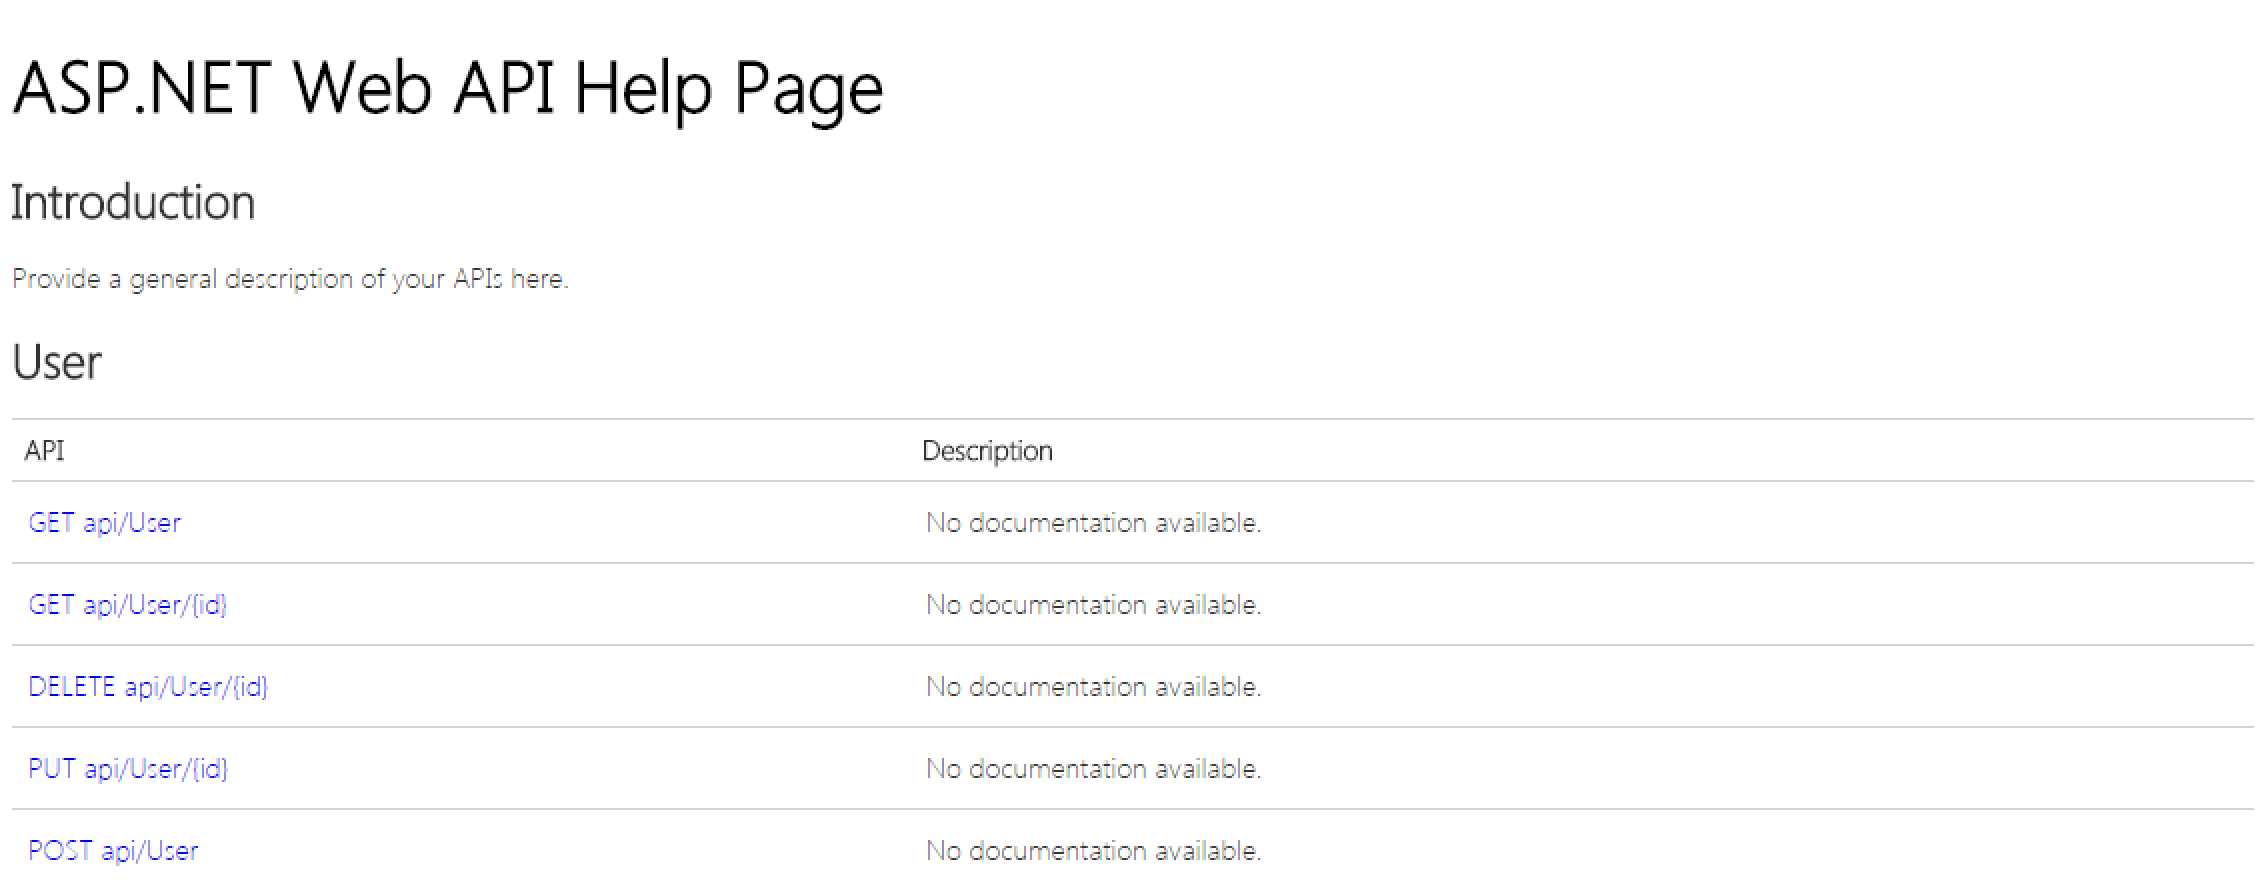
In some cases, it is useful to create custom Web API methods - the ones that CRUD Controllers do not give you for free. These methods could be created as part of a completely separate controller or they could extend an existing CRUD Controller. Let's look at a (contrived) example: let's imagine that we want to create a method on the server that will take a local time on the client and return a difference in minutes between that time and the time on the server. On the server, this method would look like this:
public class TimeDifferenceController : ApiController
{
	[HttpPost]
	public HttpResponseMessage Post(DateTime clientTime)
	{
		var serverTime = DateTime.Now;
		var timeSpan = serverTime - clientTime;
		return Request.CreateResponse(HttpStatusCode.OK, timeSpan.Min);
	}
}
Now let's extend our client data context to support this method.
public class MyFirstProjectWebApiDataContext : WebApiDataContext
{
	public override string BaseUrl
	{
		get { return "http://localhost:#####/api/"; }
	}

	public async Task<int> GetTimeDiffAsync(DateTime time)
	{
		var request = new HttpRequestMessage(HttpMethod.Post, BaseUrl + "TimeDifference");
		var dataResponse = await HttpClient.SendAsyncAndPreserveContext(request);
		var responseContentStr = dataResponse.Content != null ? await dataResponse.Content.ReadAsStringAsync() : "";

		if !(dataResponse.IsSuccessStatusCode) throw new SupermodelWebApiException(dataResponse.StatusCode, responseContentStr);
		var timeDifference = JsonConvert.DeserializeObject<int>(responseContentStr);
		return timeDifference;
	}
}
This is how we could use this newly created method:
var timeDifference = await UnitOfWorkContext<MyFirstProjectWebApiDataContext>.CurrentDataContext.GetTimeDiffAsync(DateTime.Now);Allows you to disable an option within an enum so that it does not appear for the user in the dropdown/radioselects that use this Enum. In the below example, the option "Orange" will no longer appear to the user, but it will be grandfathered in for Entities that had "Orange" selected previously. Once it has changed, however, they cannot choose "Orange" again.
public enum FavoriteColor
{
	Red = 1;
	[Disabled] Orange = 2;
	Yellow = 3;
	Green = 4;
	Blue = 5;
	Indigo = 6;
	Violet = 7;
}
There is a similar mechanism for lookups that are stored in a database. Each MVC Model has a virtual property that's called IsDisabled. The default implementation returns "false", but you can override it and create any type of logic that you want, determining which MVC Models are disabled and which are not. Then, if you have a dropdown/radioselect/list-of-checkboxes/select-list that is based on this MVC Model, Disabled items will be similarly grandfathered in.
Makes property read-only on the screen. In the below example, the user will no longer be able to edit their Name field.
public class PersonEditMvcModel : MvcModelForEntity<Person>
{
	[DisplayOnly] public TextBoxForStringMvcModel Name { get; set; }
}
public class Person : Entity
{
	#region Properties
	public string Name { get; set; }
	#endregion
}
Supermodel also includes two useful MvcHtmlString extensions:
Specifies how an enum is labeled and displayed to the user. In the below example, Yellow will be displayed to the user as "Lemon". Otherwise, camel notation is spelled out by Supermodel, meaning that it will separate your enum into multiple words based on the capital letters.
public enum FavoriteColor
{
	Red = 1;
	Orange = 2;
	[Description("Lemon")] Yellow = 3;
	Green = 4;
	Blue = 5;
	Indigo = 6;
	Violet = 7;
}Validates email addresses against the regular expression for email addresses.
Forces asterisk to appear next to property display to demarcate it as "required" to users without actually making the property required.
Removes label display from property
This attribute marks a property on the client-side for future reference in a JavaScript script.
The List Column attribute allows you to specify the header title for a property's column in the List view, as well as the order in which the list is displayed.
[ListColumn(Header="User's Name", OrderBy = "Name", OrderByDesc = "-Name"), Required]


public string Name { get; set; }Stipulates that two properties must match. For example, if you have a user confirm their password, it must match the original instance of their password.
[DataType(DataType.Password), MustEqualTo("ConfirmPassword")]
 public string NewPassword { get; set; }
[DataType(DataType.Password), MustEqualTo("NewPassword")]
public string ConfirmPassword { get; set; }Stipulates that one specified string property must be the same length or longer than another specified string property.
Stipulates that one specified string property must be longer than another specified string property.
Stipulates that one specified string property must be shorter than or the same length as another specified string property.
Stipulates that one specified string property must be shorter than another specified string property.
Allows you to specify that a property is required, and displays "*" next to the field, which demarcates the property as required in the user interface.
Allows you to specify that for a required property you do not wish to display the "*" that demarcates the property as required in the user interface.
Allows you to specify the order in which you want properties to appear in your view. The default ScreenOrder is set to 100, so if you specify a property's ScreenOrder to be greater than 100, it will appear farther down on the page. In the below example, all of the enums are set to 100 other than Yellow, which is set to 200. Therefore, Yellow will appear last when the colors are display on the screen.
public enum FavoriteColor
{
	Red = 1;
	Orange = 2;
	[ScreenOrder(200)] Yellow = 3;
	Green = 4;
	Blue = 5;
	Indigo = 6;
	Violet = 7;
}
Allows you to prevent a property from being displayed in the Detail Screen. By setting ScaffoldColumn(false), a property will not be listed in a Detail View. By default, ScaffoldColumn is true.
Supermodel provides three styles of UI Components: Customizable Generic, Twitter Bootstrap, and JQuery Mobile style, allowing you to easily create a beautiful Bootstrap-style website or JQMobile mobile application, or create your own.
These UI components expose properties that control their behavior and their look. For example, most UI controls expose a property that controls HTML attributes that go onto the HTML tag for this component, or UI components for numeric values expose properties that control the valid range. You can easily explore those properties using IntelliSense in Visual Studio.
public class UserMvcModel : MvcModelForEntity<User>
{
	[Required] public BinaryFileMvcModel UserImage { get; set; }
}
public class User : Entity
{
	#region Properties
	public BinaryFile UserImage { get; set; }
	#endregion
}
public class UserMvcModel : MvcModelForEntity<User>
{
	[Required] public BinaryFileMvcModel UserImage { get; set; }
	[RMapTo(PropertyName = "UserImage"), HideLabel]
	public ImageMvcModel UserImageView { get; set; }
}
public class User : Entity
{
	#region Properties
	public BinaryFile UserImage { get; set; }
	#endregion
} If you want to create a checkbox for an Entity, simply use the following template. You can replace any instance of "Horizontal" with "Vertical" to get a vertical list of checkboxes.
public class UserMvcModel : MvcModelForEntity<User>
{
 	public CheckboxesListHorizontalMvcModelUsing<FavoriteColorMvcModel> Colors { get; set; }
}
public class User : Entity
{
	#region Properties
	public virtual IEnumerable<favoritecolor>
	Colors { get; set; }
	#endregion
}
namespace Domain.Entities
{
public class FavoriteColorMvcModel : MvcModelForEntity<FavoriteColor>
{
public string Name { get; set; }
public override string Label { get { return Name; } }
}
public class FavoriteColor : Entity
{
#region Properties
public string Name { get; set; }
#endregion
}
} public class UserMvcModel : MvcModelForEntity<User>
{
public CheckboxMvcModel CheckIfTrue { get; set; }
}
public class User : Entity
{
#region Properties
public bool? CheckIfTrue { get; set; }
#endregion
} public class UserMvcModel : MvcModelForEntity<User>
{
[DisplayName("Date of Birth")] public DateMvcModel DOB { get; set; }
}
public class User : Entity
{
#region Properties
public DateTime? DOB { get; set; }
#endregion
}public class UserMvcModel : MvcModelForEntity<User>
{
public DropDownMvcModelUsingEnum<User.FavoriteColorEnum>
FavoriteColor { get; set; }
}
public class User : Entity
{
public enum FavoriteColorEnum { Red, Orange, Yellow, Green, Blue, Indigo, Violet };
#region Properties
public FavoriteColorEnum FavoriteColor { get; set; }
#endregion
} public class UserMvcModel : MvcModelForEntity<User>
{
public DropDownMvcModelUsing<FavoriteColorMvcModel>
}
public class User : Entity
{
#region Properties
public virtual FavoriteColor FavoriteColor { get; set; }
#endregion
}public class FavoriteColorMvcModel : MvcModelForEntity<FavoriteColor>
{
public string FavoriteColorName { get; set; }
public override string Label
{
get { return FavoriteColorName; }
}
}
public class FavoriteColor : Entity
{
#region Properties
public string FavoriteColorName { get; set; }
#endregion
}
public static void Seed(MyFirstProjectDbContext context)
{
	var favoritecolors = new[]
	{
		new FavoriteColor{ FavoriteColorName = "Red" },
		new FavoriteColor{ FavoriteColorName = "Orange" },
		new FavoriteColor{ FavoriteColorName = "Yellow" },
		new FavoriteColor{ FavoriteColorName = "Green" },
		new FavoriteColor{ FavoriteColorName = "Blue" },
		new FavoriteColor { FavoriteColorName = "Indigo" },
		new FavoriteColor { FavoriteColorName = "Violet" }
	};

	foreach (var  favoritecolor in favoritecolors) context.Set<FavoriteColor>().Add(favoritecolor);
}public class FavoriteColorMvcModel : MvcModelForEntity<FavoriteColor>
public string Name { get; set; }
{
get {return Name;}
}
public class FavoriteColor : Entity
{
public string Name;
}public class UserMvcModel : MvcModelForEntity<User>
{
public RadioSelectHorizontalMvcModelUsing<FavoriteColorMvcModel> FavoriteColor {get; set;}
}
public class User : Entity
{
#region Properties
public virtual FavoriteColor FavoriteColor { get; set; }
#endregion
}public class UserMvcModel : MvcModelForEntity<User>
{
public RadioSelectHorizontalMvcModelUsingEnum<Person.FavoriteColorEnum>
FavoriteColor { get; set; }
}
public class User : Entity
{
public enum FavoriteColorEnum { Red, Orange, Yellow, Green, Blue, Indigo, Violet };
#region Properties
public FavoriteColorEnum FavoriteColor { get; set; }
#endregion
}public class FavoriteColorMvcModel : MvcModelForEntity<FavoriteColor>
public string Name { get; set; }
{
get {return Name;}
}
public class FavoriteColor : Entity
{
public string Name;
}public class UserMvcModel : MvcModelForEntity<User>
{
public RadioSelectVerticalMvcModelUsing<FavoriteColorMvcModel> FavoriteColor {get; set;}
}
public class User : Entity
{
#region Properties
public virtual FavoriteColor FavoriteColor { get; set; }
#endregion
}public class UserMvcModel : MvcModelForEntity<User>
{
public RadioSelectVerticalMvcModelUsingEnum<Person.FavoriteColorEnum>
FavoriteColor { get; set; }
}
public class User : Entity
{
public enum FavoriteColorEnum { Red, Orange, Yellow, Green, Blue, Indigo, Violet };
#region Properties
public FavoriteColorEnum FavoriteColor { get; set; }
#endregion
}public class UserMvcModel : MvcModelForEntity<User>
{
public TextAreaMvcModel Description { get; set; }
}
public class User : Entity
{
#region Properties
public string Description { get; set; }
#endregion
} public class UserMvcModel : MvcModelForEntity<User>
{
public TextBoxForDoubleMvcModel Height { get; set; }
}
public class User : Entity
{
#region Properties
public double Height { get; set; }
#endregion
} public class UserMvcModel : MvcModelForEntity<User>
{
public TextBoxForIntMvcModel Age { get; set; }
}
public class User : Entity
{
#region Properties
public int Age { get; set; }
#endregion
} public class UserMvcModel : MvcModelForEntity<User>
{
public TextBoxForPasswordMvcModel Secret { get; set; }
}
public class User : Entity
{
#region Properties
public string Secret { get; set; }
#endregion
} public class UserMvcModel : MvcModelForEntity<User>
{
public TextBoxForStringMvcModel Name { get; set; }
}
public class User : Entity
{
#region Properties
public string Name { get; set; }
#endregion
}To provide the Twitter Bootstrap framework for your app, simply add the TweeterBS class to your MVC models and MasterLayout. For example, your UserMvcModel would be changed to the following (note the changes in red):
public class UserMvcModel : TweeterBS.MvcModelForEntity<User>
{
	public TweeterBS.TextBoxForStringMvcModel Name { get; set; }
}

public class User : Entity
{
	#region Properties
	public string Name { get; set; }
	#endregion
}
And your Master Layout would also need to call the TweeterBS class:
@using Supermodel.Extensions
@Html.Supermodel().TweeterBS.MasterLayout(this, "Your App Name", "1.10.1", "2.3.2")
Twitter Bootstrap also comes with some unique UI Components, such as Accordion sections.
@model UserSearchMvcModel
<script src="/Content/Scripts/Custom/search-panel.js"></script>

<div class="row">
    <div class="span4">
        @MvcHtmlString.Create(Html.Supermodel().TweeterBS.CRUDSearchFormInAccordeonForModel("Accordion", Model.GetPanels()).ToString().Replace("form-horizontal", ""))
    </div>
</div>
You would also need to update your UserSearchMvcModel to include the GetPanels( ) method. The TweeterBS.AccordeonPanel( ) HTML extension takes the following parameters: an string for the element Id, a string for the panel title, and two ints, ScreenOrderFrom and ScreenOrderTo, that control where elements are placed on the screen. In the following code, we've stated that we want the UserSearch field and the MaximumAge search field to be placed in two different panels.
public class UserSearchMvcModel : TweeterBS.MvcModel
{
	public List<TweeterBS.AccordeonPanel> GetPanels()
	{
		var panels = new List<TweeterBS.AccordeonPanel>()
		{
			new TweeterBS.AccordeonPanel("UserSearch", "User Search", 100, 100)
			new TweeterBS.AccordeonPanel("MaximumAge", "Maximum Age", 200, 200)
		};
		return panels;
	}

	[ScreenOrder(100)] public string UserSearch { get; set; }
	[ScreenOrder(200)] public int? MaximumAge { get; set; }
}
So, if we open the UserSearch panel, we would see the following Search View screen:
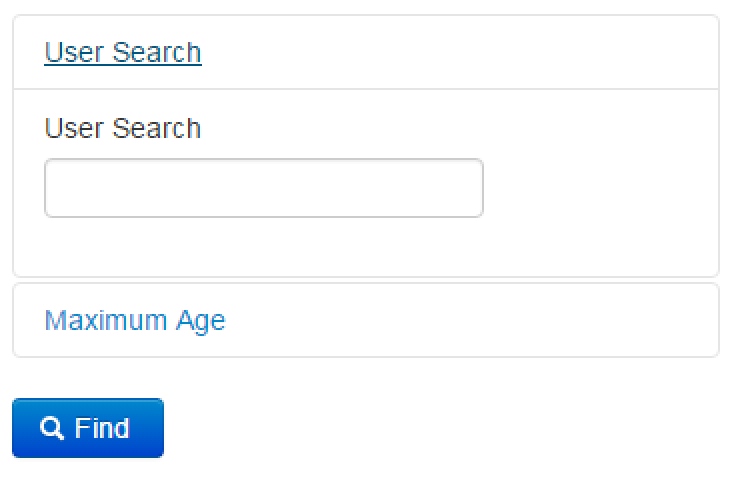
If we open the MaximumAge panel, the UserSearch panel collapses automatically:
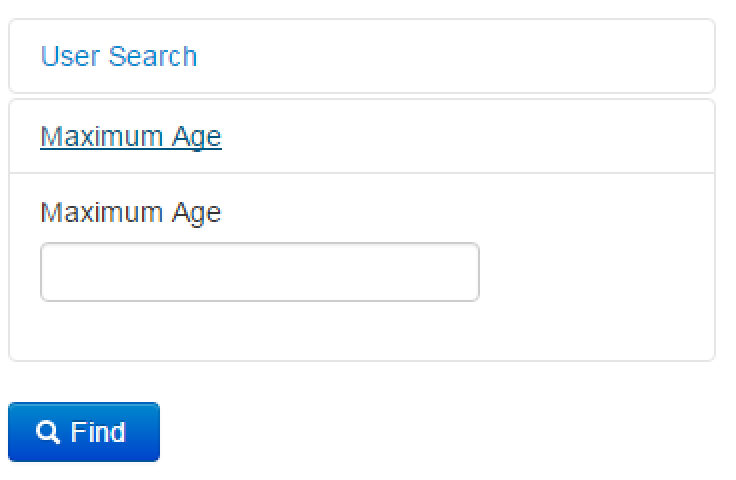
To provide the JQuery Mobile framework for your app, simply add the JQMobile class to your MVC models and MasterLayout. For example, your PersonMvcModel would be changed to the following (note the changes in red):
public class UserMvcModel : JQMobile.MvcModelForEntity<User>
{
	public JQMobile.TextBoxForStringMvcModel Name { get; set; }
}
public class User : Entity
{
	#region Properties
	public string Name { get; set; }
	#endregion
}
And your Master Layout would also need to call the JQMobile class:
@using Supermodel.Extensions
@Html.Supermodel().JQMobile.MasterLayout(this, "Your App Name", "1.10.1", "1.3.1", true)
JQuery Mobile also comes with some unique UI Components, such as Sliders.
Displays a slider for a property of type integer with a default minimum value of 0 and a default maximum value of 100.
Within your entity you need a property of type int:
public int? Rating { get; set; } And within your MVC Model, you need to call JQMobile.SliderForIntMvcModel
public JQMobile.SliderForIntMvcModel Rating { get; set; }Displays a slider for a property of type double with a default minimum value of 0 and a default maximum value of 100.
Within your entity you need a property of type int:
public int? Height { get; set; }And within your MVC Model, you need to call JQMobile.SliderForIntMvcModel
public JQMobile.SliderForDoubleMvcModel Height { get; set; }